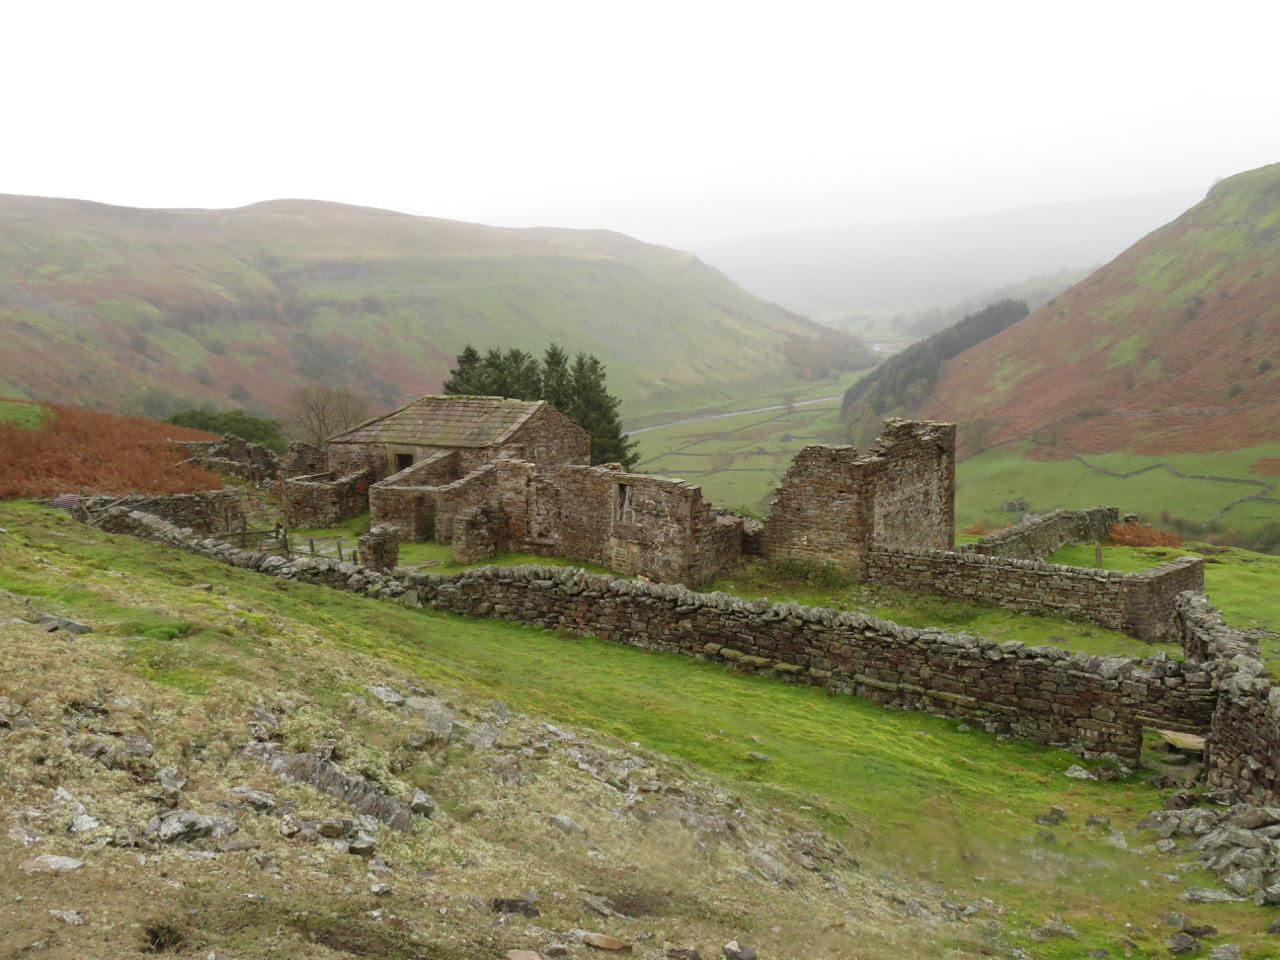
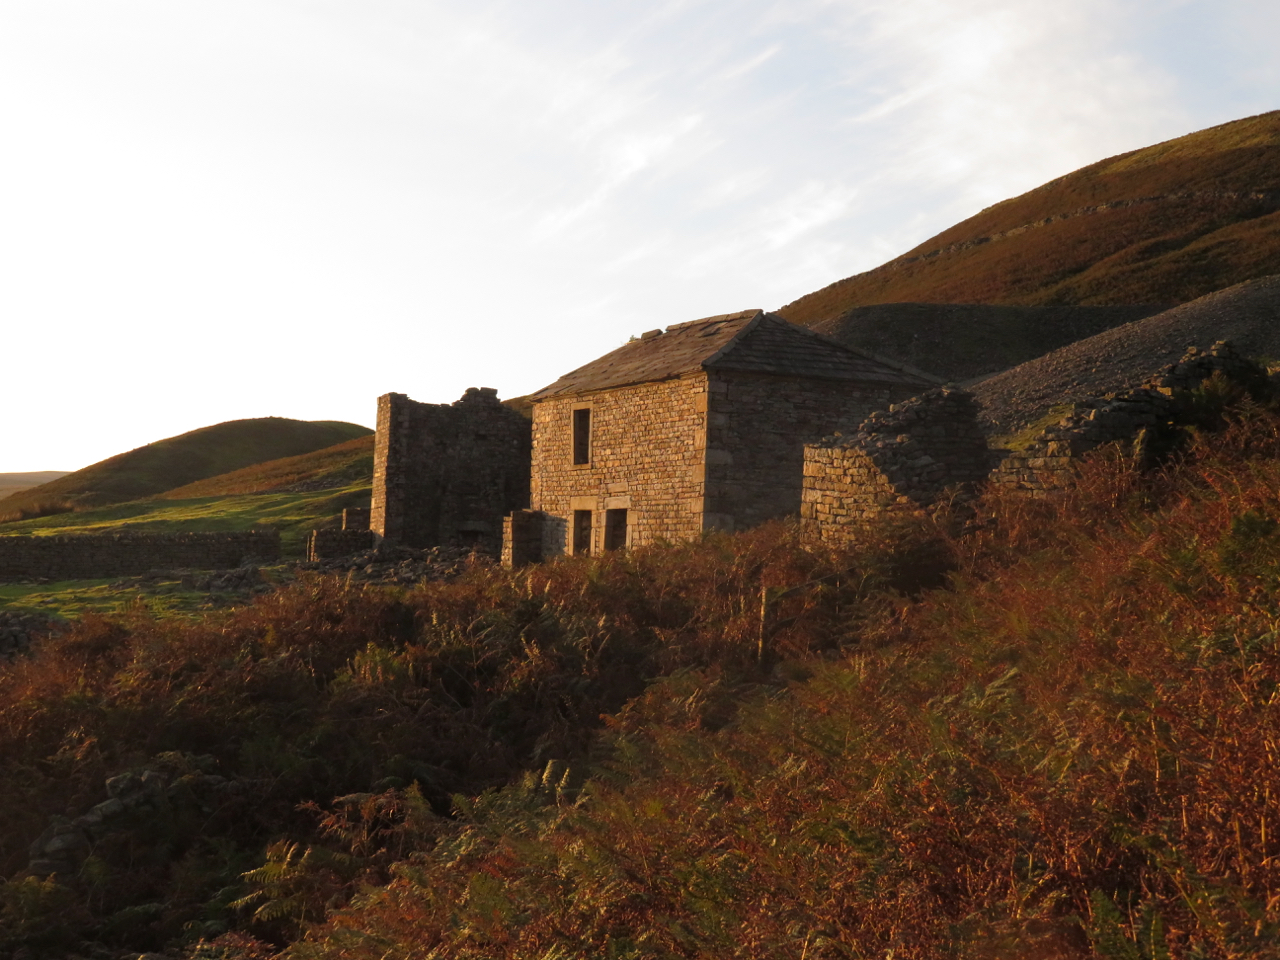
As lockdown restrictions have eased, I’ve been able to revisit a few of the sites for my project and have enjoyed getting back to Keld, Muker, Birkdale and Semerwater. It has been interesting to see how the whole situation with Covid has impacted my work for the project. With the exception of teaching workshops, gallery deliveries, art fairs and exhibitions, I mainly work from home in my studio. As my work calendar quickly went from full to totally empty I found myself with plenty of time to myself and few distractions from other projects. At times, making new prints for my exhibition has been a struggle but at others, it has been a solace – something to become absorbed in allowing me to forget what was happening in the wider world. What I have noticed is that my focus shifted from making landscape pieces or larger single prints to much smaller work inspired by words and details.

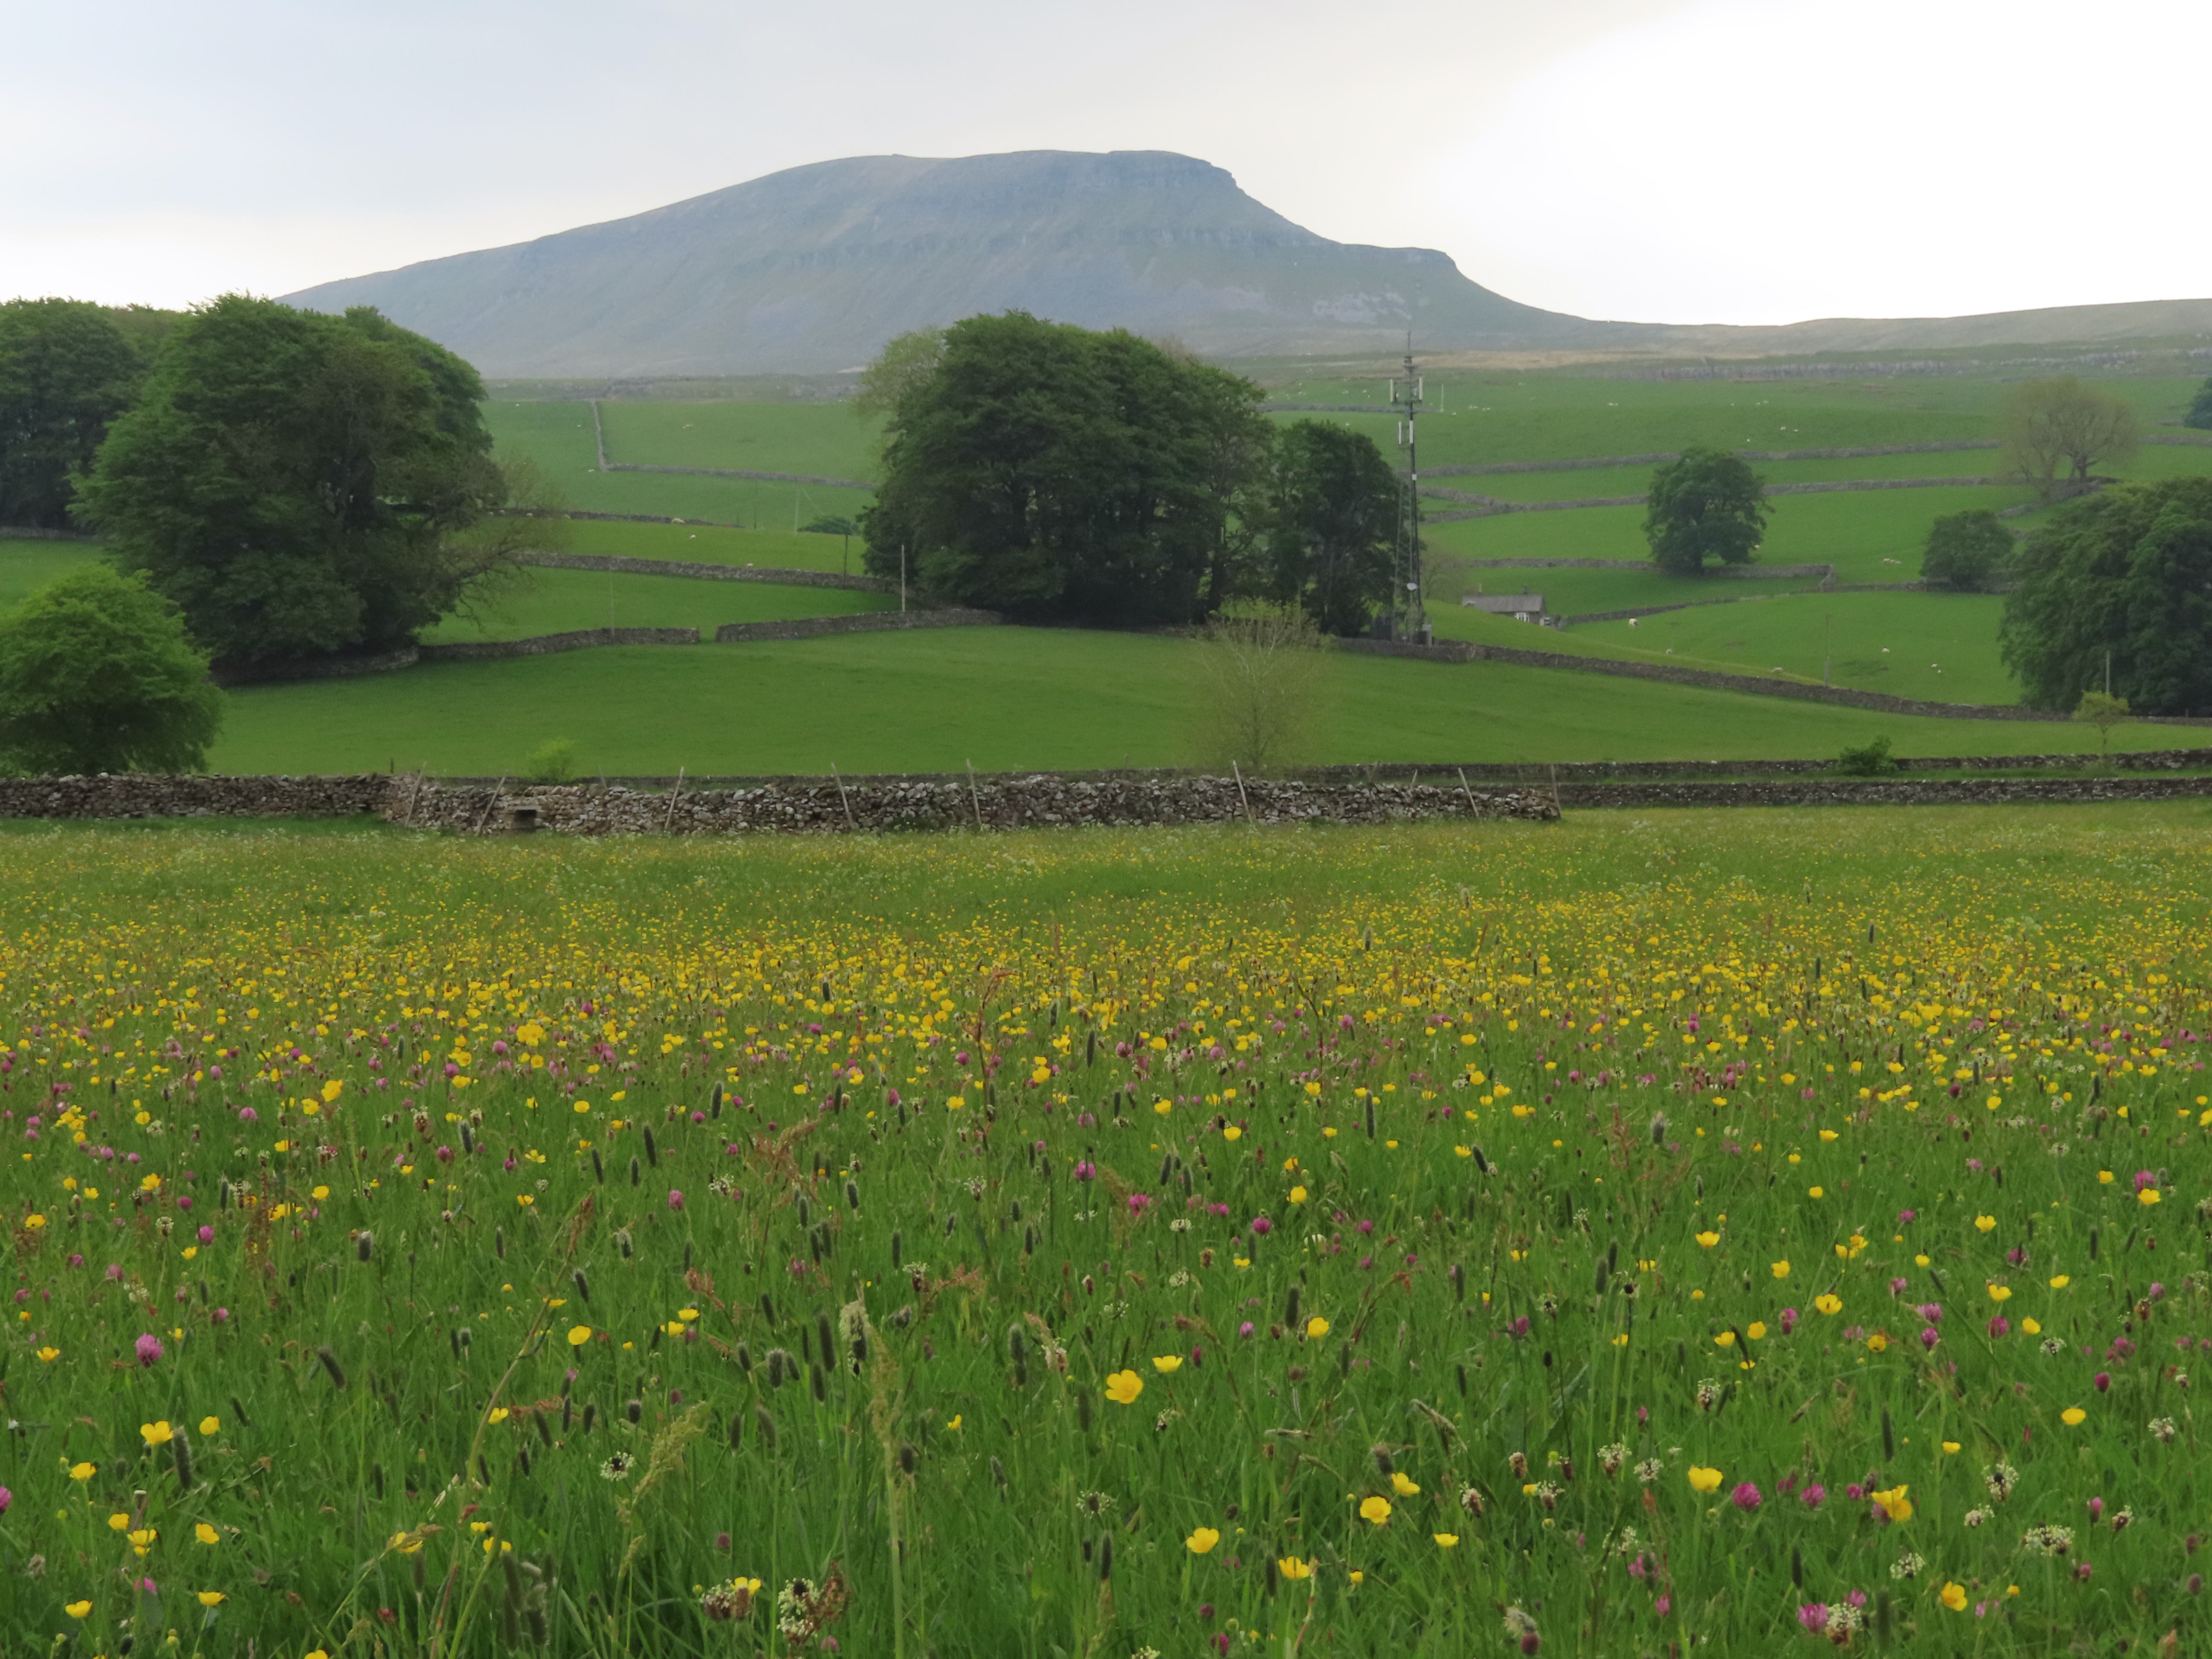
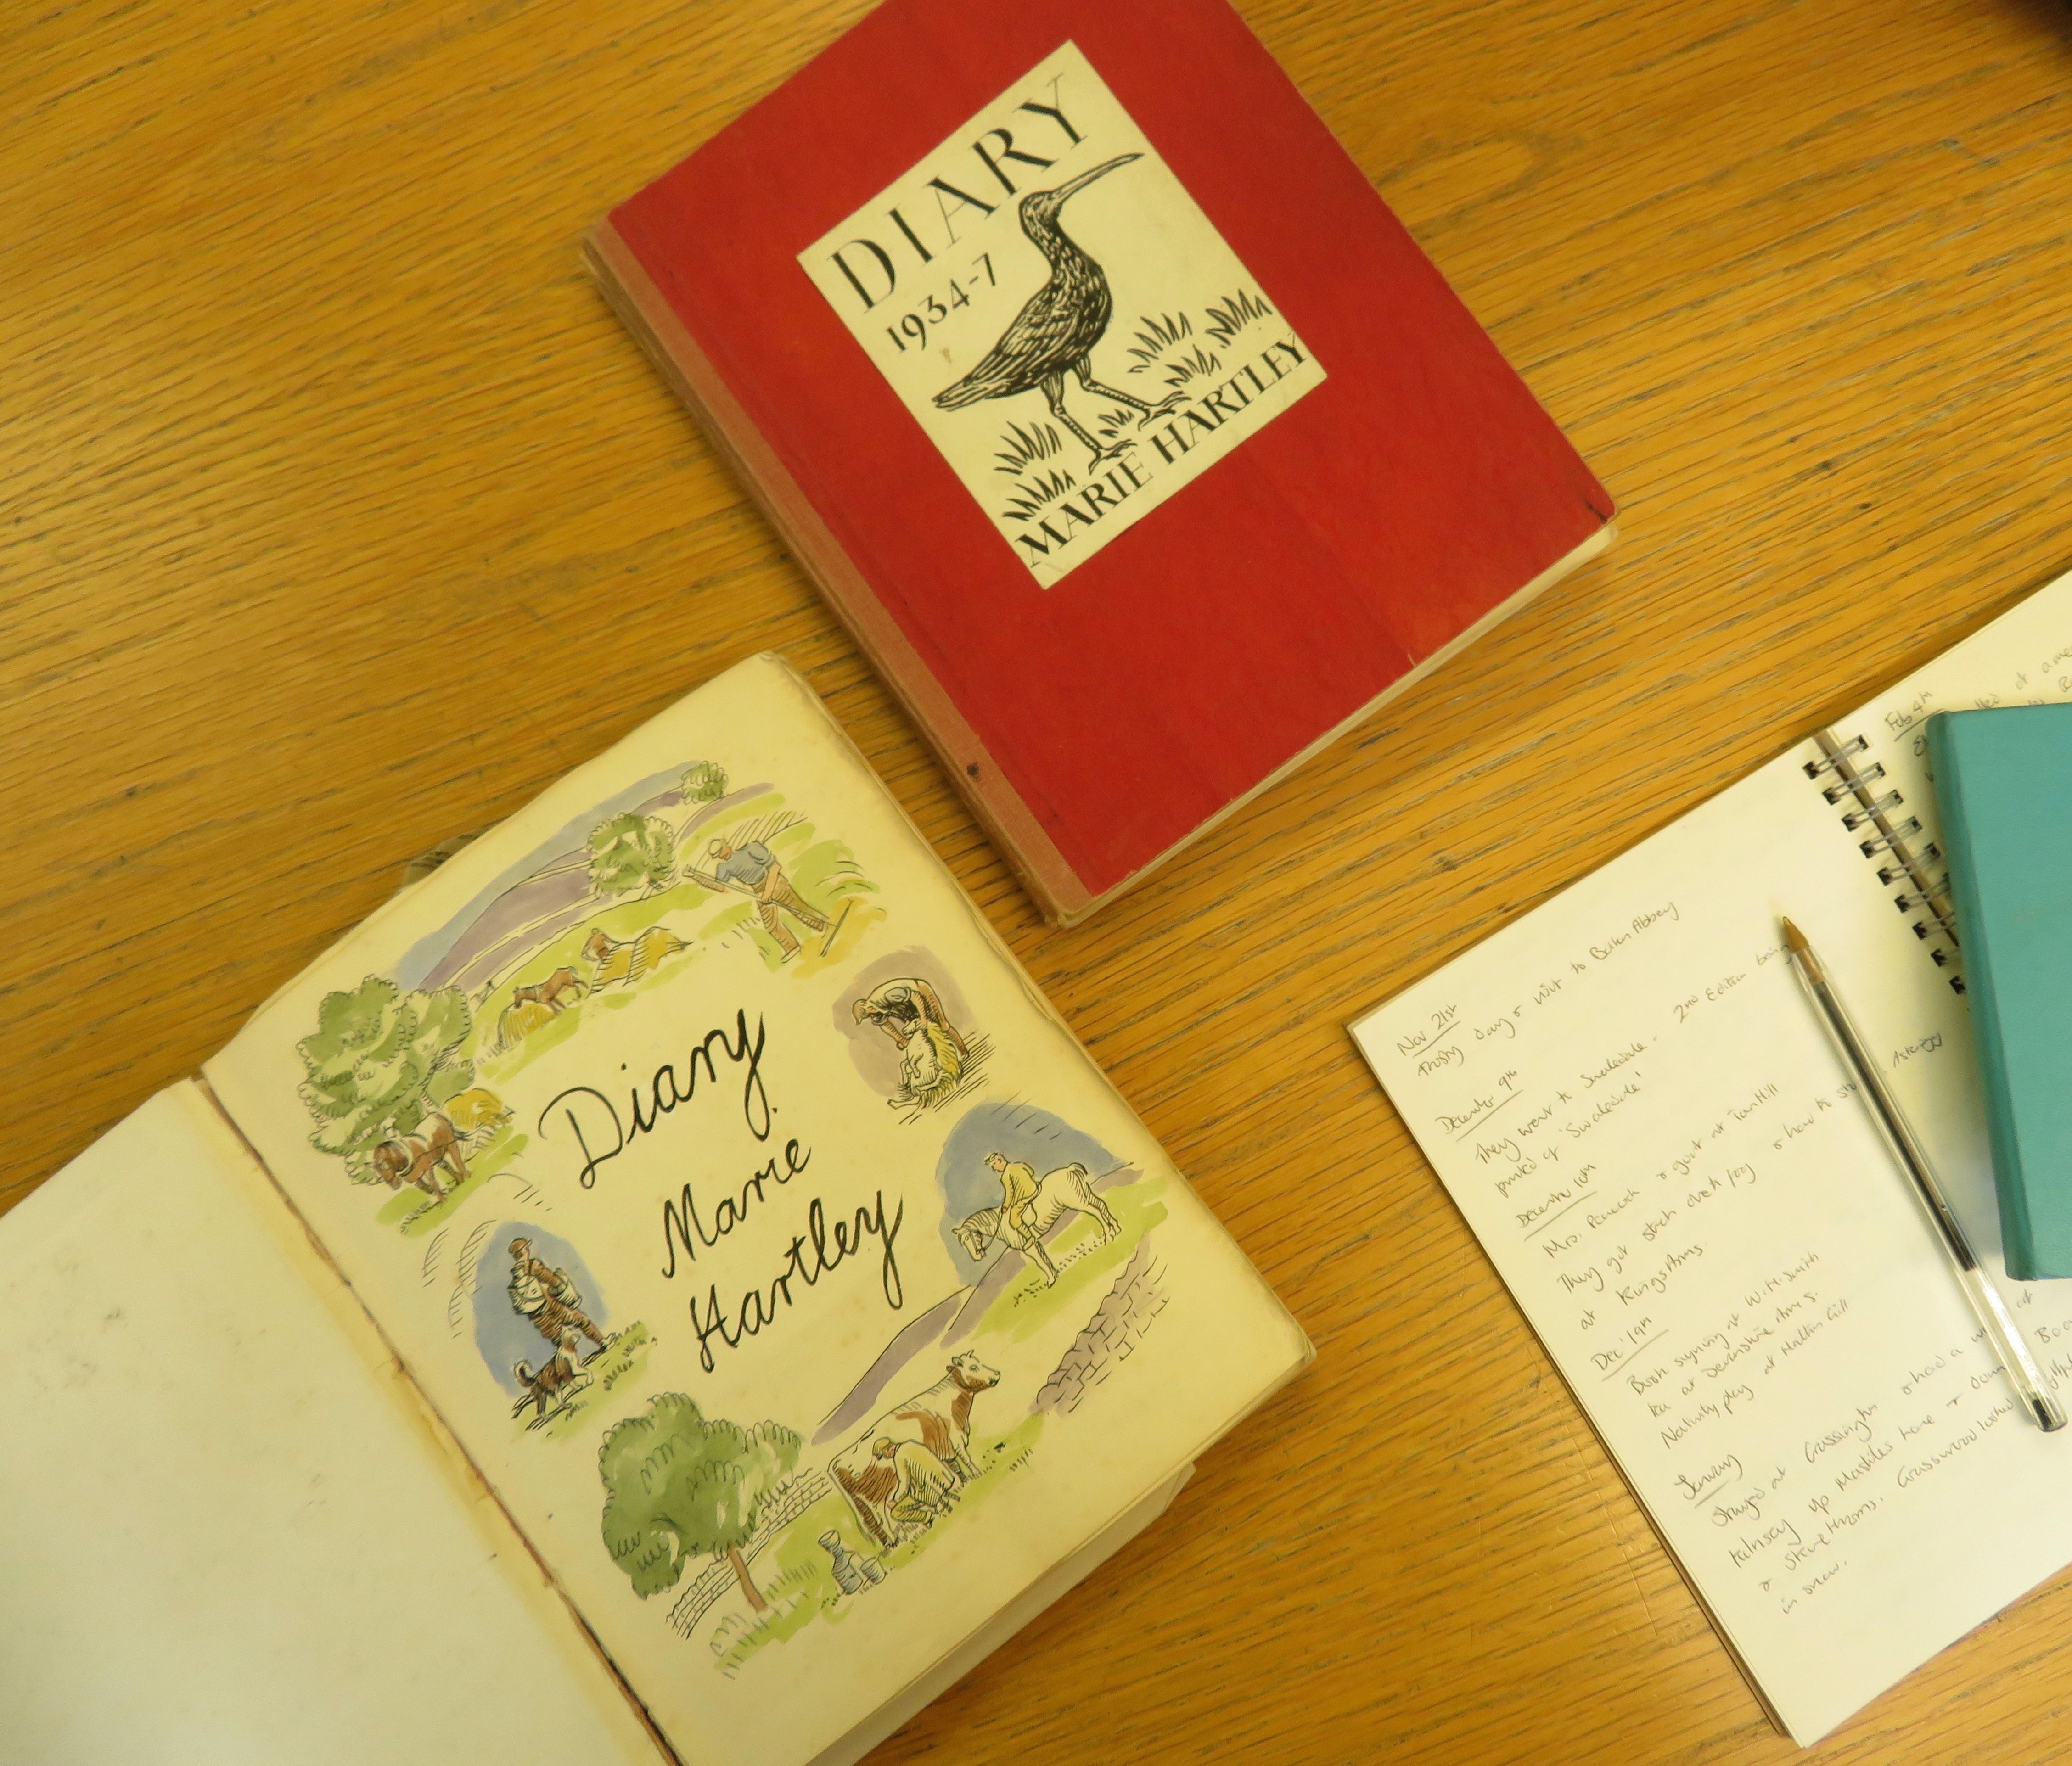
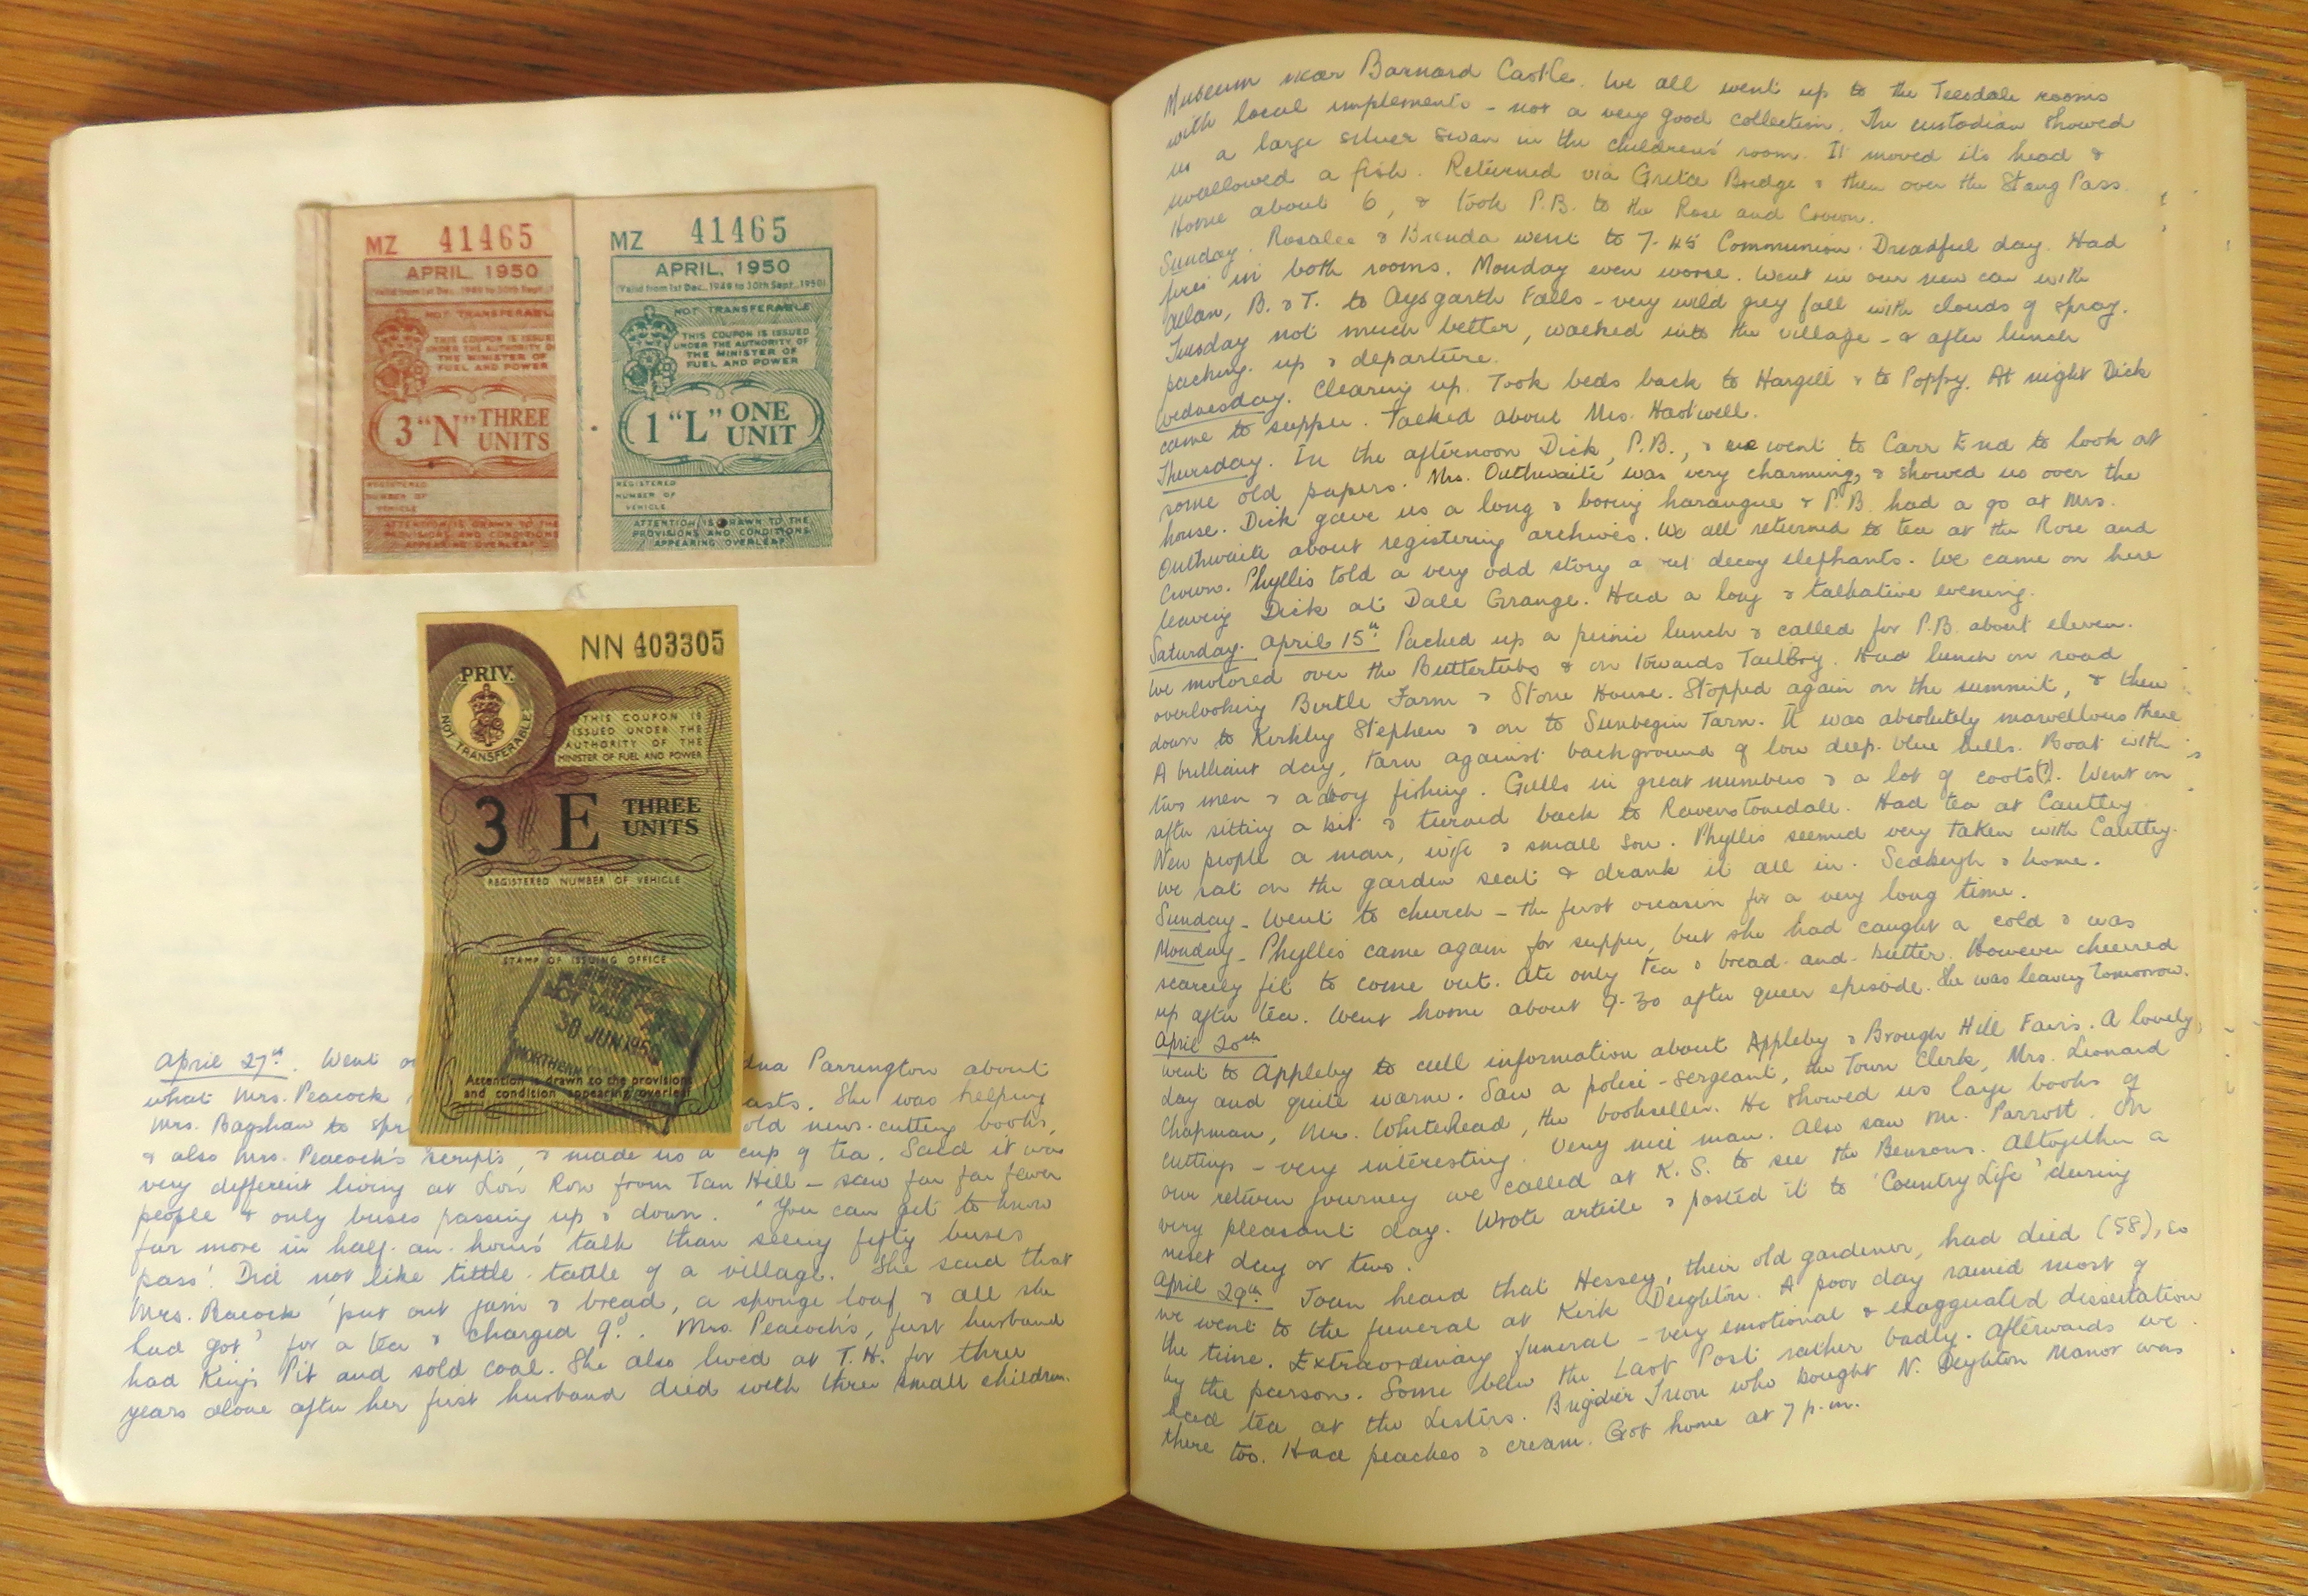
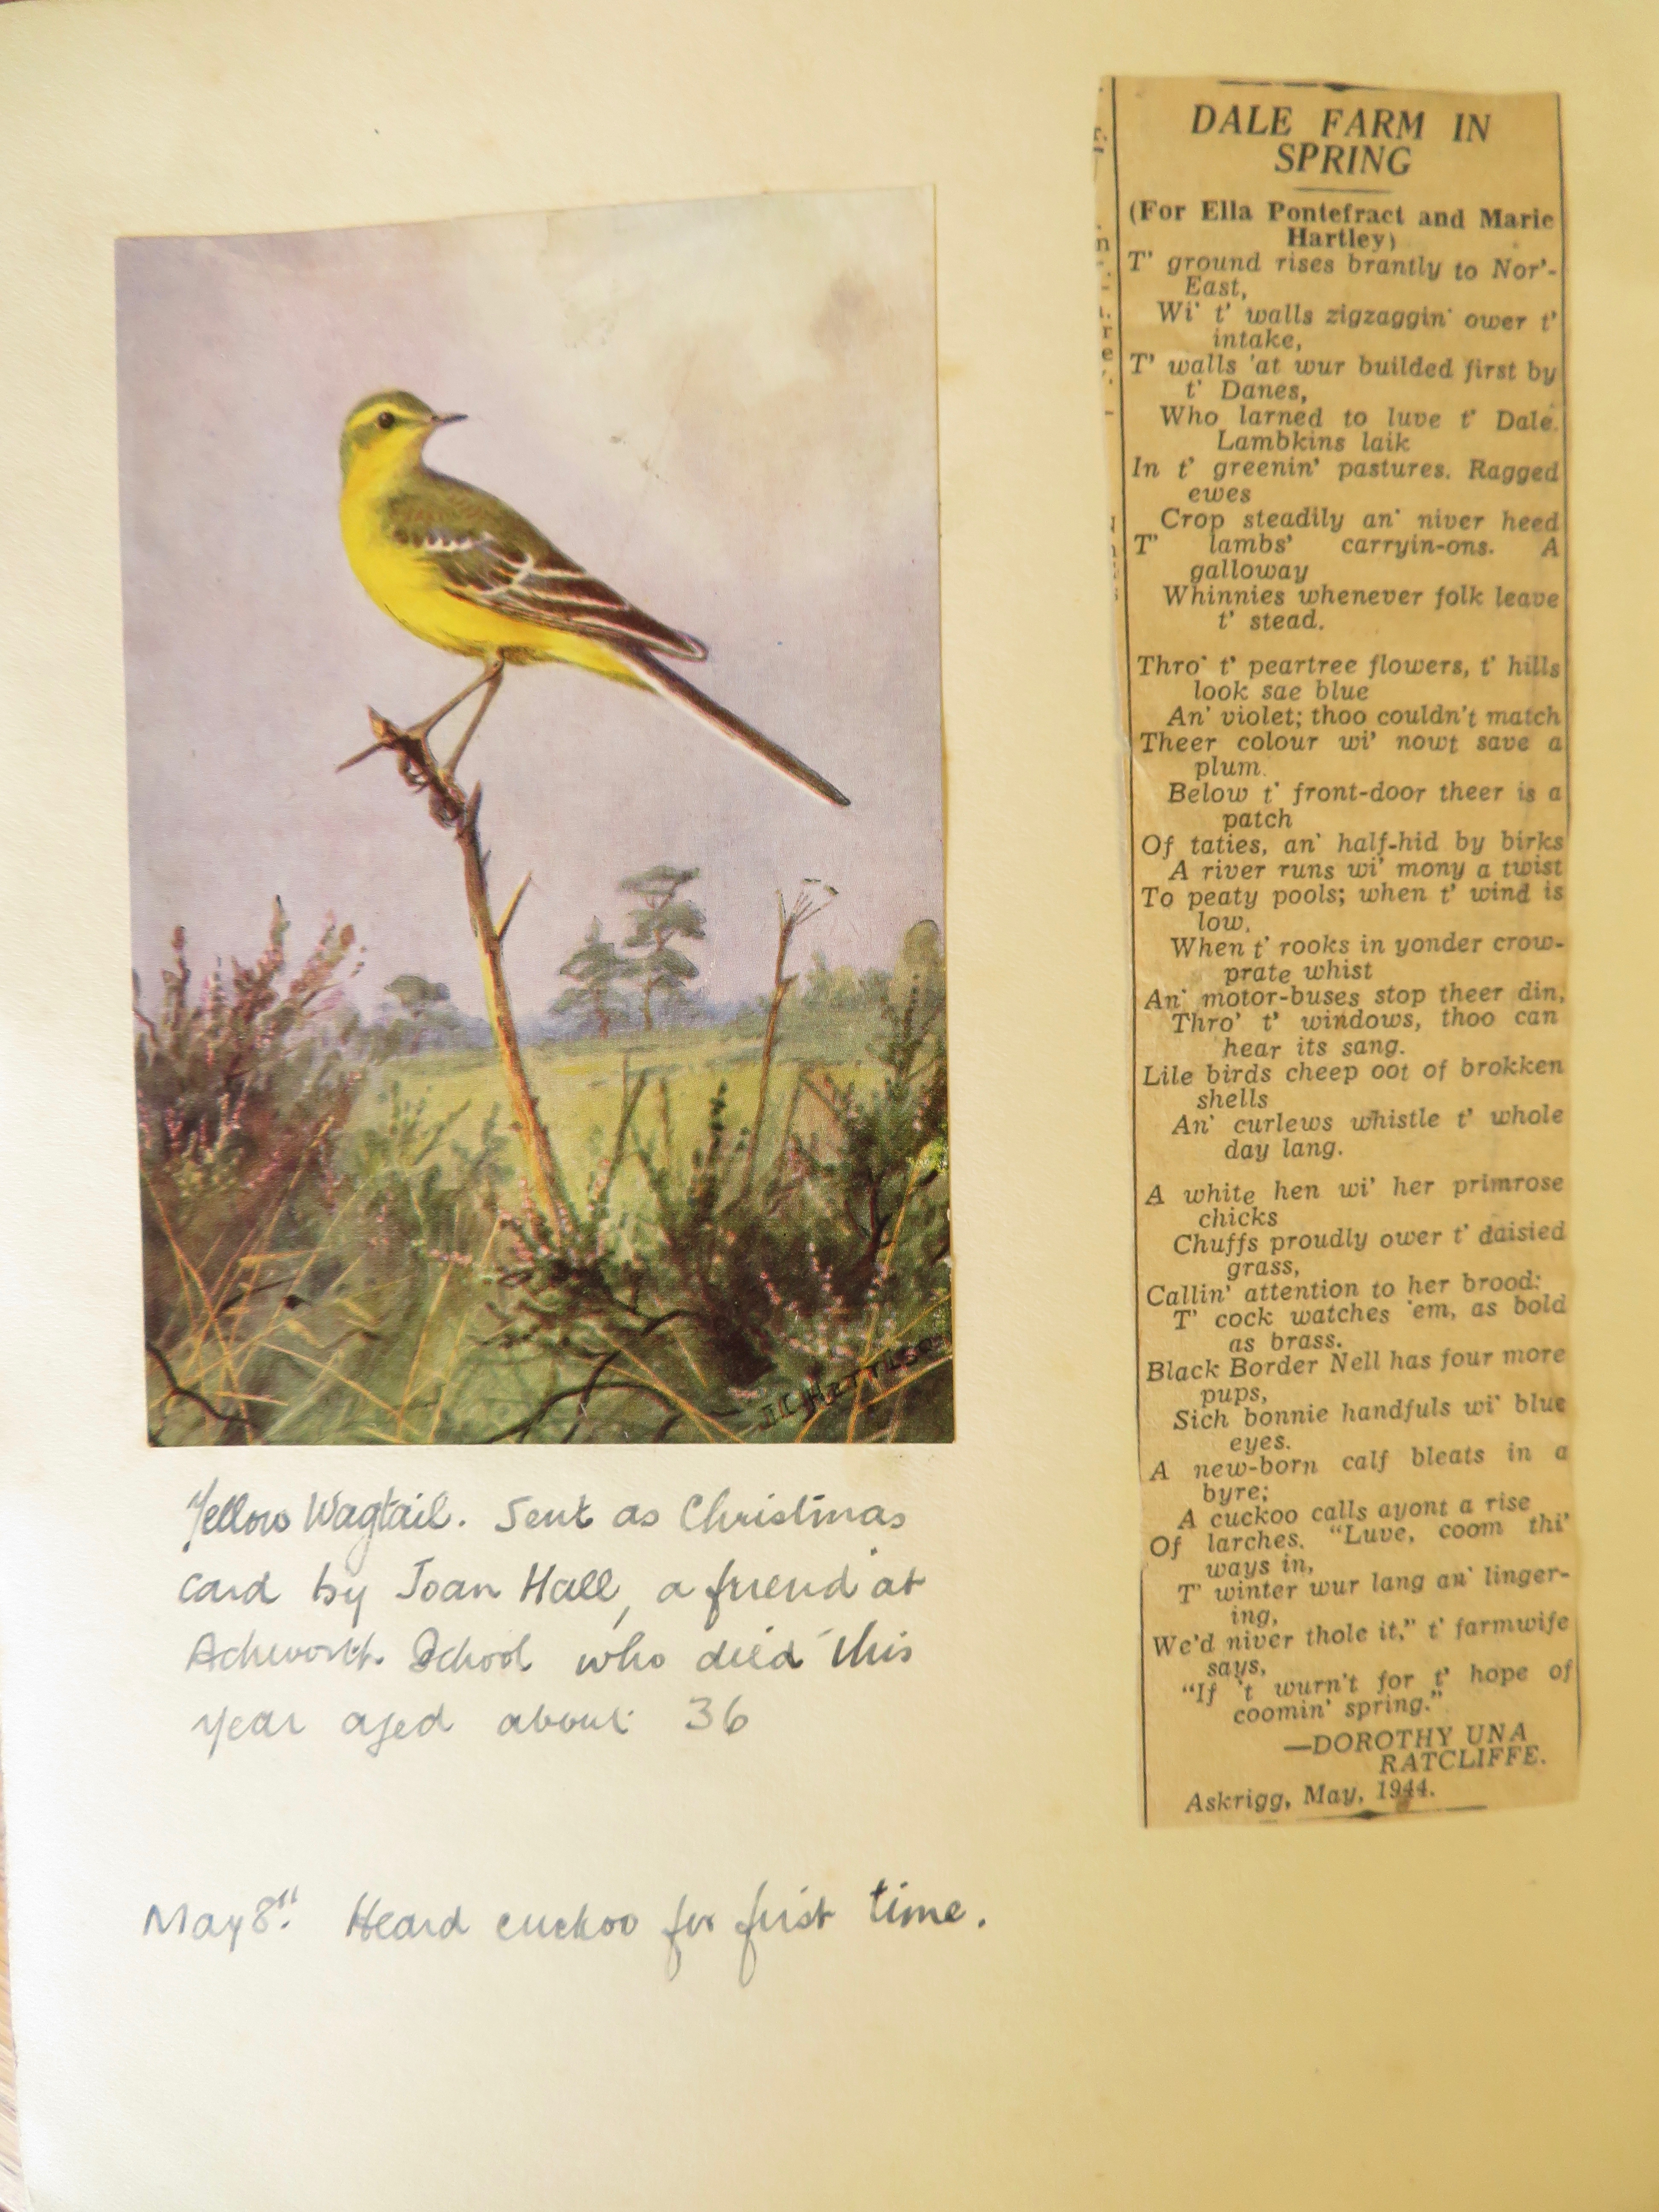
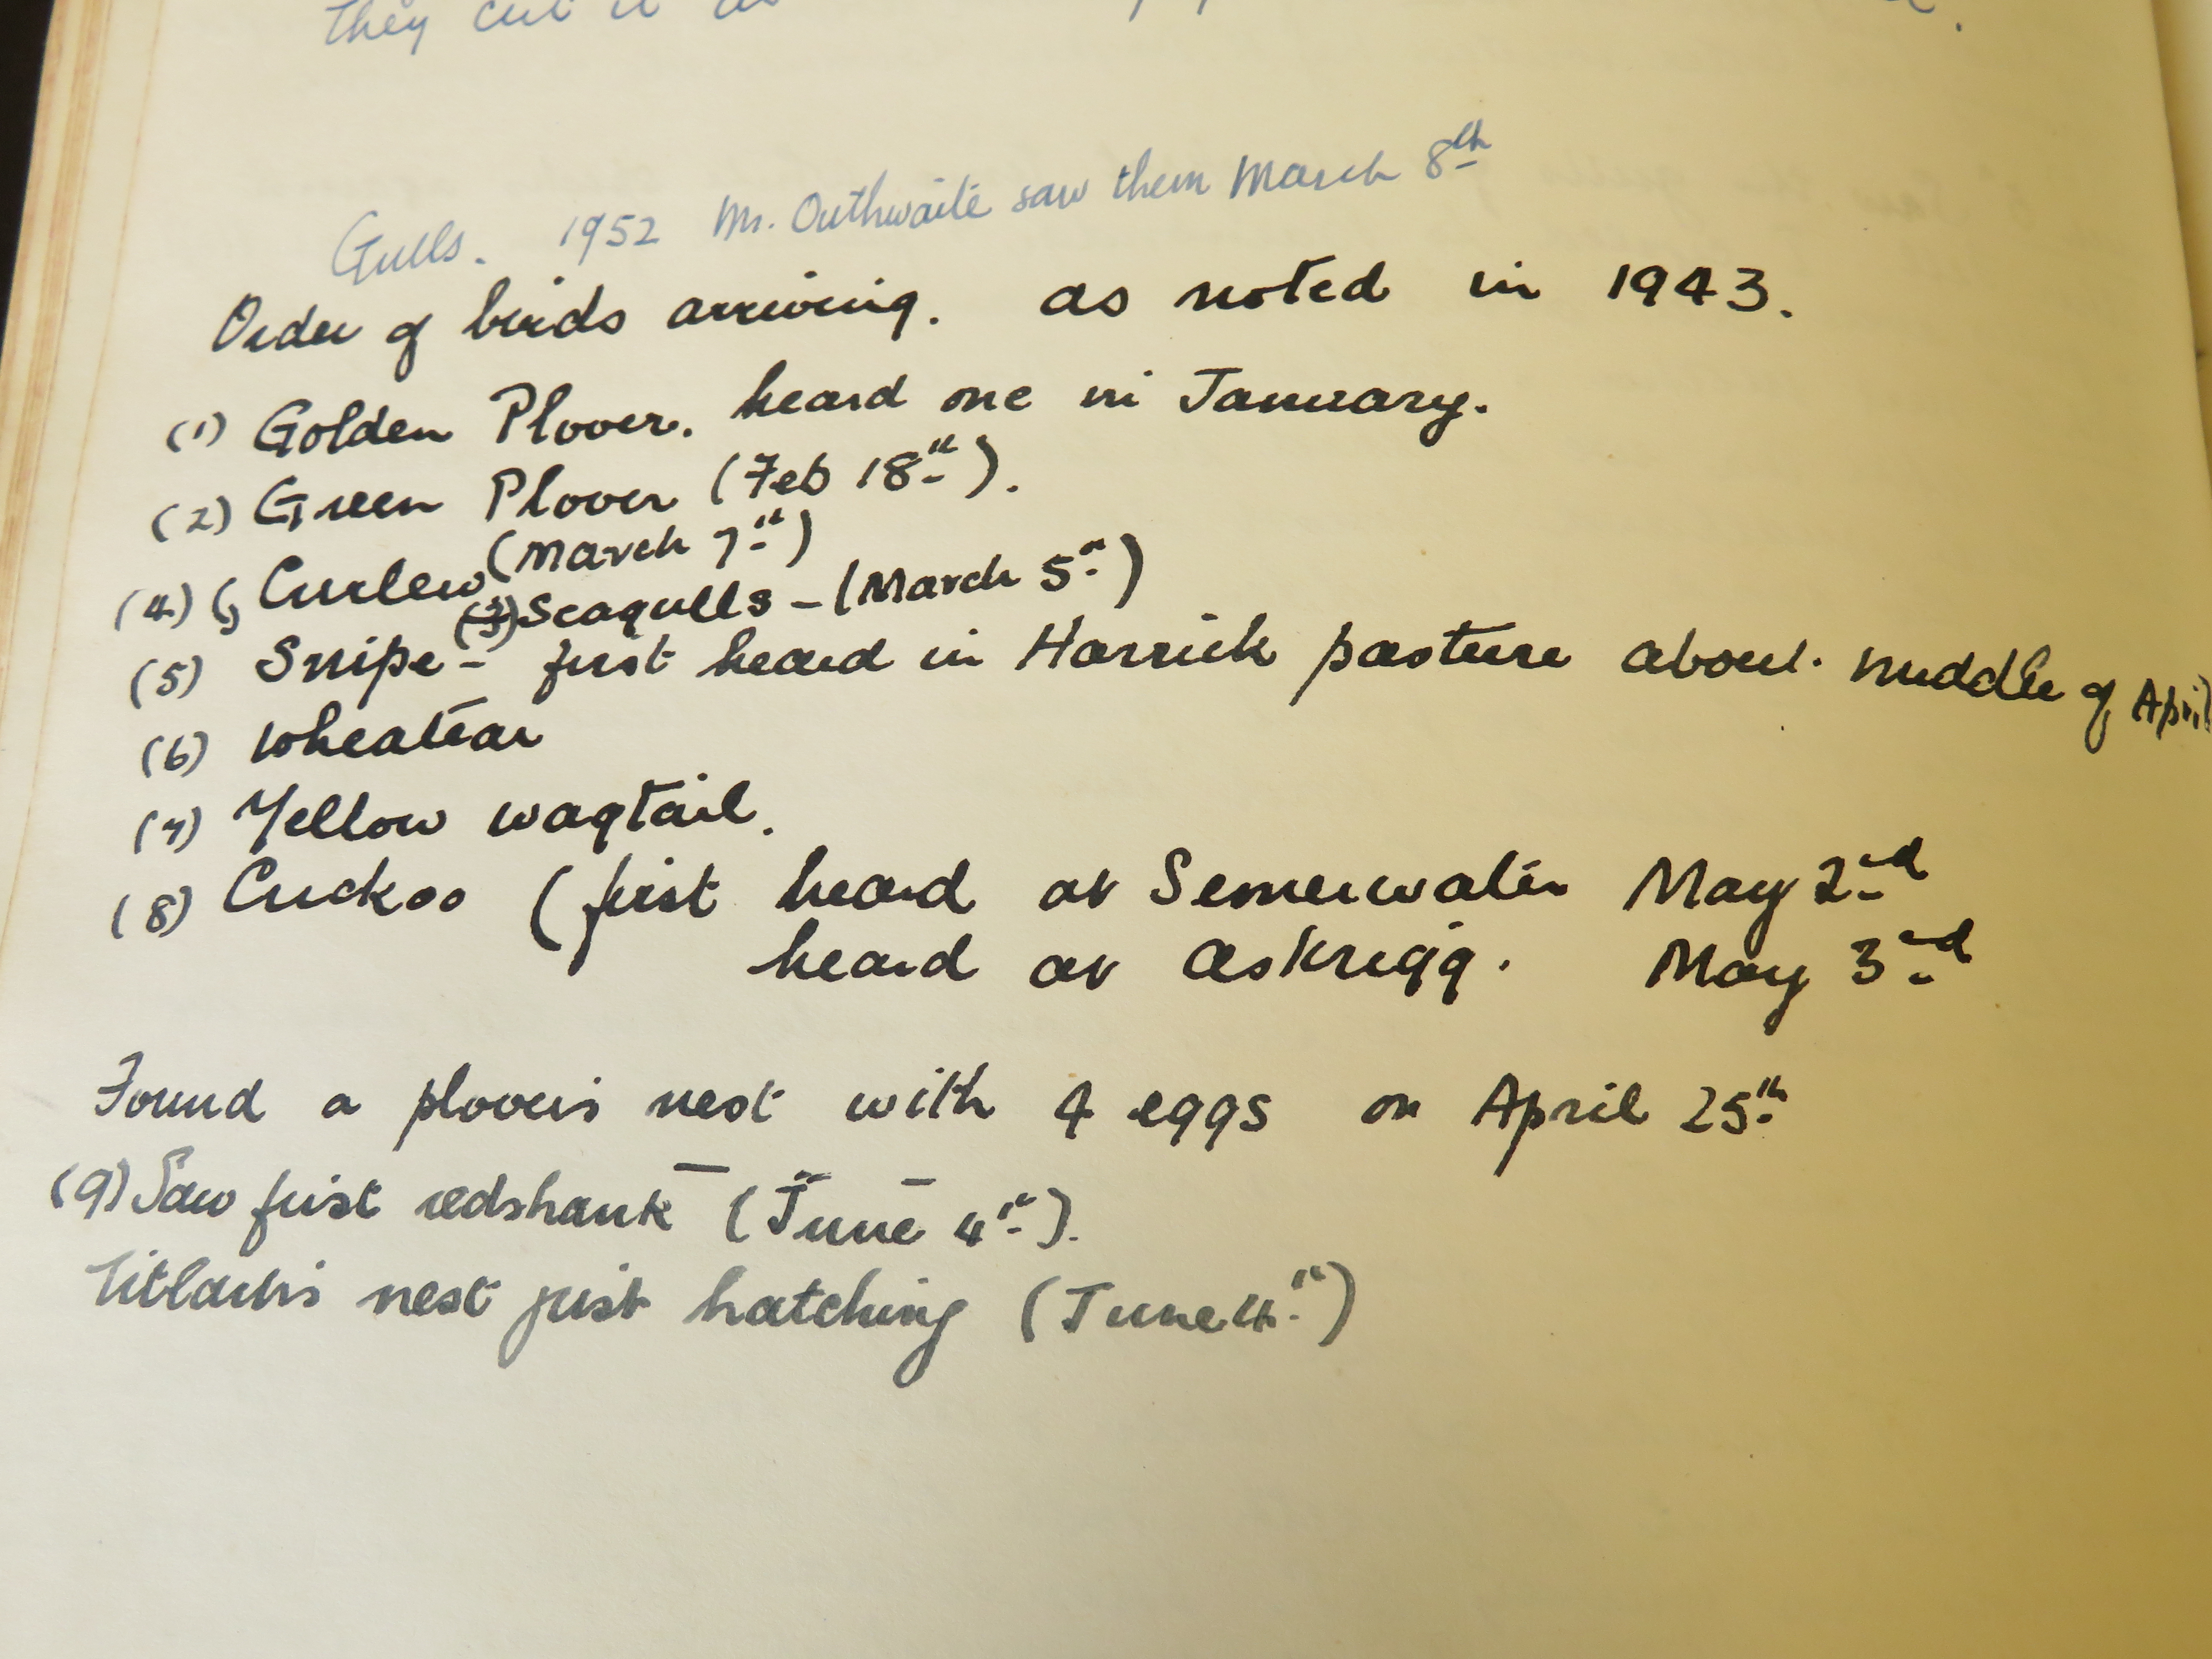
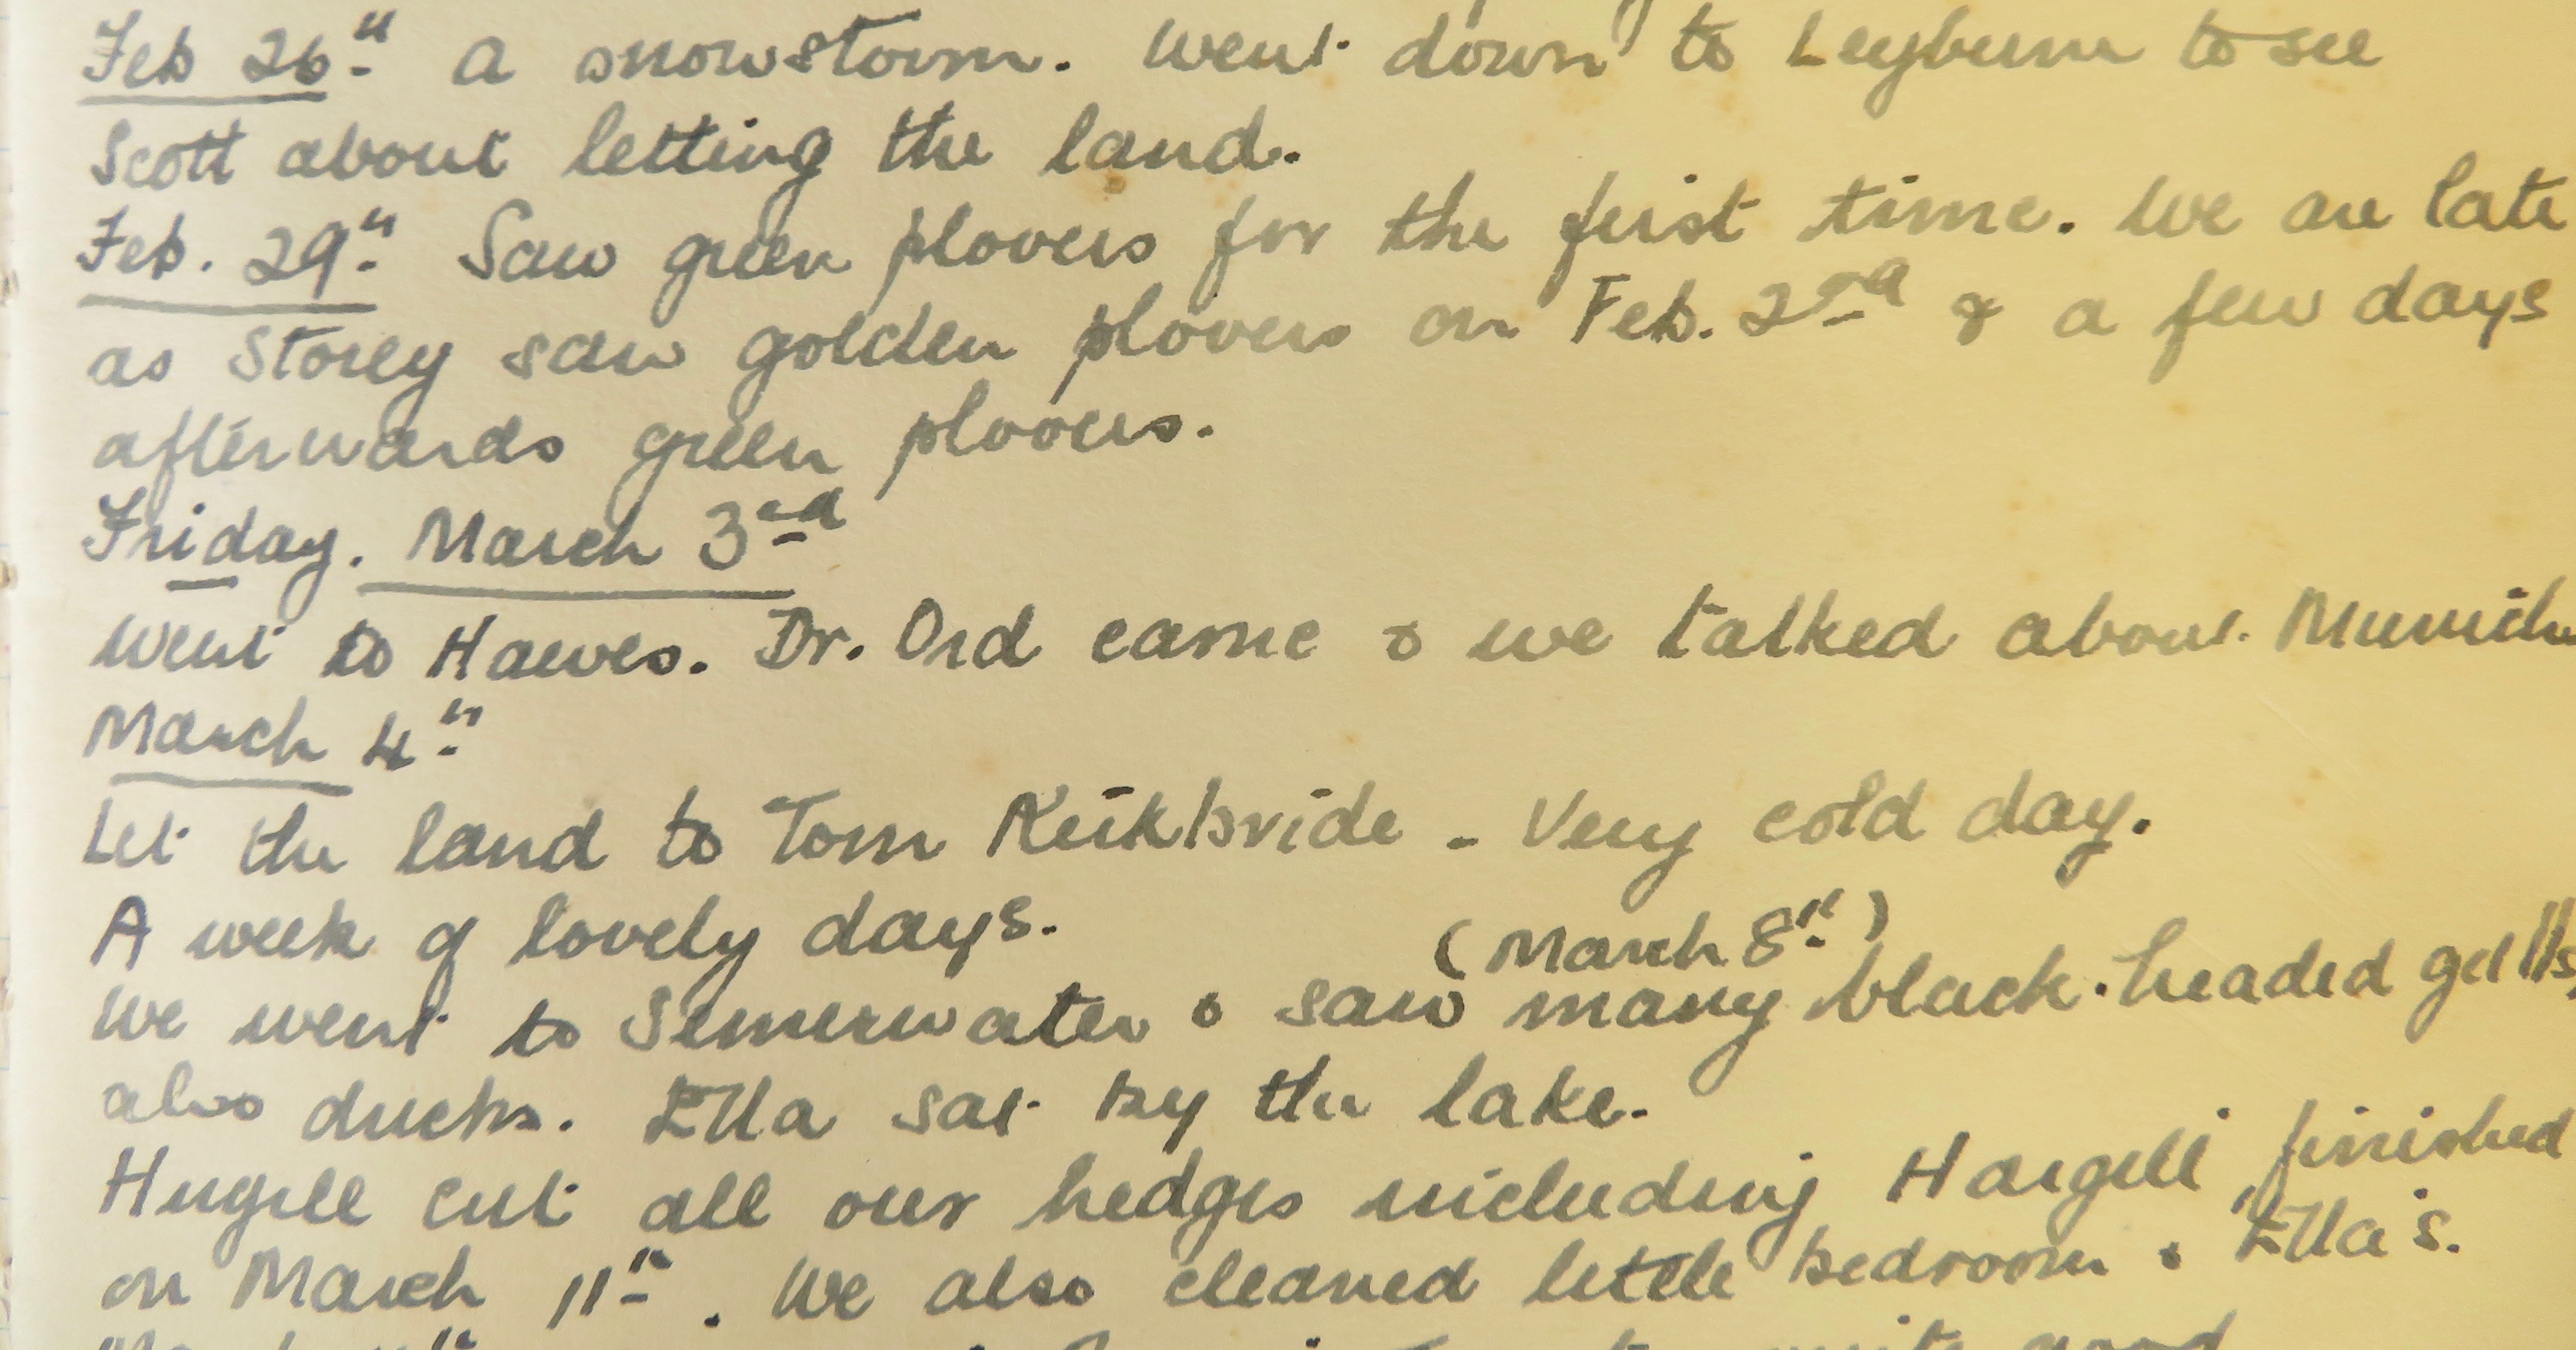
As for many people, nature has become an even bigger inspiration during this time. The birds becoming active and migrants returning as spring arrived became of huge interest to me as I went out for my daily exercise. The songs seemed louder and the species more varied. I saw linnets in the lane, curlews in the field, oystercatchers nesting by the road, ring ouzels right next to the footpath on Penyghent and, with the absence of traffic and people, they all seemed bolder and more at ease. Meeting a local farmer on one of my walks, we stood across the lane from each other and discussed how we felt that the Yorkshire Dales was probably as quiet as it would have been a hundred years ago. I began listing all of the birds that I’d seen within my local area and I compared that with a list that I’d found in Marie Hartley’s diary (from 1943-47).
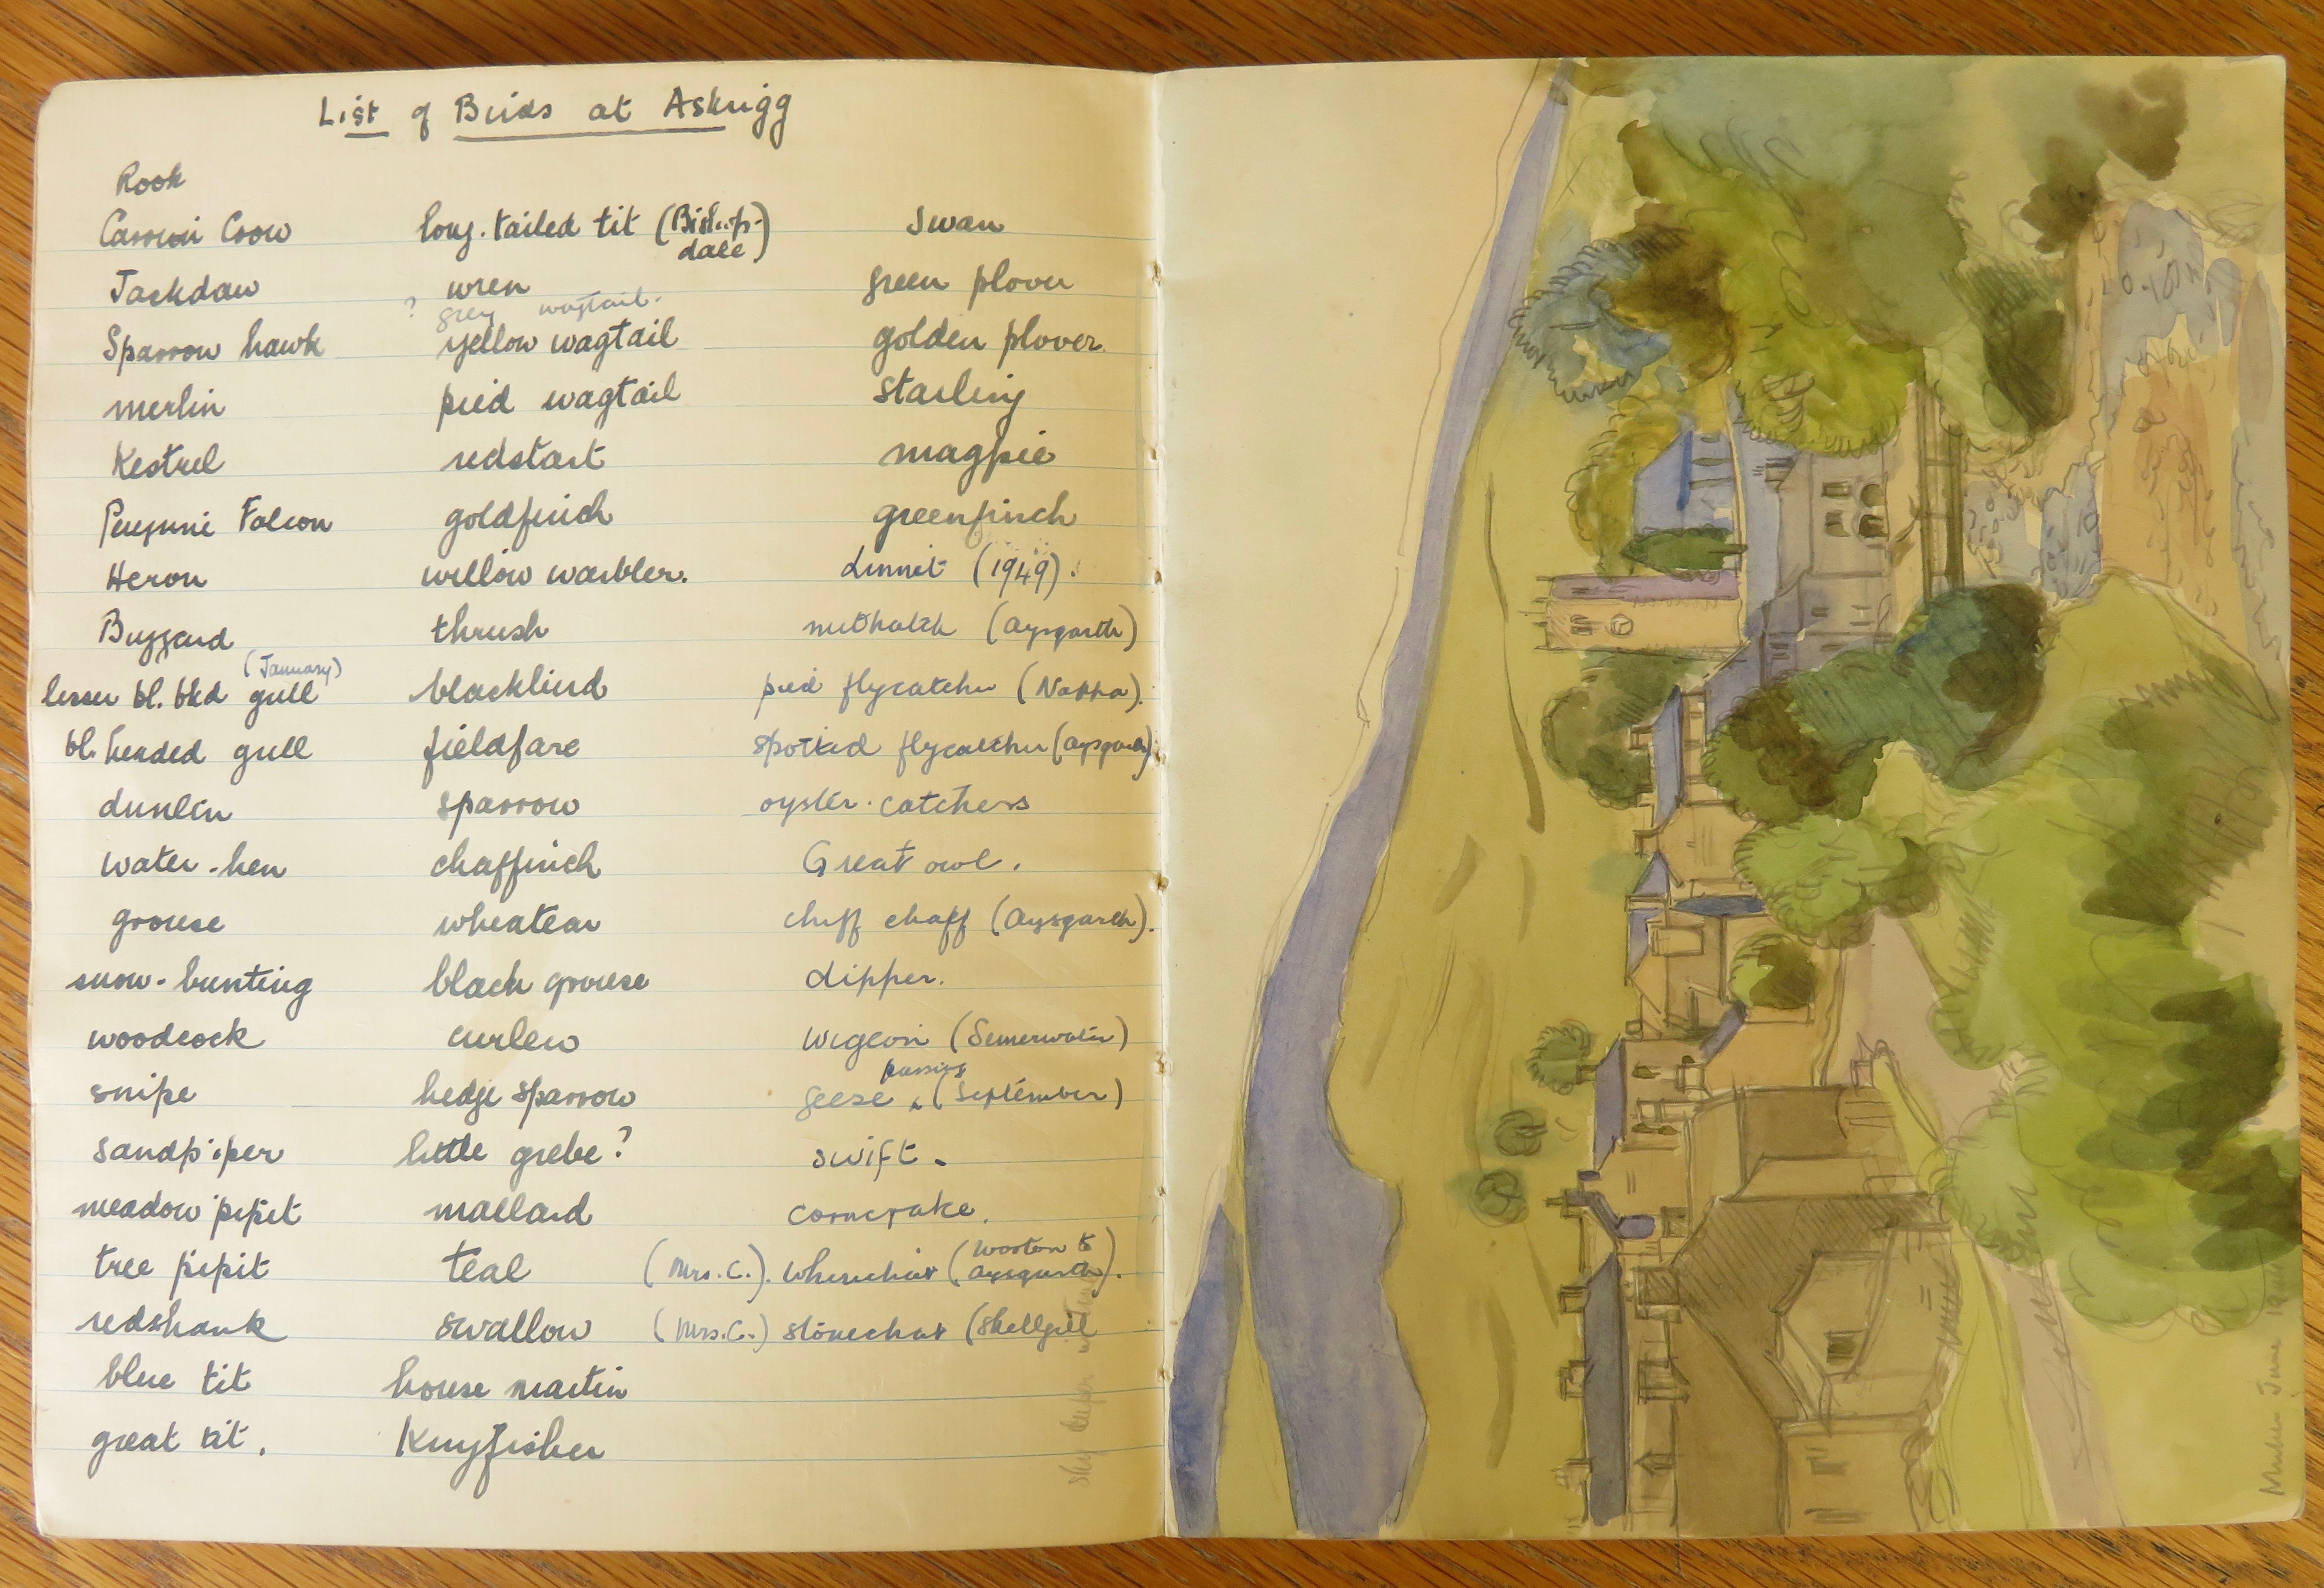
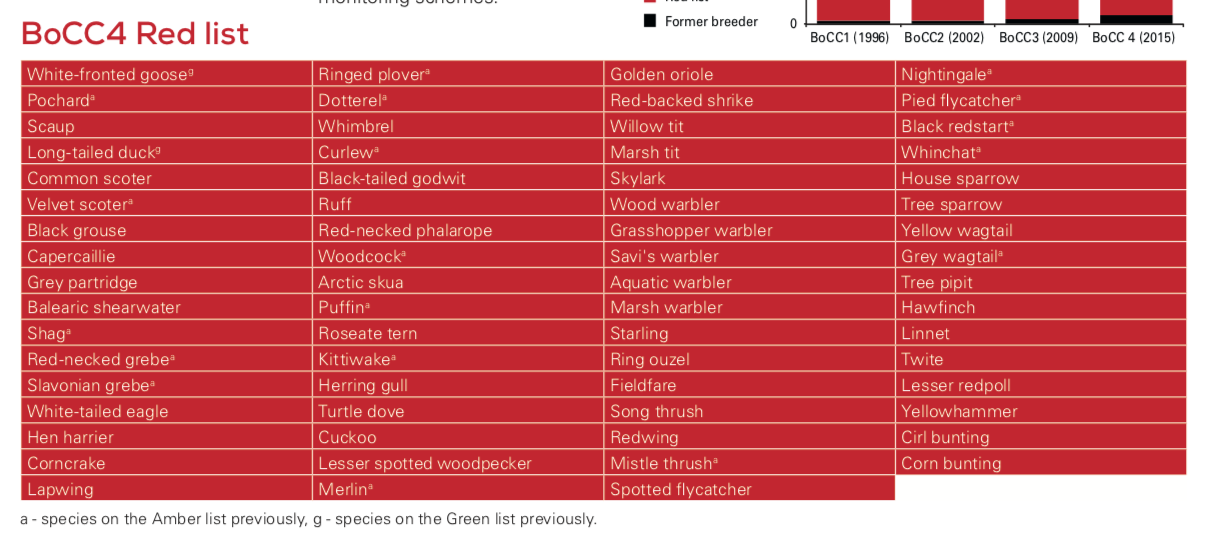
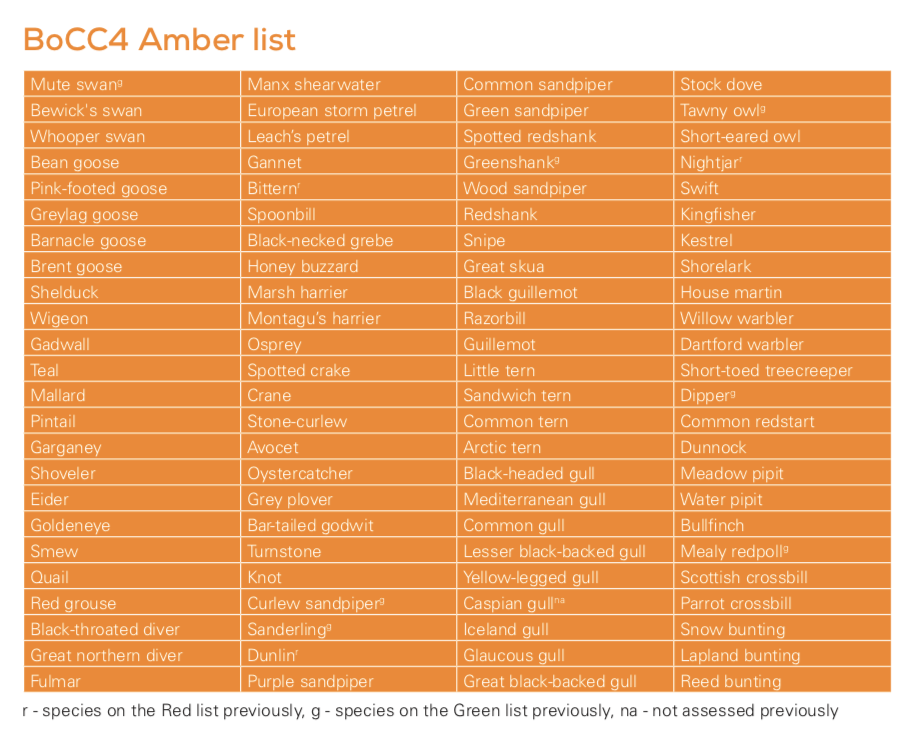
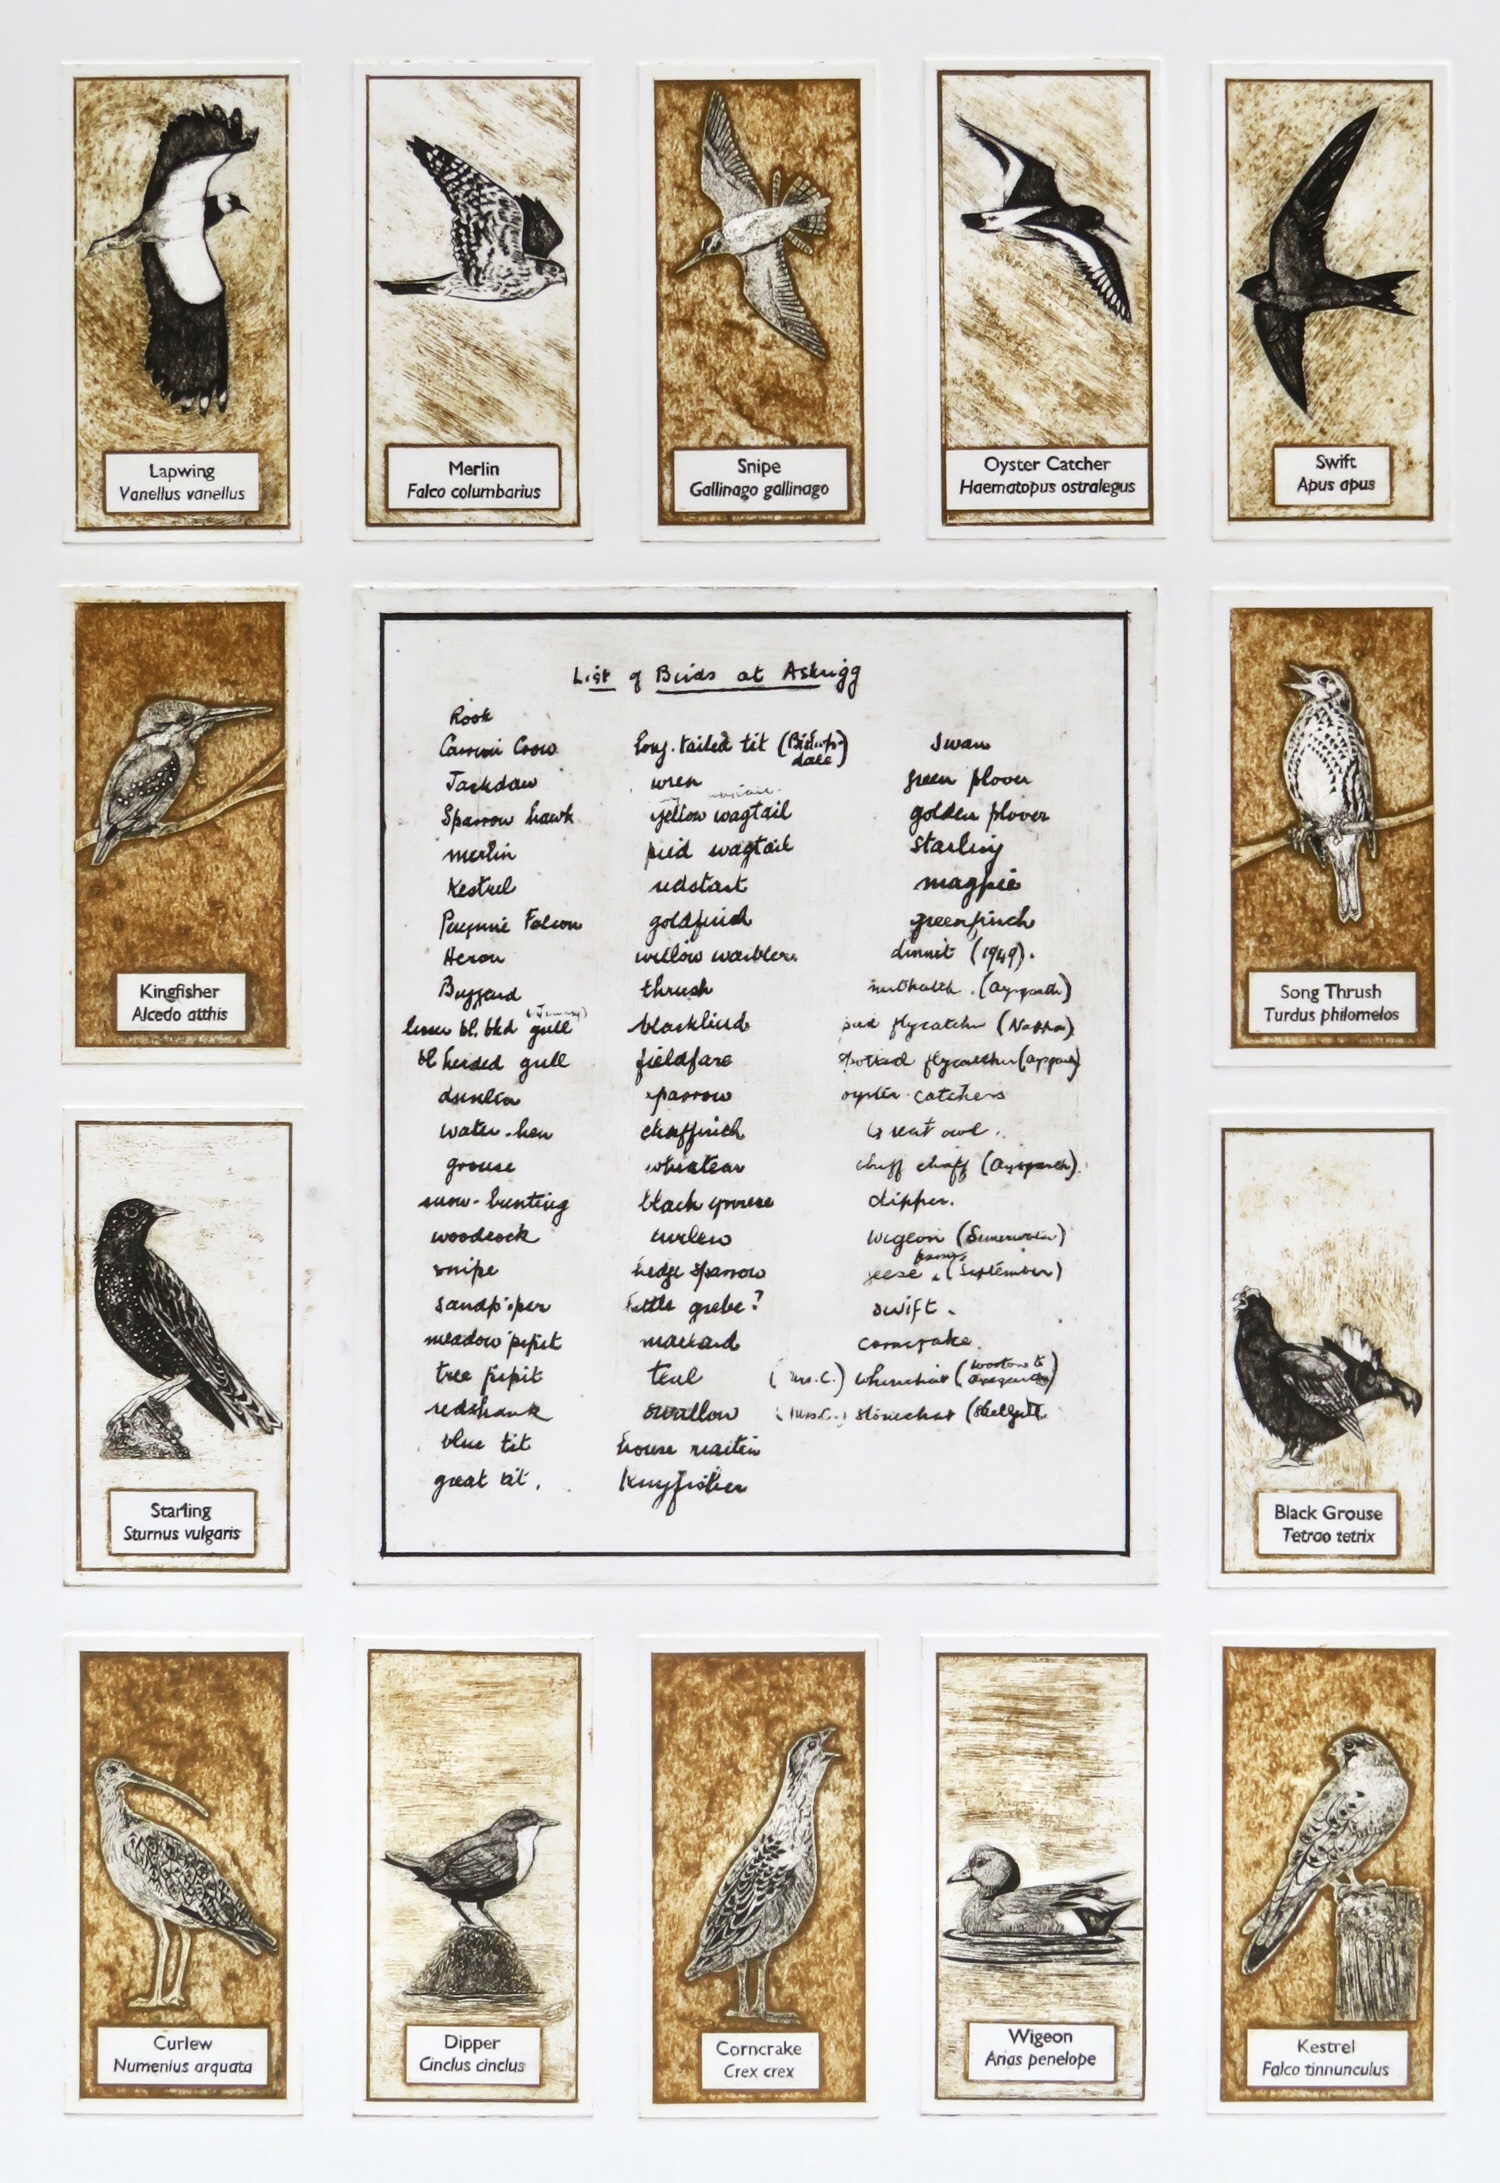
I’d already noticed the appearance of the corncrake on that list, a bird no longer seen in the Yorkshire Dales, and I started to make a note of all the birds on both our lists that have been classed as ‘birds of conservation concern’ by the BTO (British Trust for Ornithology) & RSPB (Royal Society for the Protection of Birds). “The assessment is based on the most up-to-date evidence available and criteria include conservation status at global and European levels and, within the UK: historical decline, trends in population and range, rarity, localised distribution and international importance” (BTO). The ‘Red List’ currently has 67 species of birds found in the UK that have been assessed as being at risk. Marie’s list of 66 birds includes: 1 that is now completely absent from the Yorkshire Dales, 14 that are on the red list, 23 on the amber list and only 28 are classed as being ‘green status’ in that they are plentiful and breeding well within the UK. I have a list of 68 species that I’ve seen and have been able to positively identify within the Yorkshire Three Peaks region. I can only guess at how much more abundant many of the species were in the early 1940s, a time just before agriculture was about to undergo major changes in intensification and mechanisation.
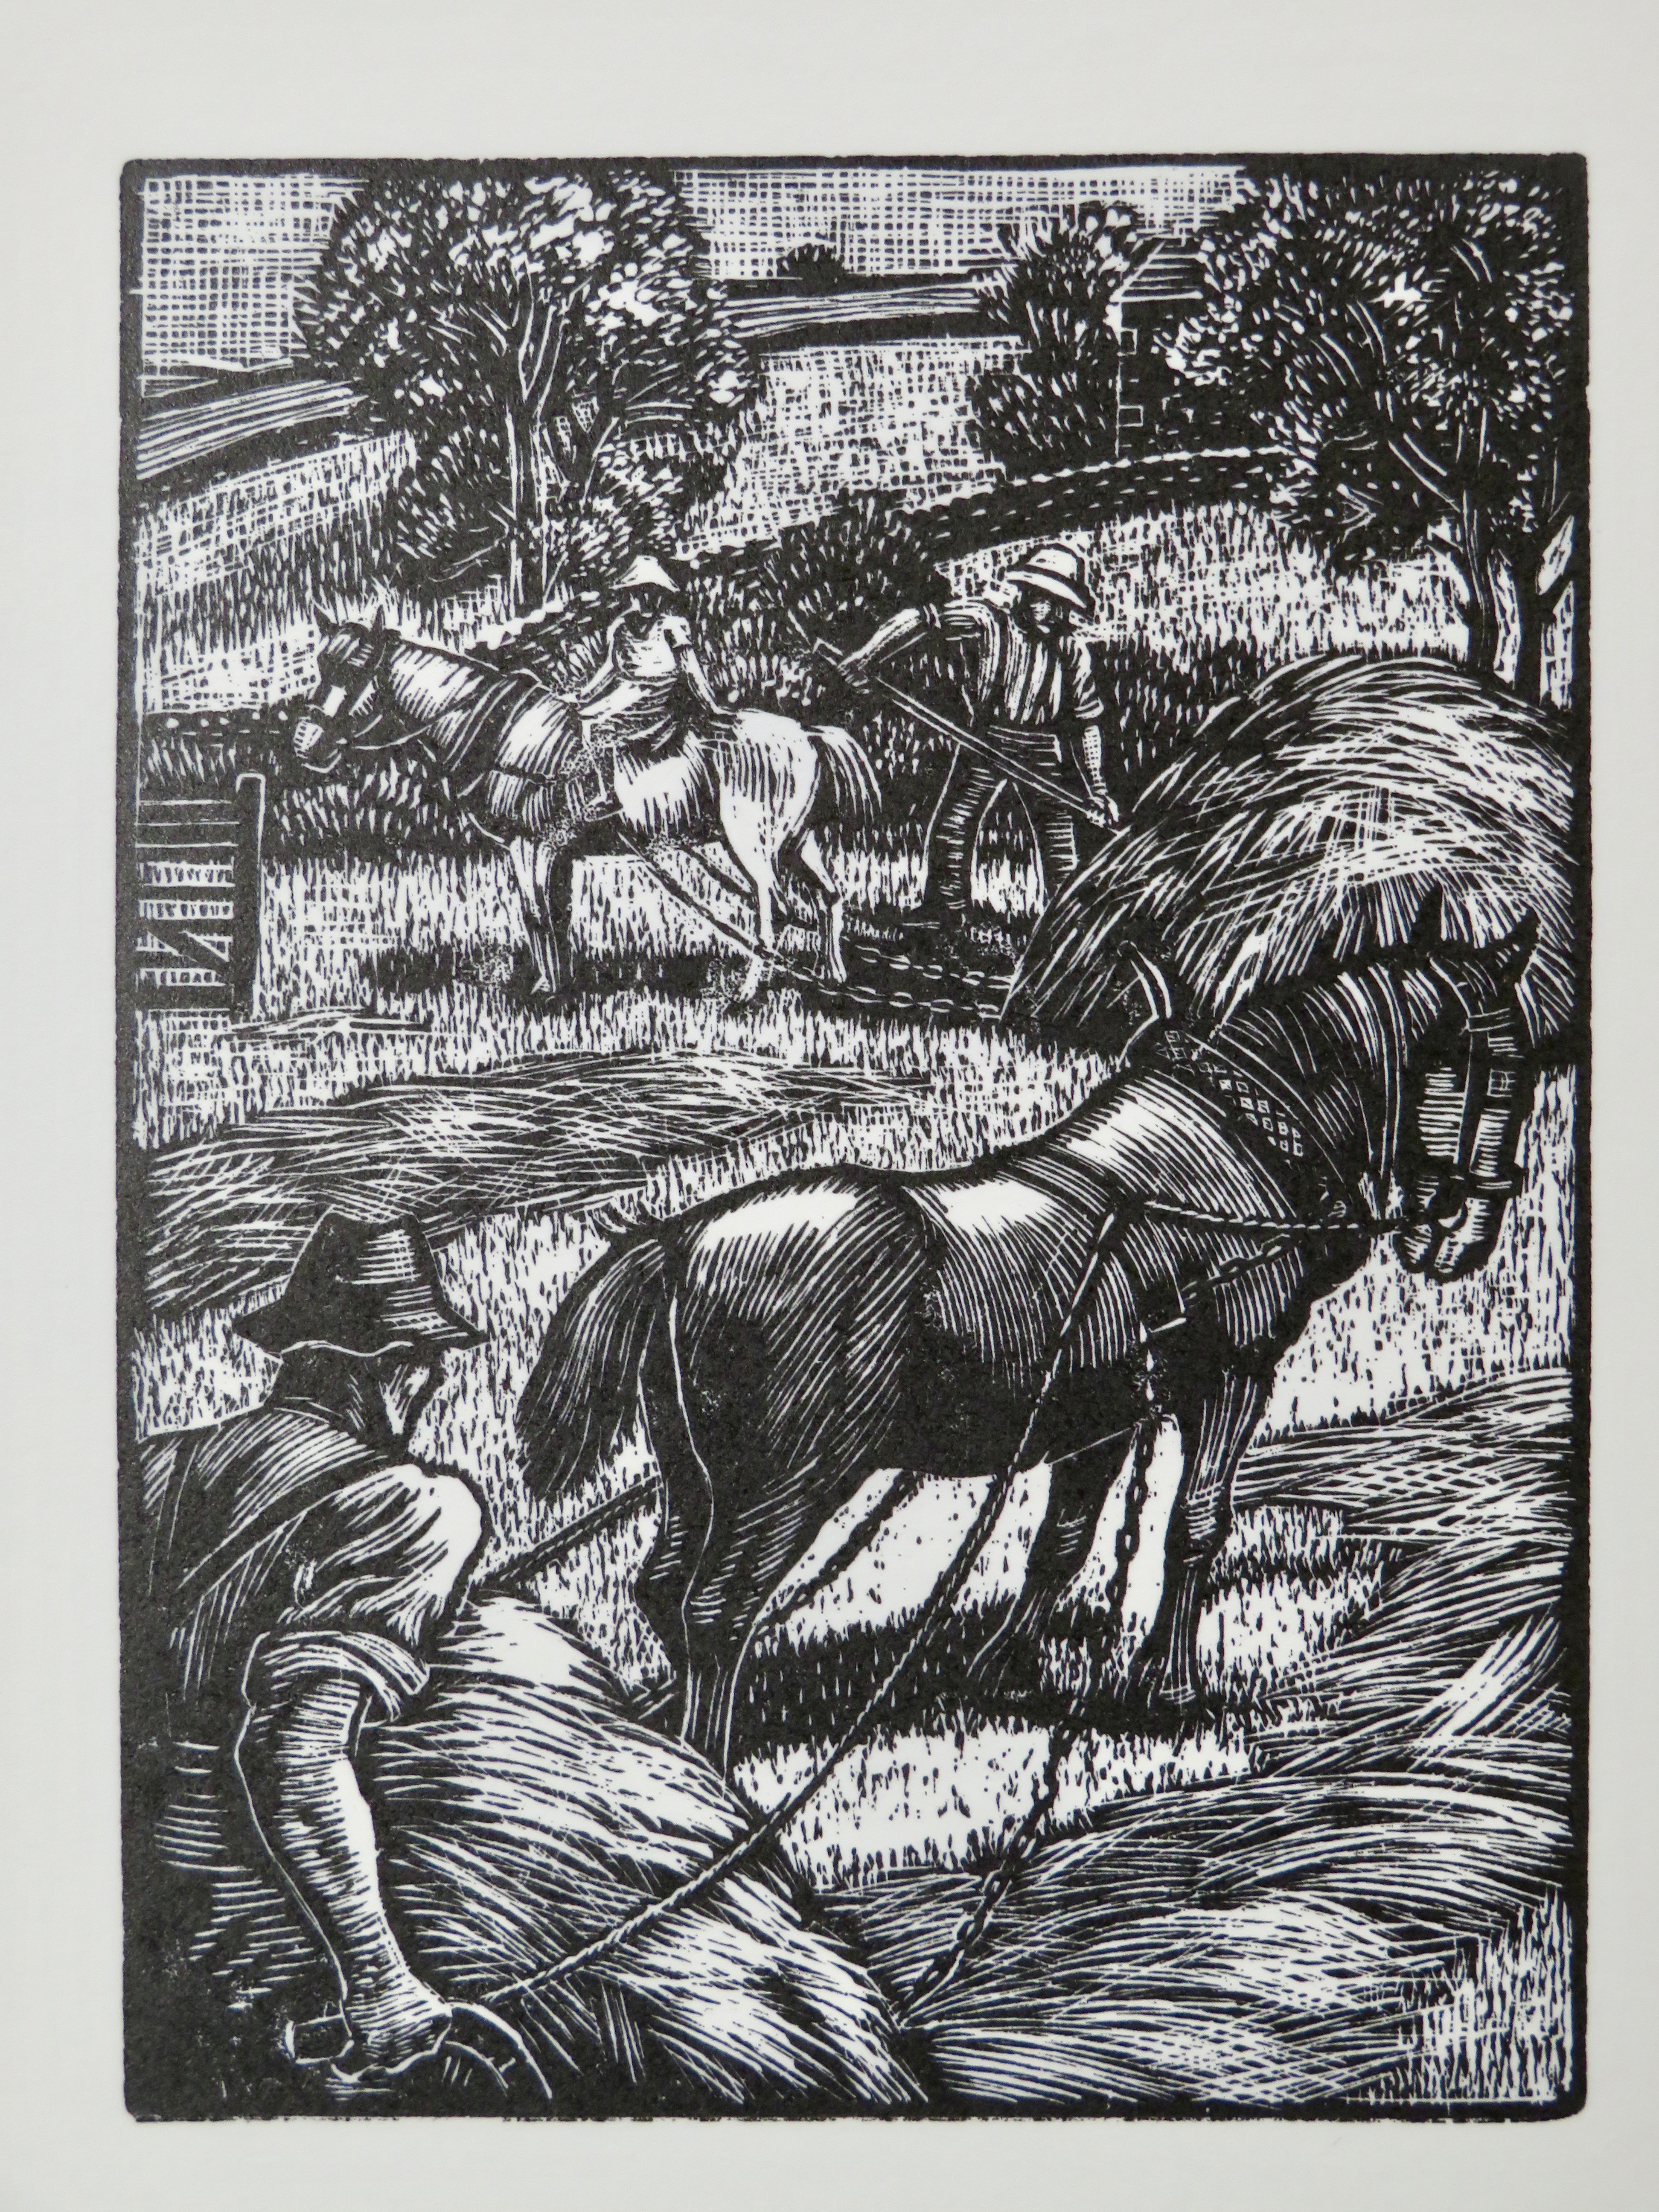
Wood engraving by Marie Hartley showing haymaking in the Yorkshire Dales.
I’m not an ornithologist and everything I know about birds has been learned from my mum (a retired ecologist) and my own research but I find the subject fascinating: worrying but also inspiring. On the one hand, it is of great concern that there are so many bird species now in decline but on the other hand, heartening to know that the Yorkshire Dales is home to so many of them. I decided to make a piece of work taking Marie’s List as a starting point. I wanted it to celebrate what we have in the Yorkshire Dales and also perhaps provoke discussion and interest in bird conservation and the reasons why so many birds are in decline.
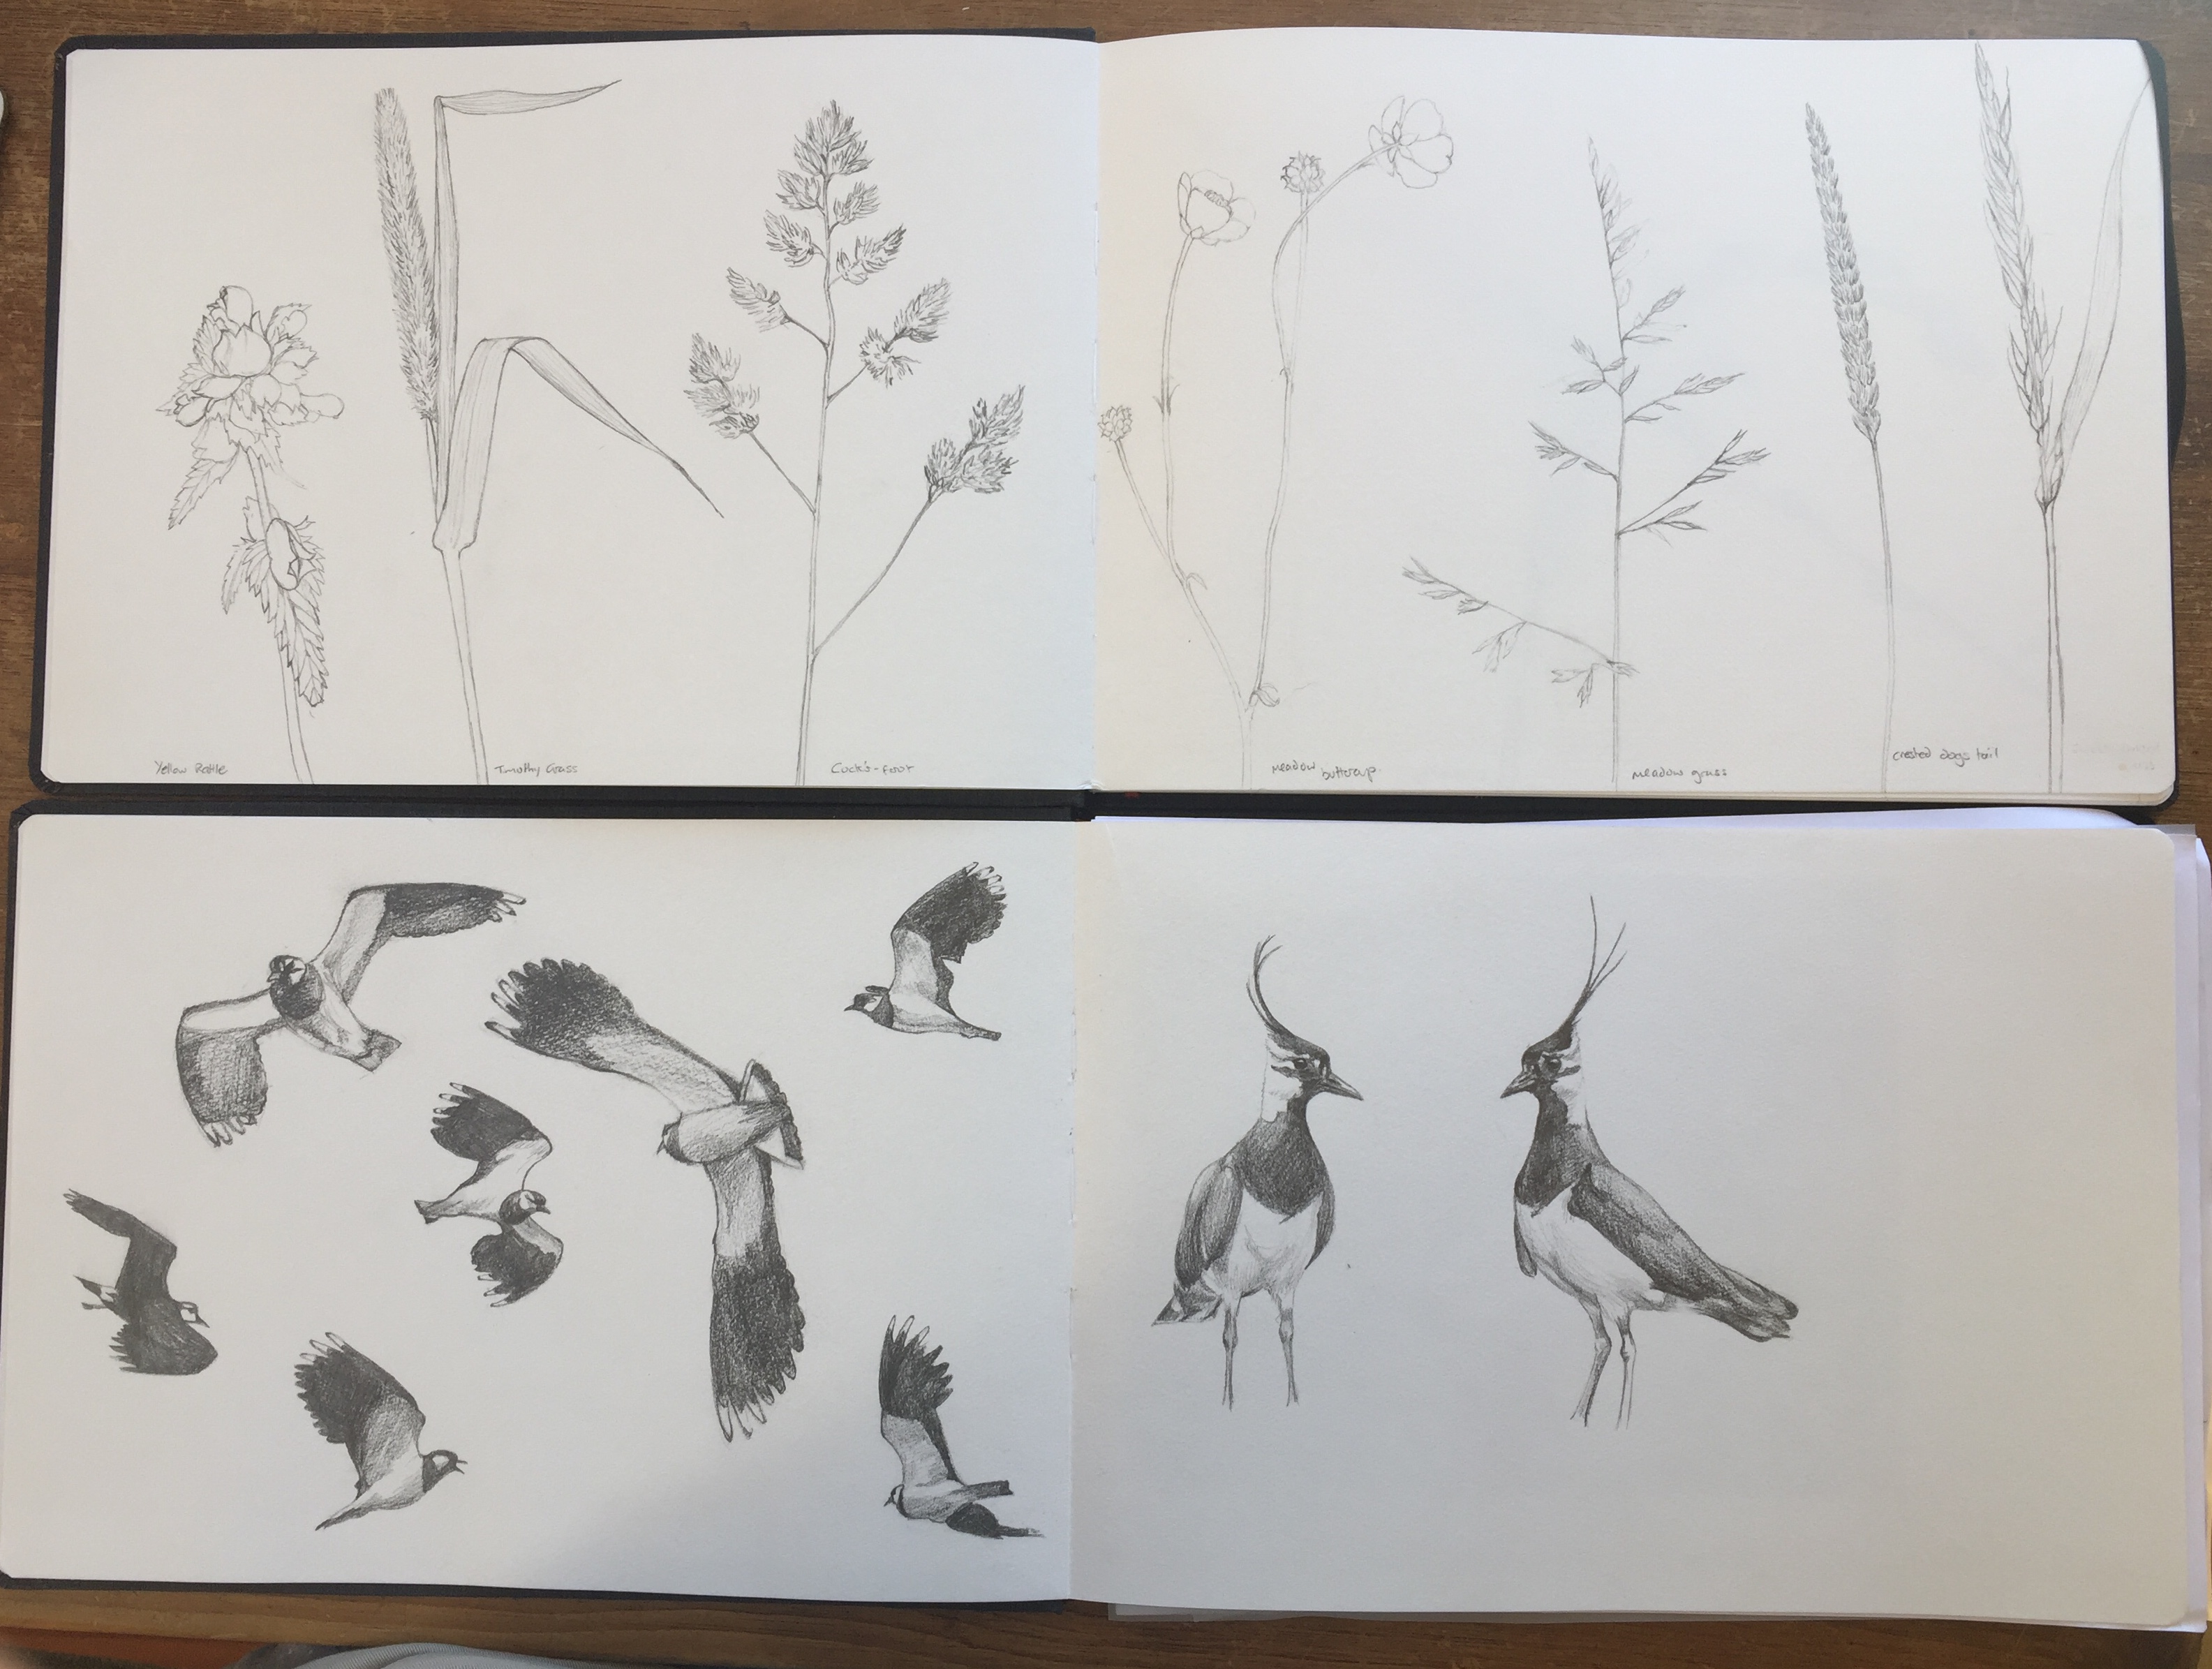
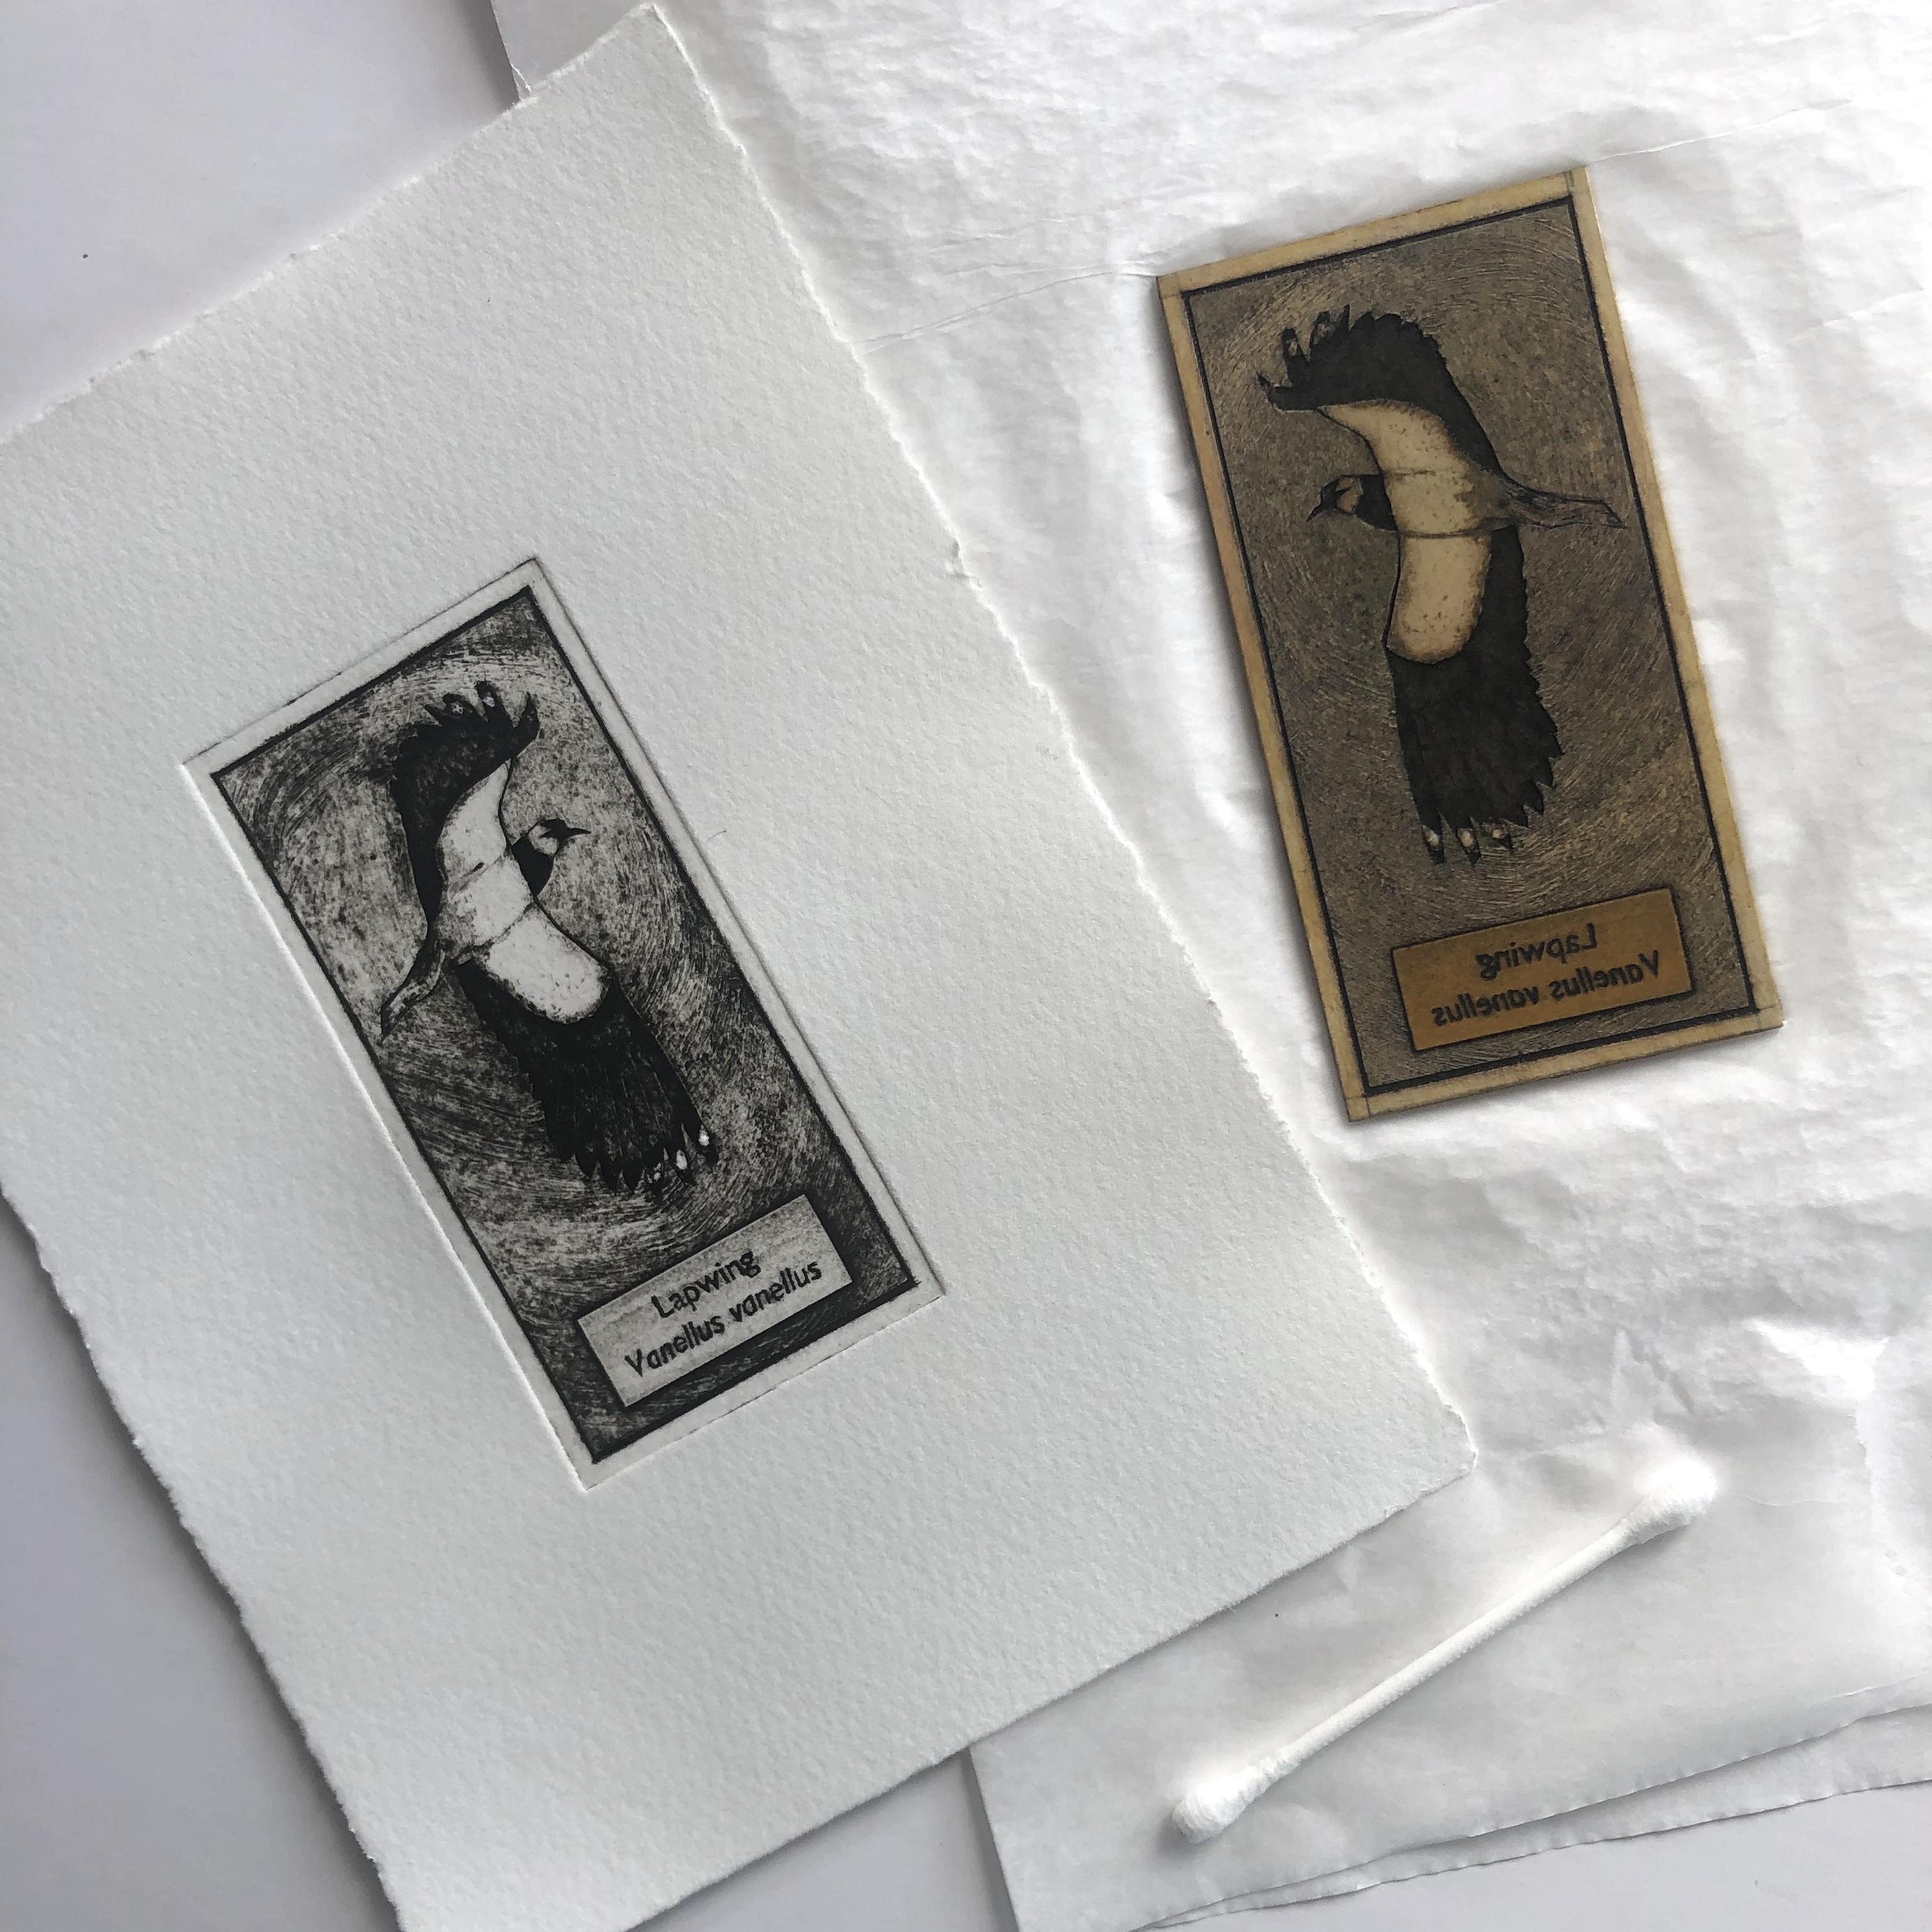
 As with all of my work, I started with an idea and that developed and changed as I made various decisions about what to include, where to focus and how to physically create the work. I selected 14 birds from Marie’s list that were either red or amber status. I decided to create an individual printing plate for each with her actual list reproduced in the middle. As I started to work out the overall design, I thought about whether I’d label the birds or not and once I decided that I would, I realised that the plates were starting to resemble the old cigarette cards that people used to collect. I have a few John Players ‘Bird of the British Isles’ cards and I love the size and detail of them. I made each little collagraph card using cutting techniques combined with gesso, acrylic medium & wood glue for texture. The labels were made by reversing text on my computer, printing it out, varnishing it and scratching the letters out to create areas of drypoint. I used a font that resembled letterpress type from the 40s.
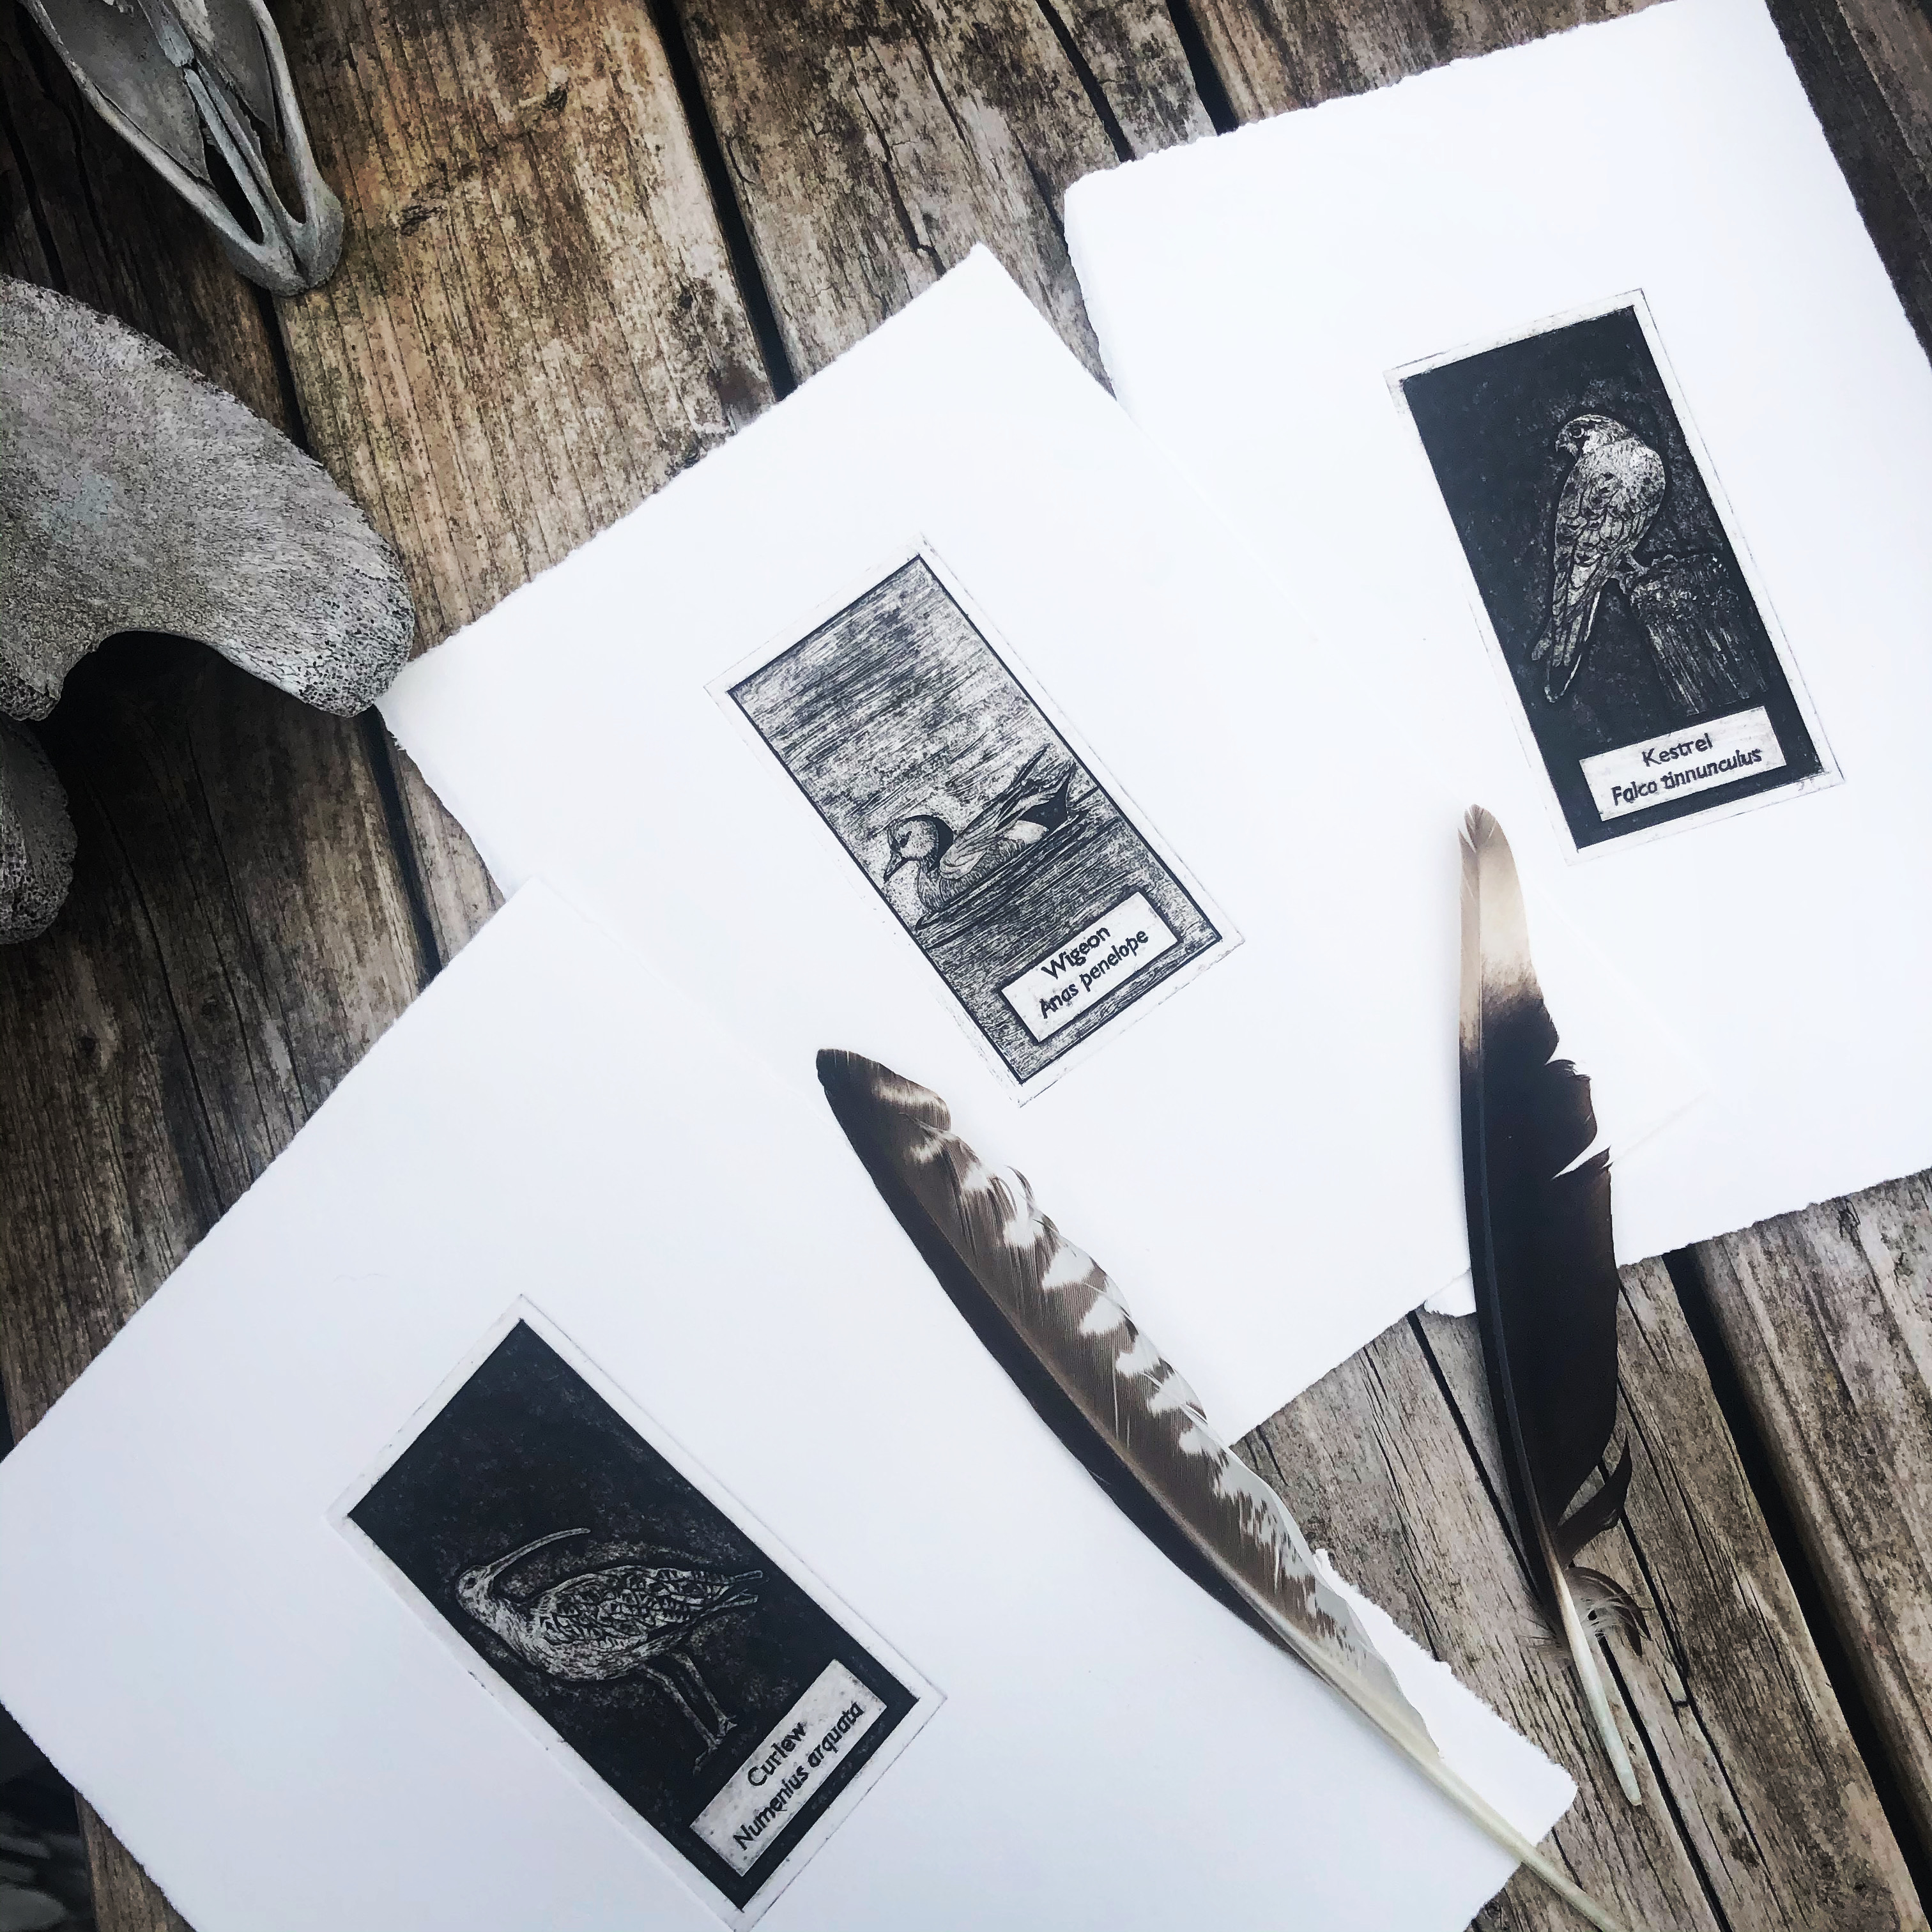
Proof prints of some of the bird collagraphs with curlew and oystercatcher feathers that I found on a run.
I also like the link between these and the tiny wood engravings of individual birds that Marie created as end pieces for chapters in the Dales books. In fact I included three of the birds she depicted: Dipper, Curlew and Snipe.

Dipper, wood engraving by Marie Hartley

Snipe, wood engraving by Marie Hartley

Curlew, wood engraving by Marie Hartley

Dipper collagraph, Hester Cox

Snipe collagraph, Hester Cox

Curlew collagraph, Hester Cox
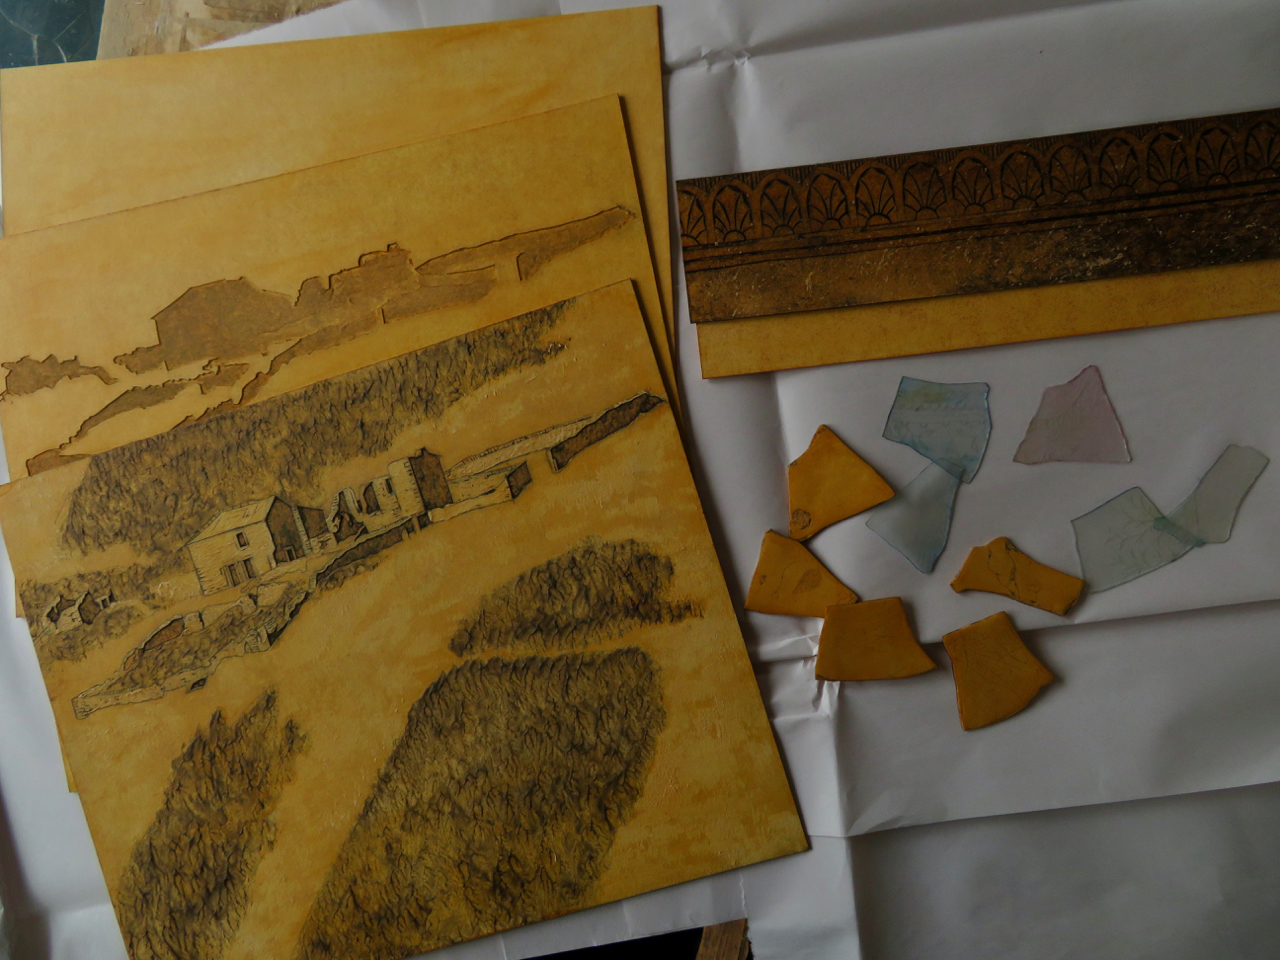
I wanted to recreate Marie’s handwriting so that the list would look as she’d written it. Normally I would use a photograph of the list and take it to a printmaking studio where I could use specialist equipment to make a printing plate such as a silkscreen or a photopolymer plate. This could then be combined with my collagraph cards to create the overall work. Unfortunately, during lockdown all the studios were closed and I wouldn’t have been able to justify travelling to them anyway (there are none that are within an hours drive). I considered ordering a photopolymer printing plate from a company but was put off by the expense and the lack of control over the quality. So I decided to go down the route of creating a drypoint using a reversed photographic printout from one of my photos of the page of Marie’s diary. It is a laborious way of working but very effective and probably exactly the thing to be doing when you feel out of sorts with the world around you. It took me two and half days to scratch out all of the letters but at the end of that, I had an intaglio printing plate that I could use alongside my little bird collagraphs.
Now to the printing part. I’d been ‘proofing’ each bird plate as I went along in order to check whether they worked and also because the pattern of light and dark backgrounds was quite important to the overall look of the print. I spent a great deal of time arranging and rearranging the cards to make the overall design aesthetically pleasing. Once I had proofed everything, it was time to make a ‘registration paper’ so that the spacing of the individual plates would be perfect every time I printed. It’s pretty straightforward, you mark on a piece of paper where each plate will go and draw out the rectangles. I then taped that to my press bed with a clean piece of tissue paper over the top. I could see the lines through the tissue but could take it off when it got dirty. The first print went quite well but after that, each time I laid the damp paper over the top the plates kept moving so that I’d end up with a wonky prints. To ink and wipe all of the plates for one print took up to 2 hours so after the second crooked print, I gave up and decided to work on the solution to the moving plates before I had another go.
I needed something to hold them in place that wouldn’t damage the plates and also wouldn’t create a ‘hotspot’ of added depth because that would make that area of the print darker due to extra pressure. Brian (my husband) suggested that I stick them to the tissue with smears of honey. Whilst I initially thought this would be really messy and unlikely to work, it did lead me to realise that I could try a small dab of bookbinder’s pva in place of the honey. It is a glue that is archival but that can also can be removed with water after it has dried. I put a tiny dab on the back of each plate which held it in place and then, after printing, I was able to wash the glue and tissue from the back of them without causing any damage to the plates. This is a bit of a revelation because I like using lots of plates to create a single image but the movement issue has often put me off.
So after a few weeks of work, the print is finished and ready to frame for whenever the exhibition goes ahead. We are now waiting to find out when the museum will reopen and what would be the best course of action regarding the dates for the show. I will let everyone know as soon as we have a definite decision.


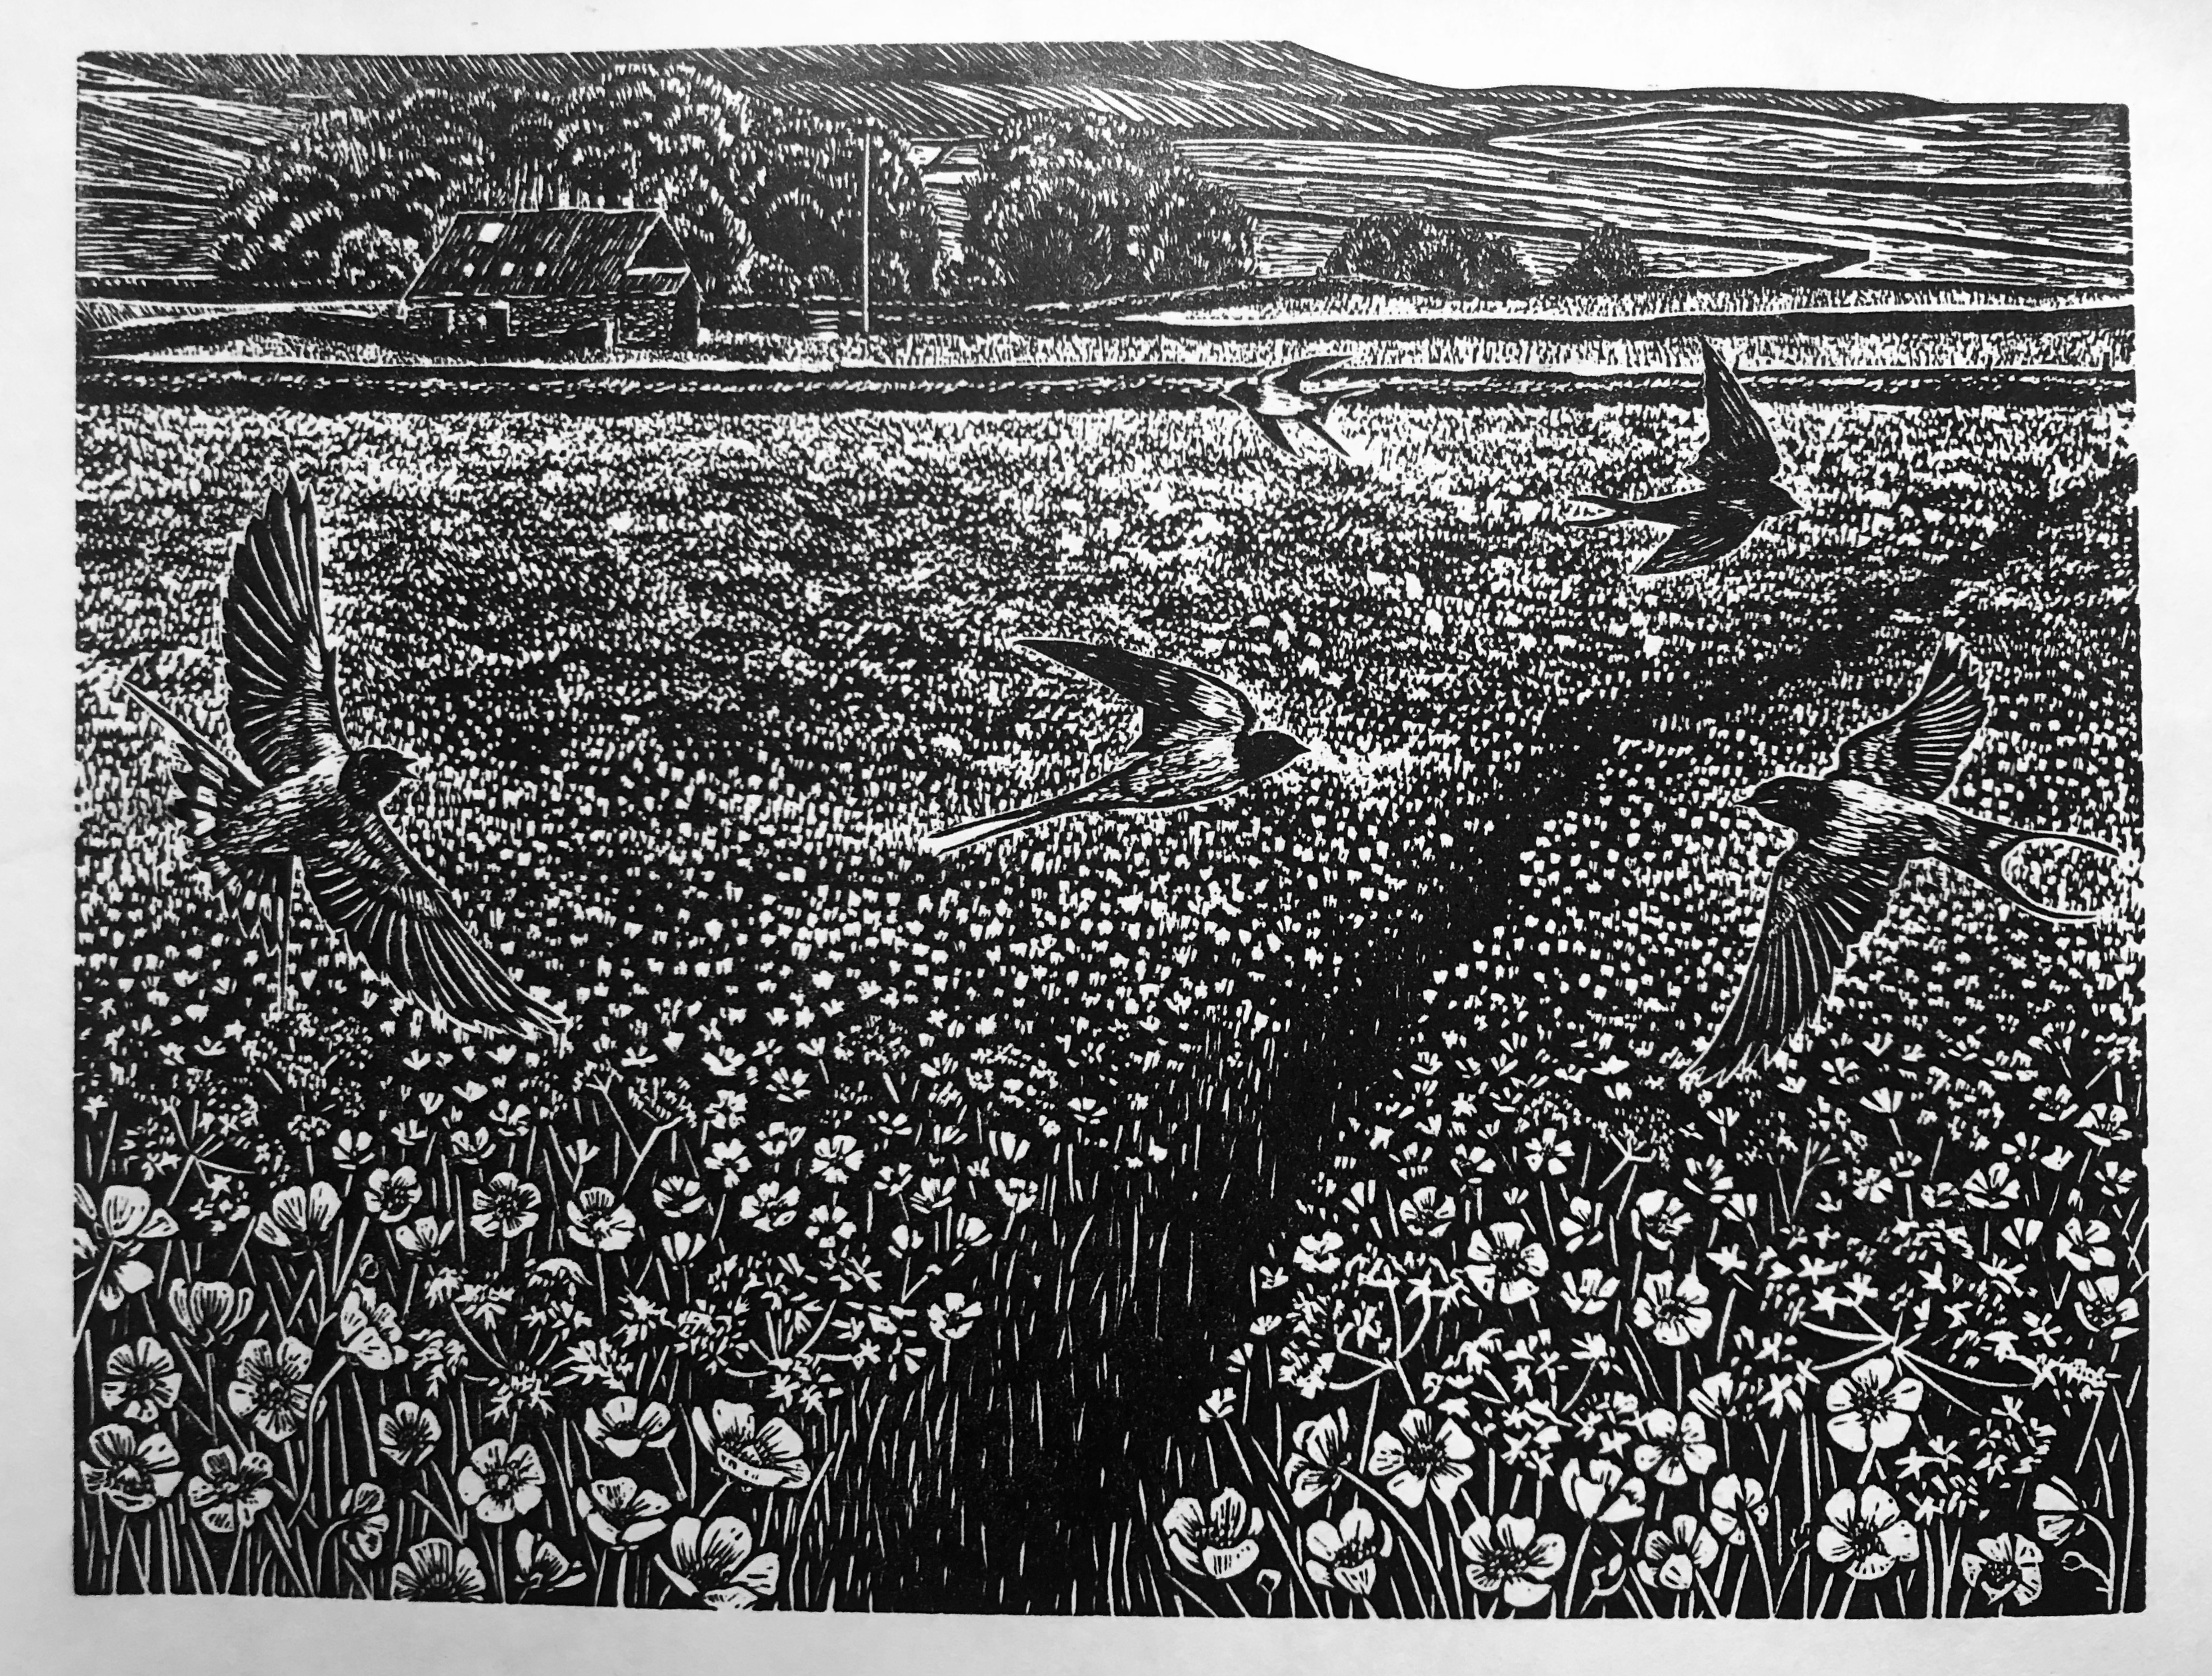
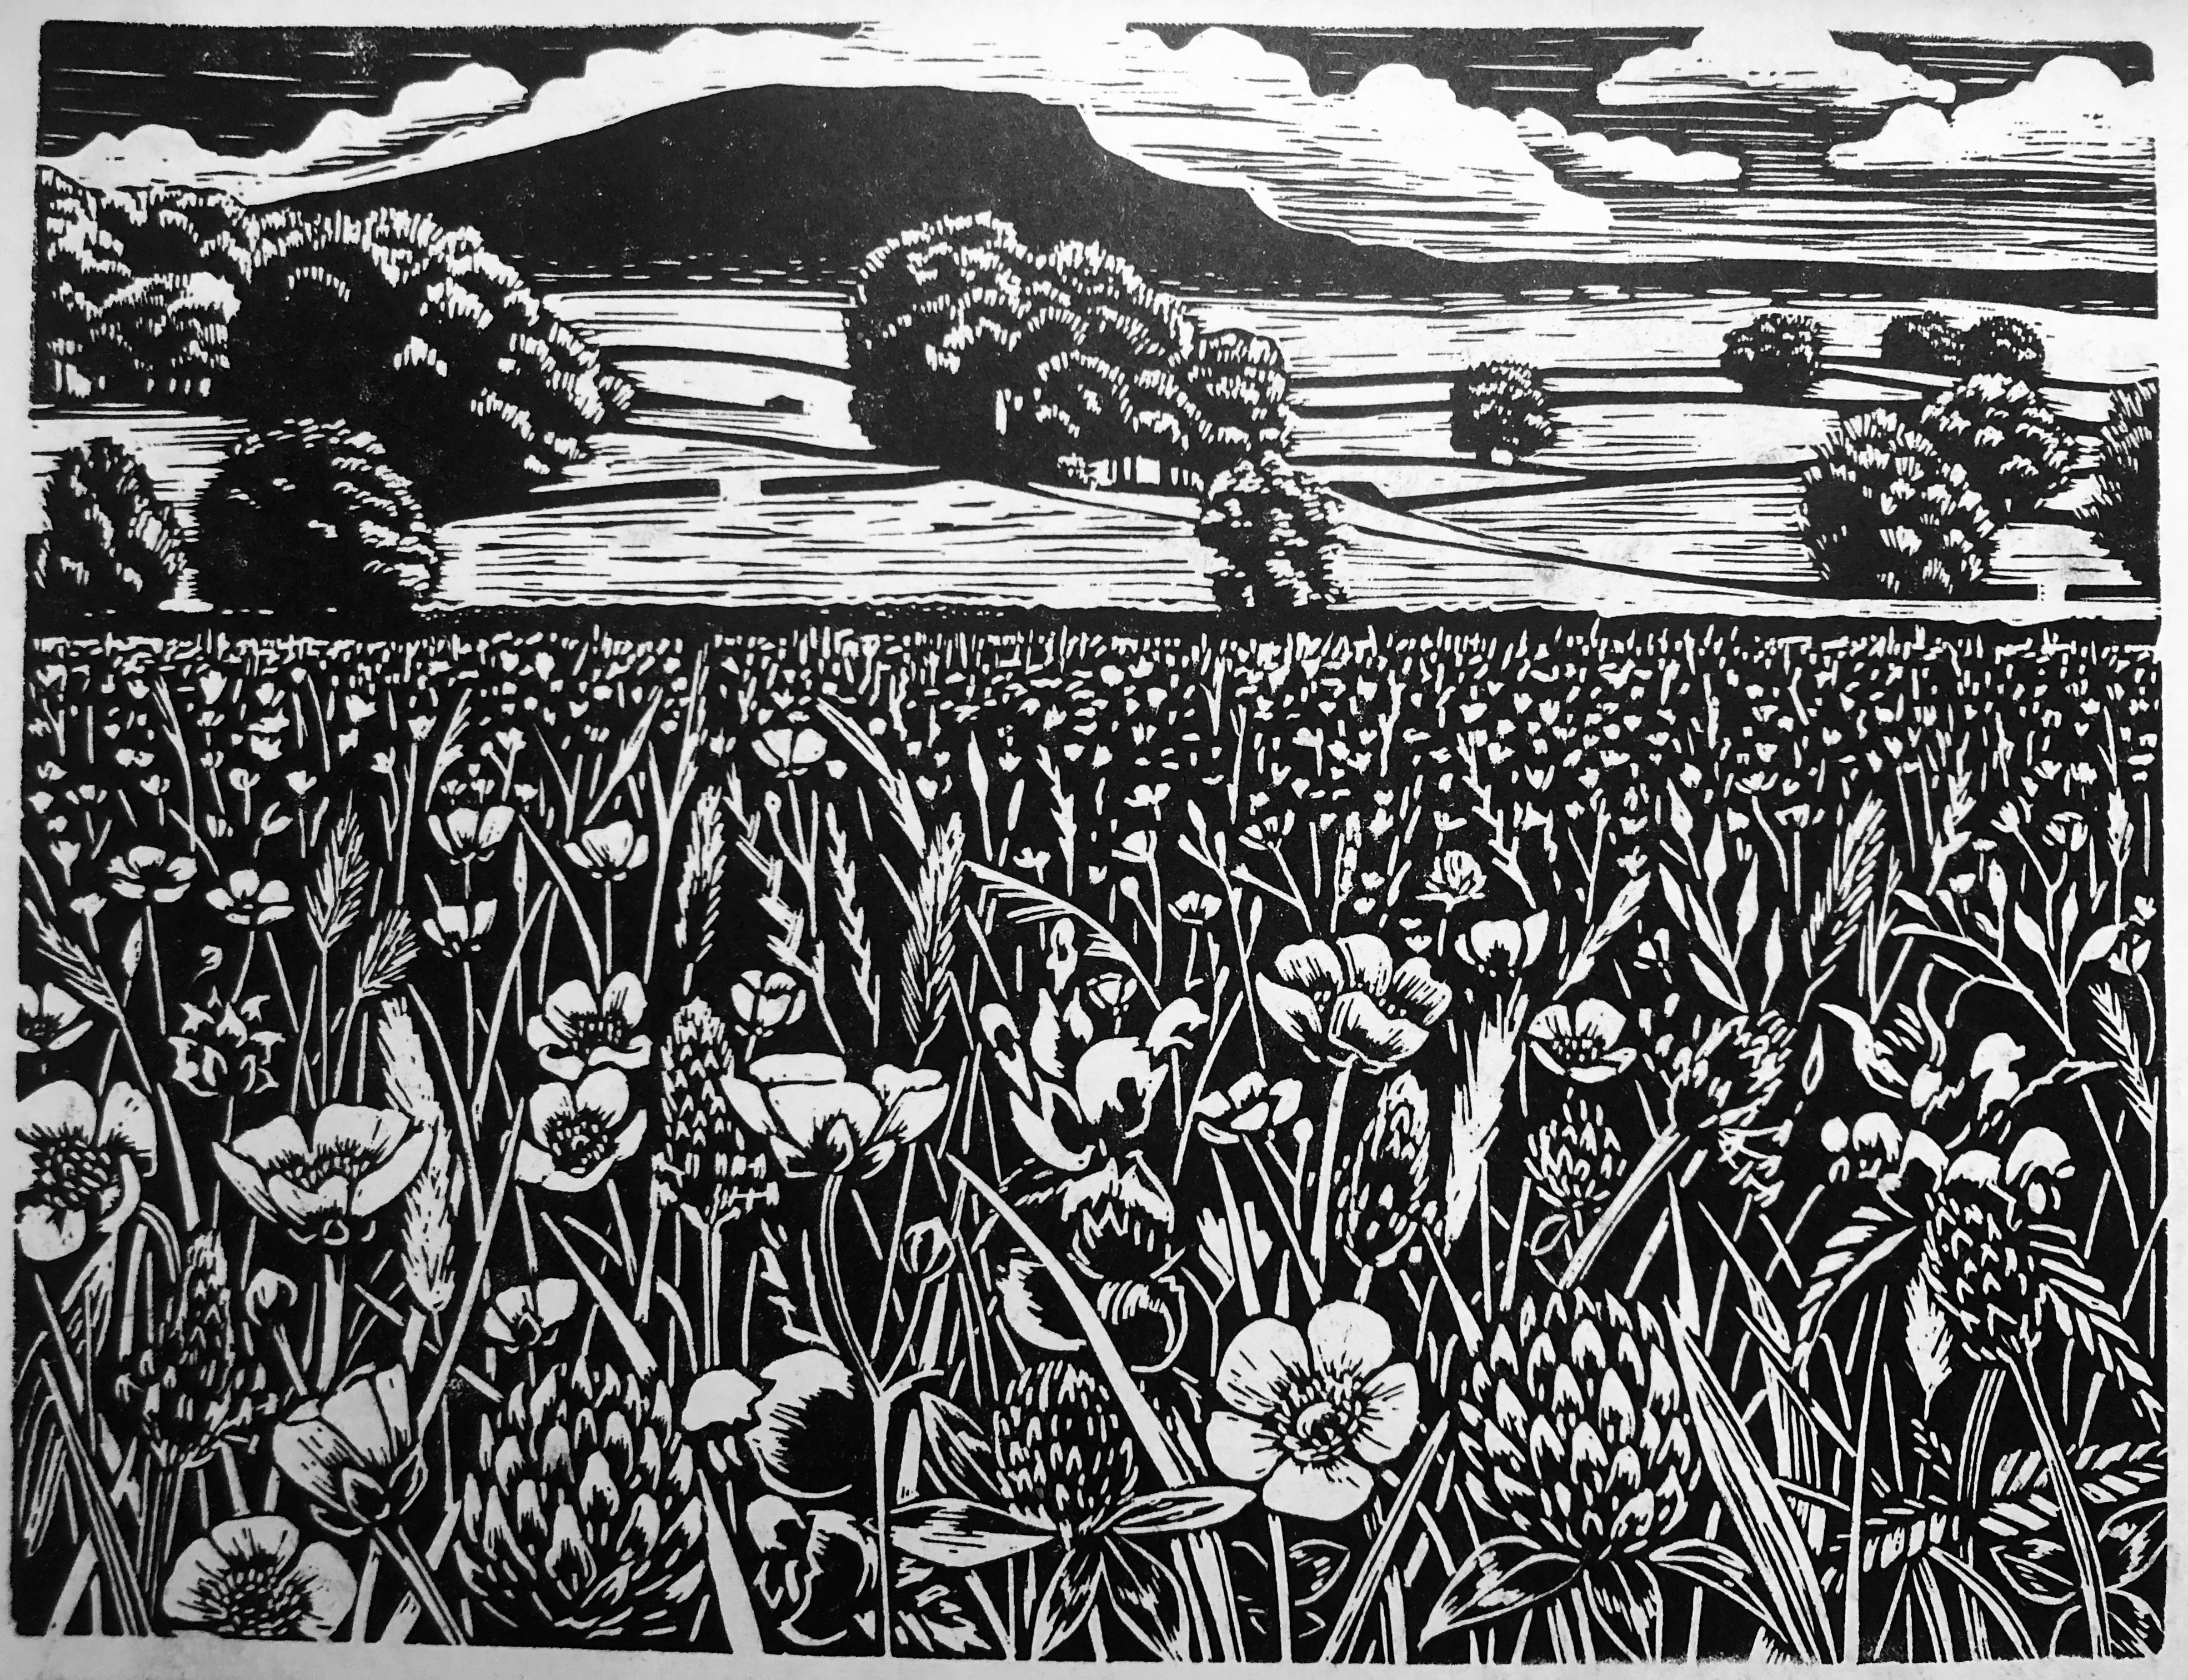

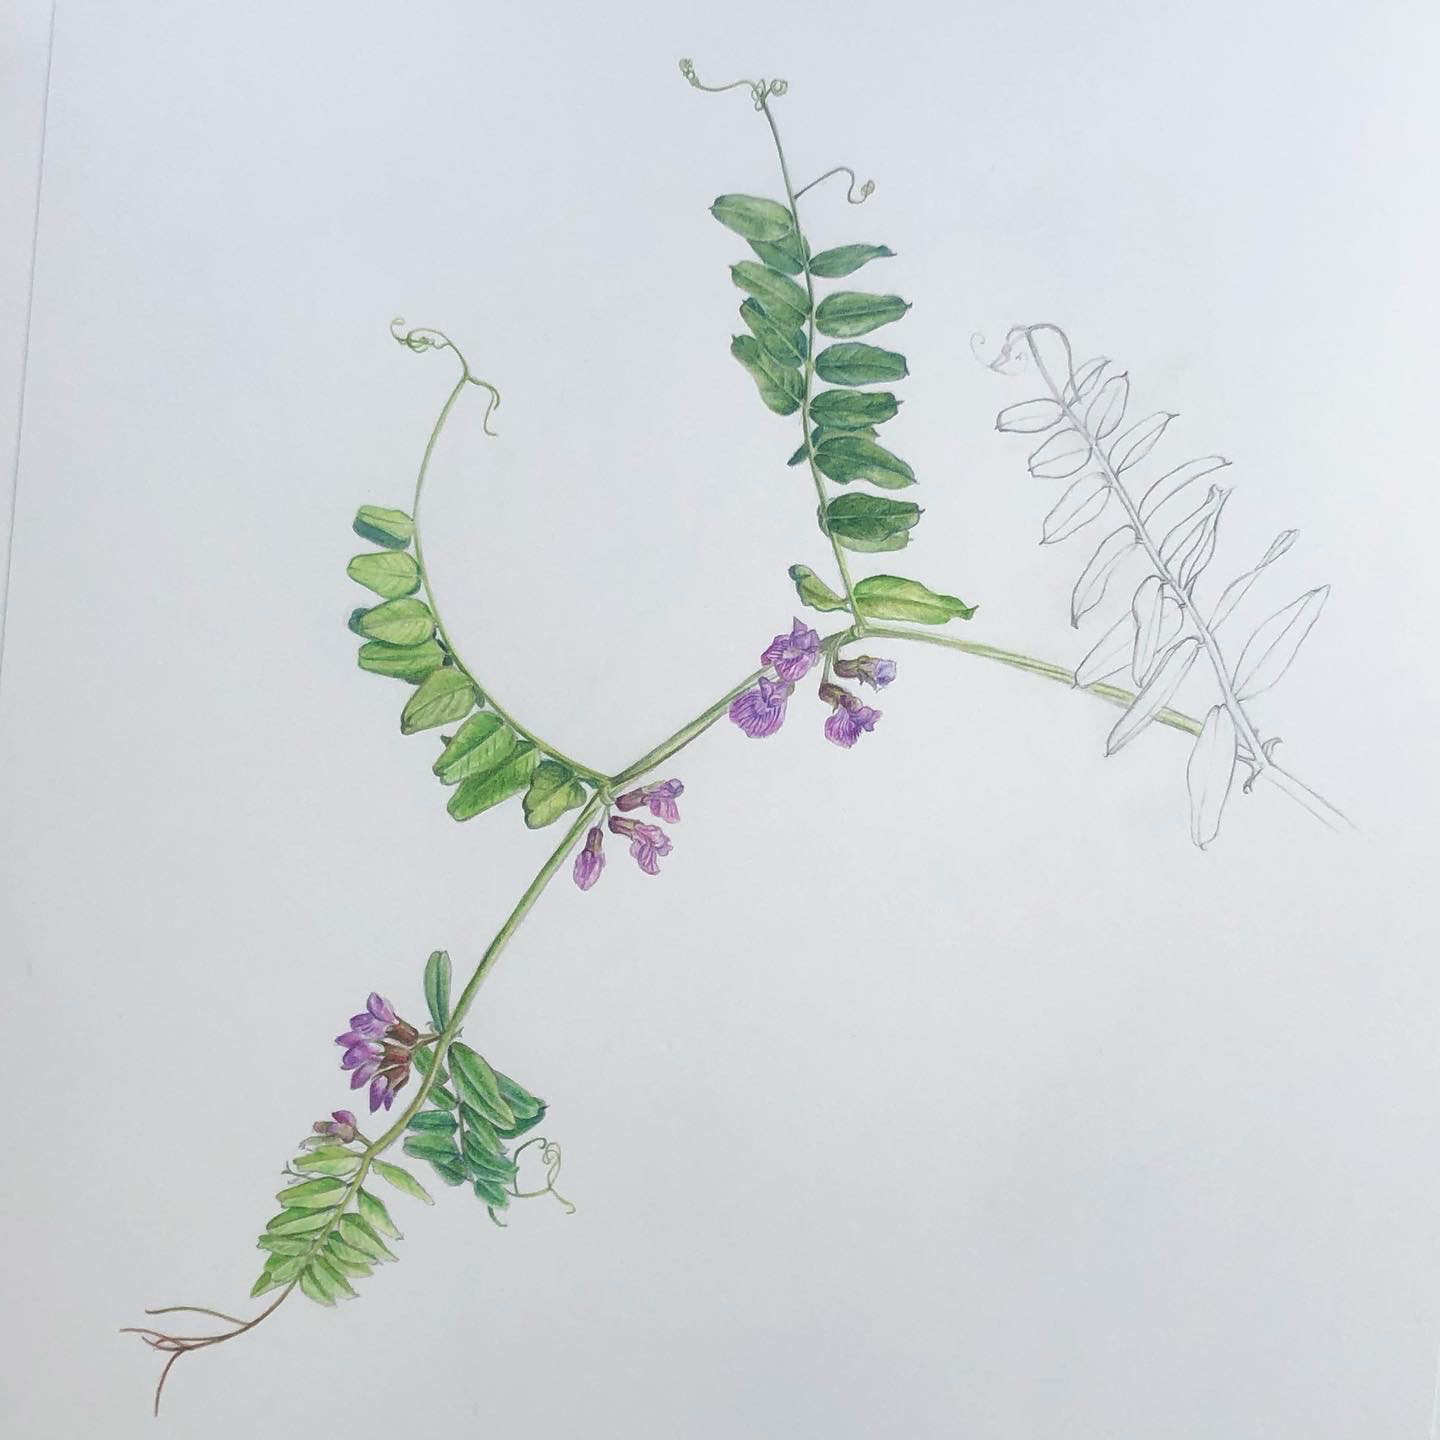


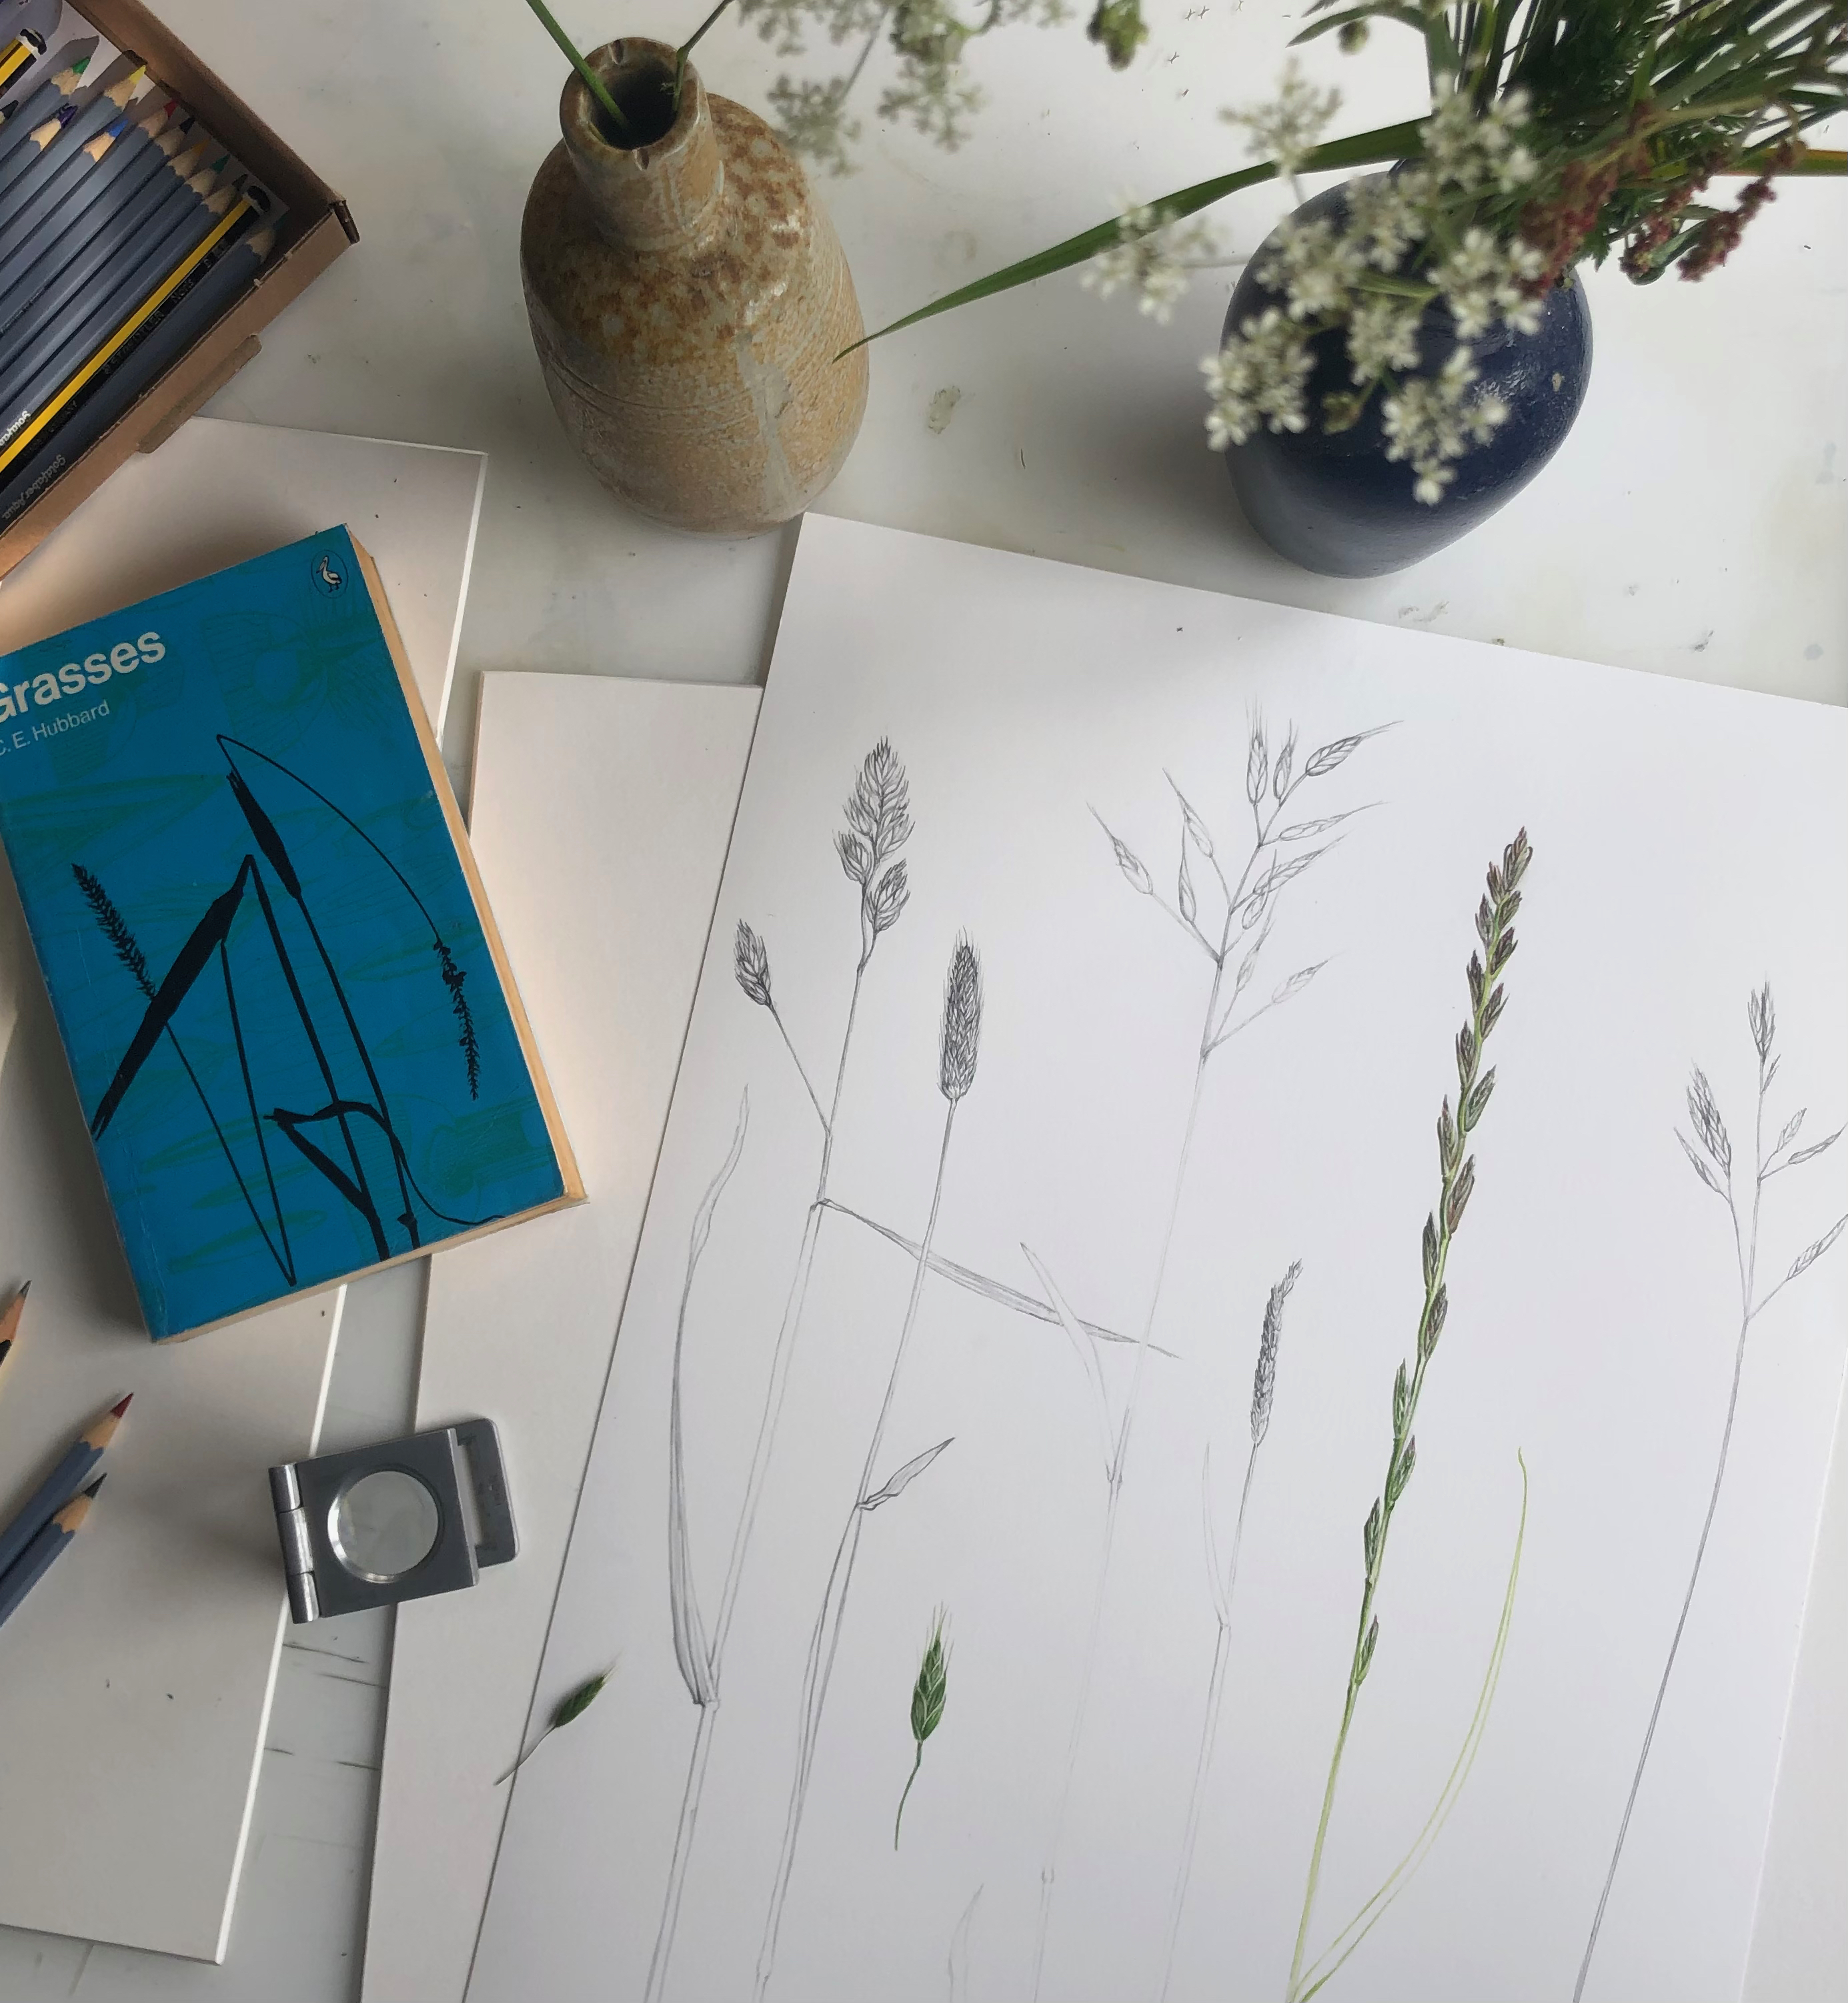


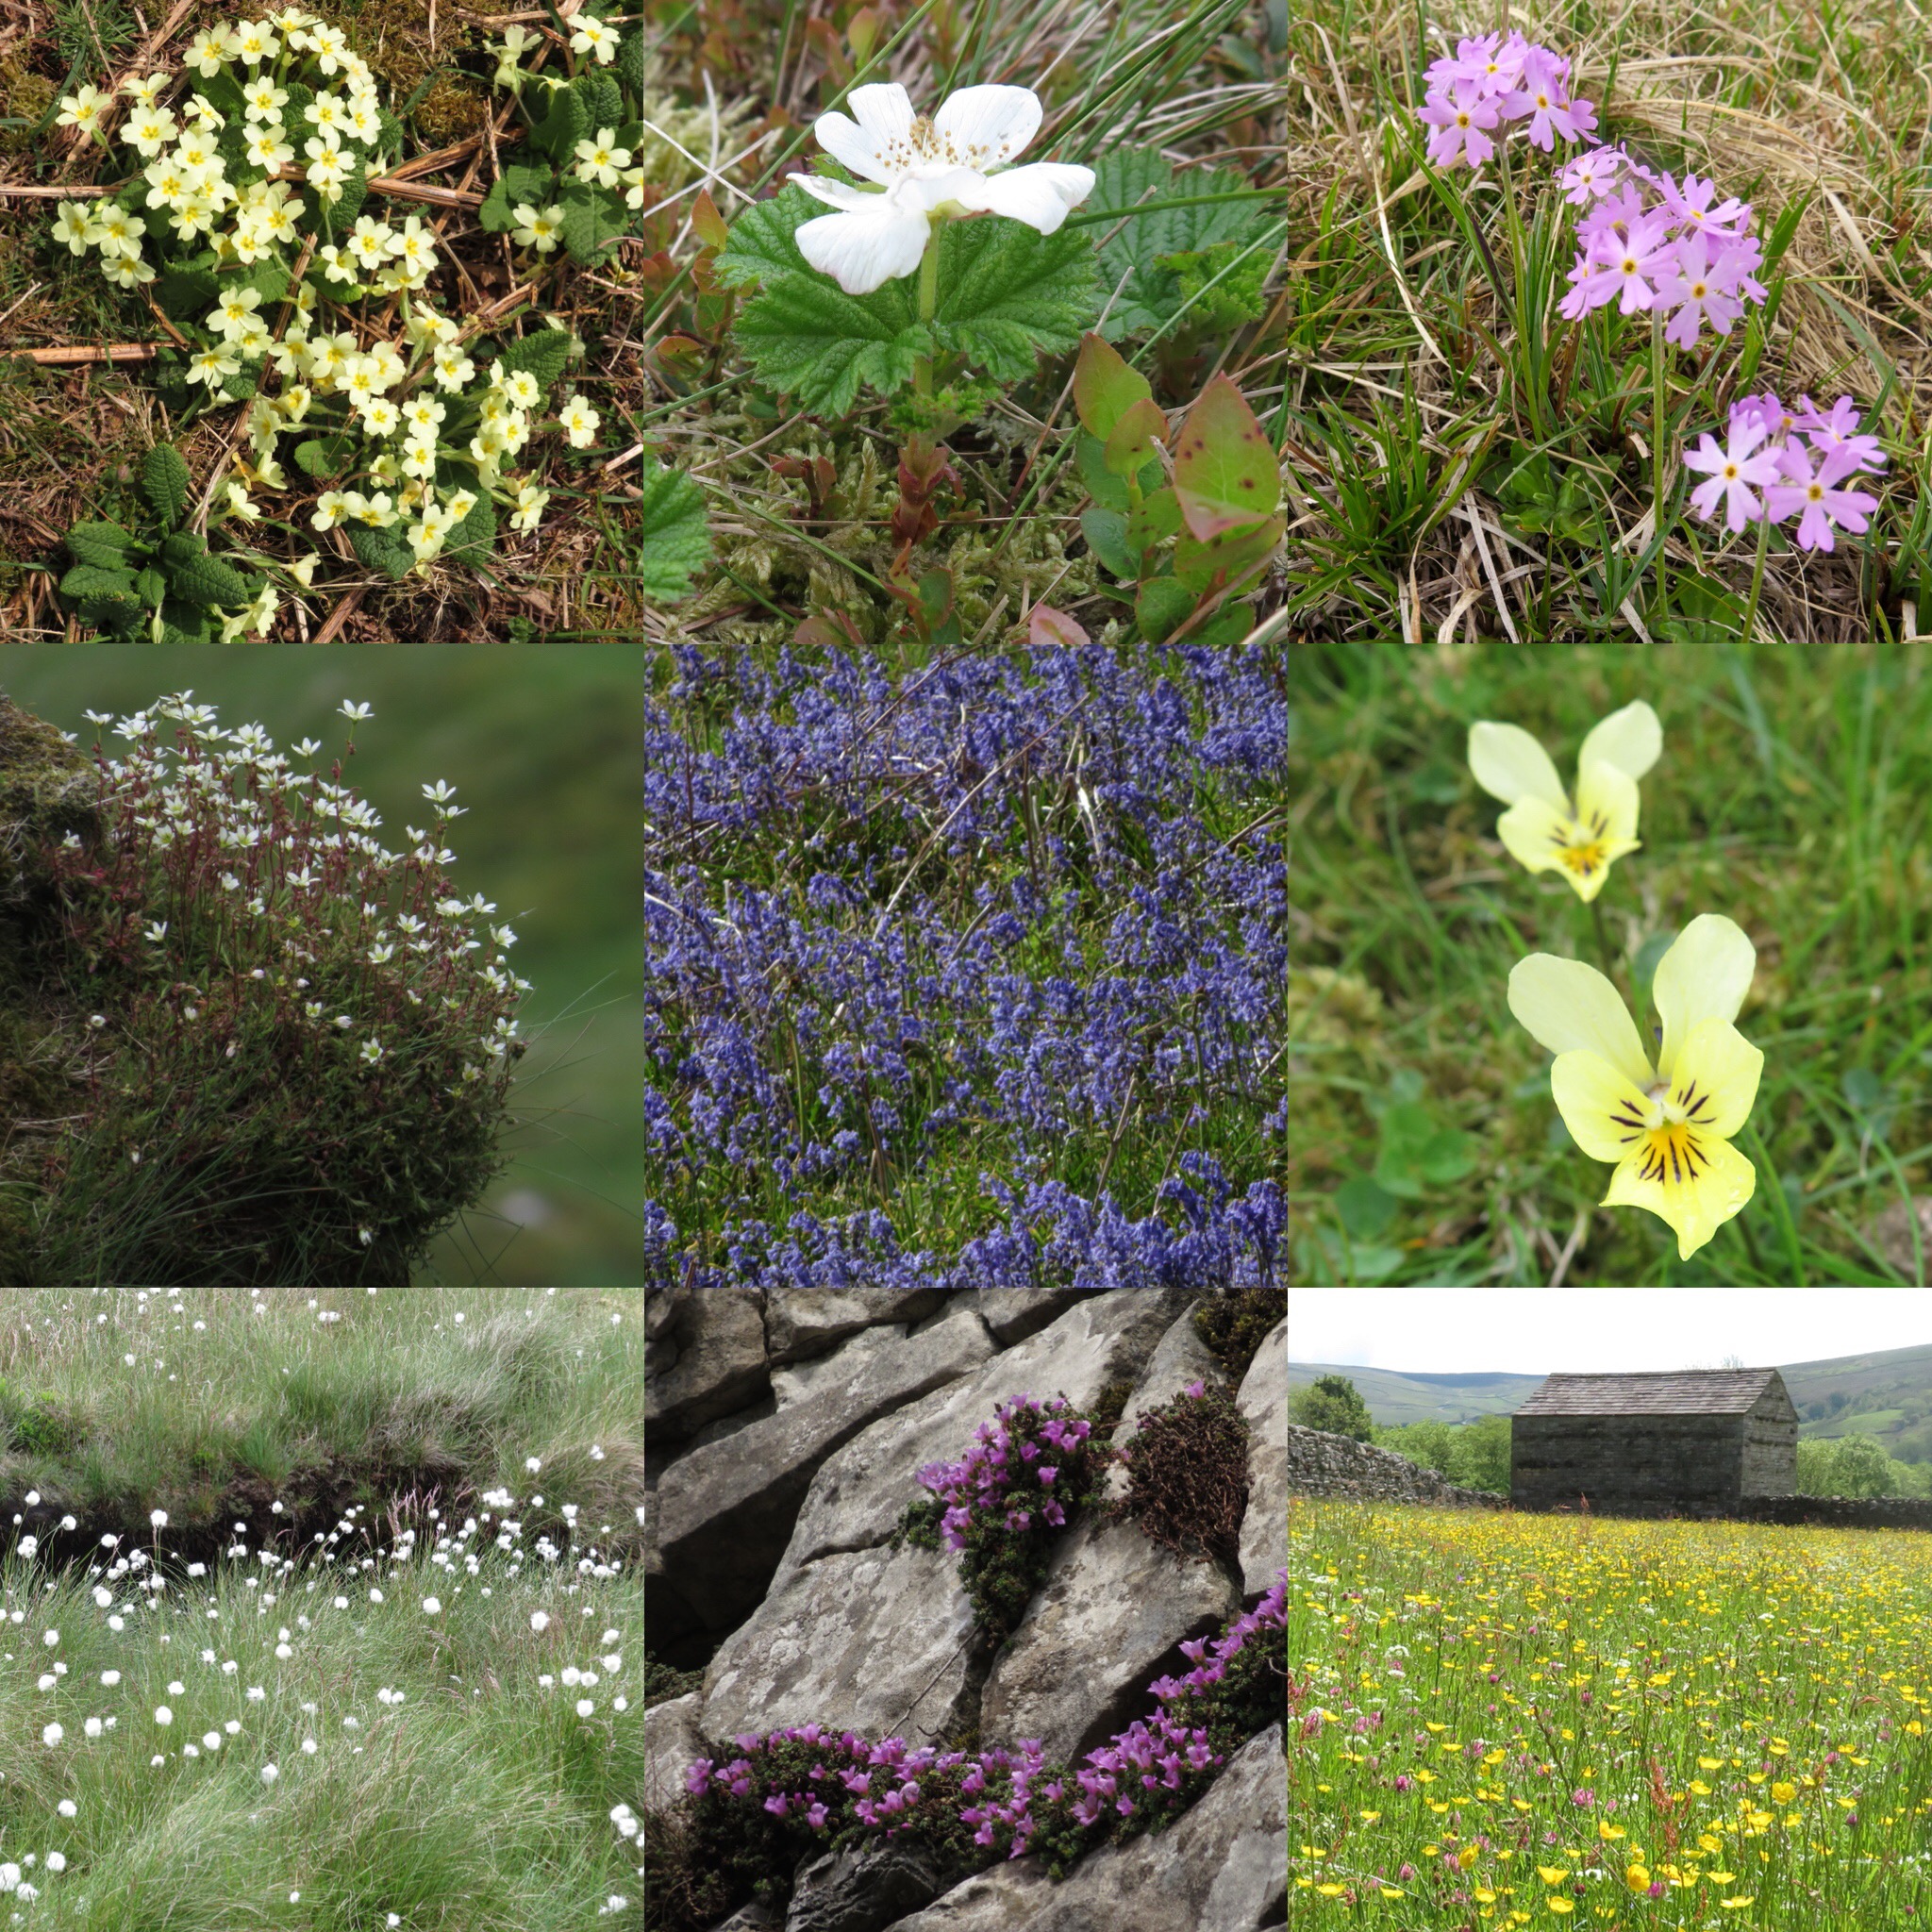
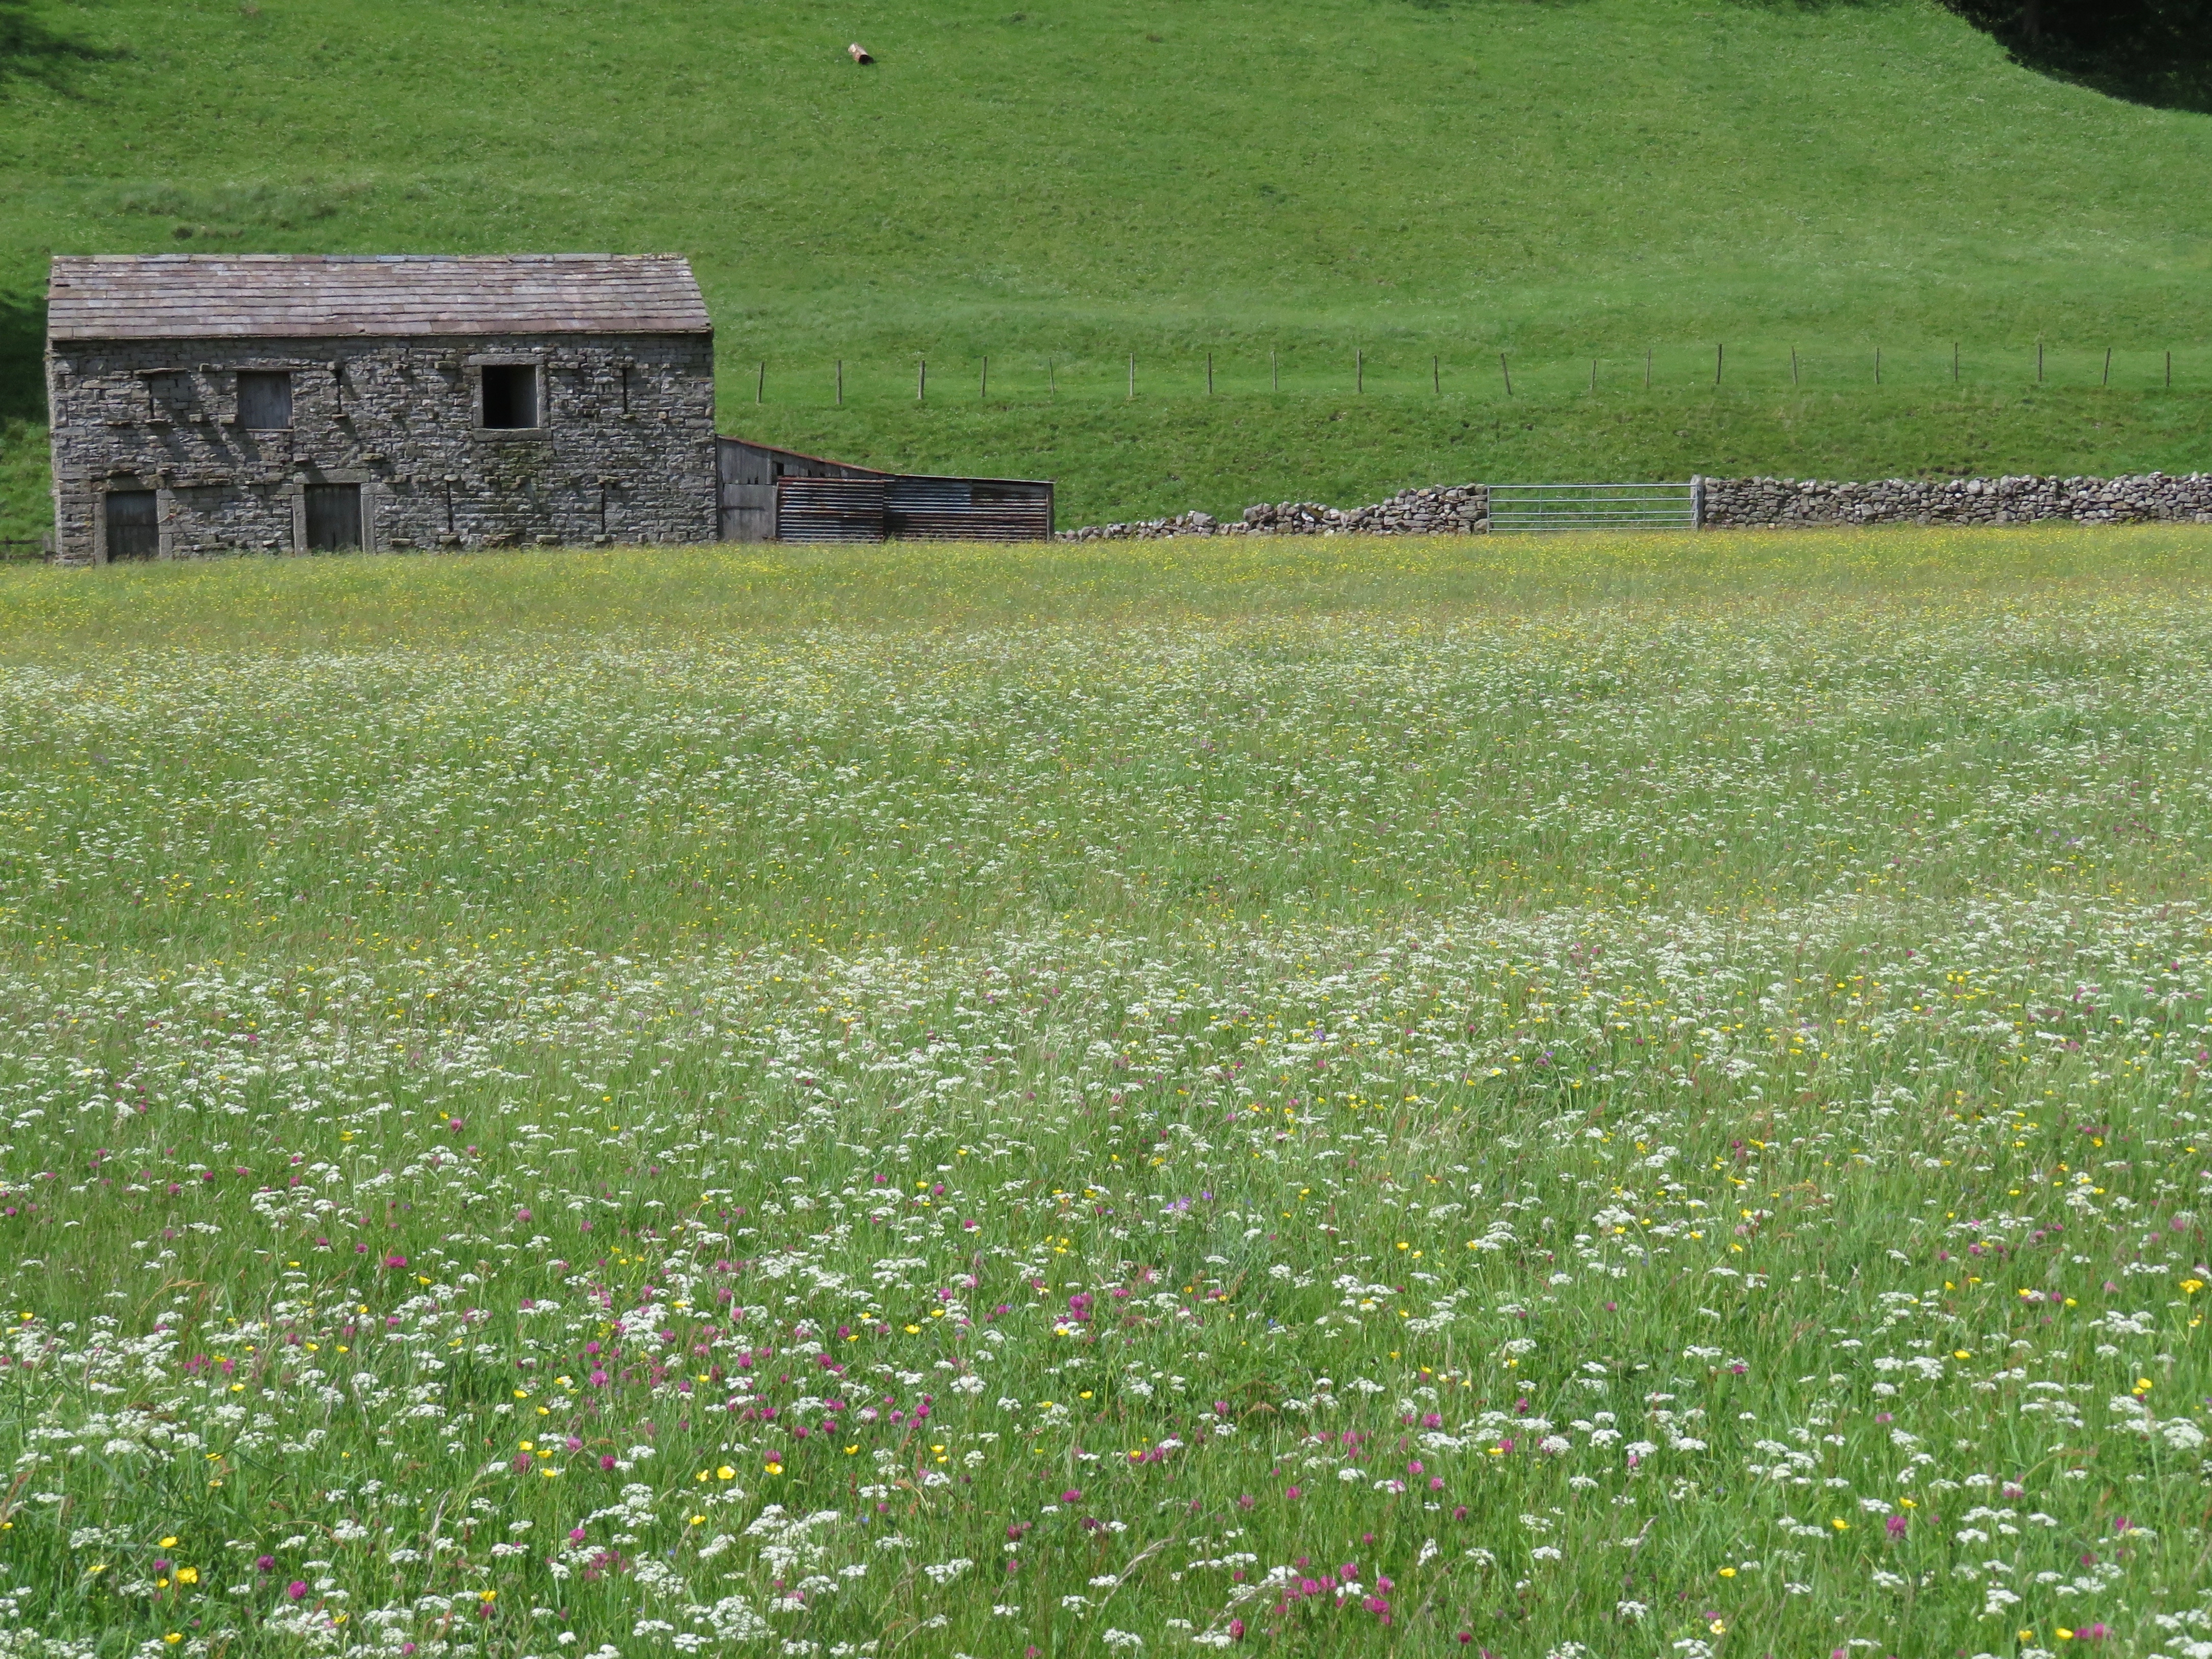
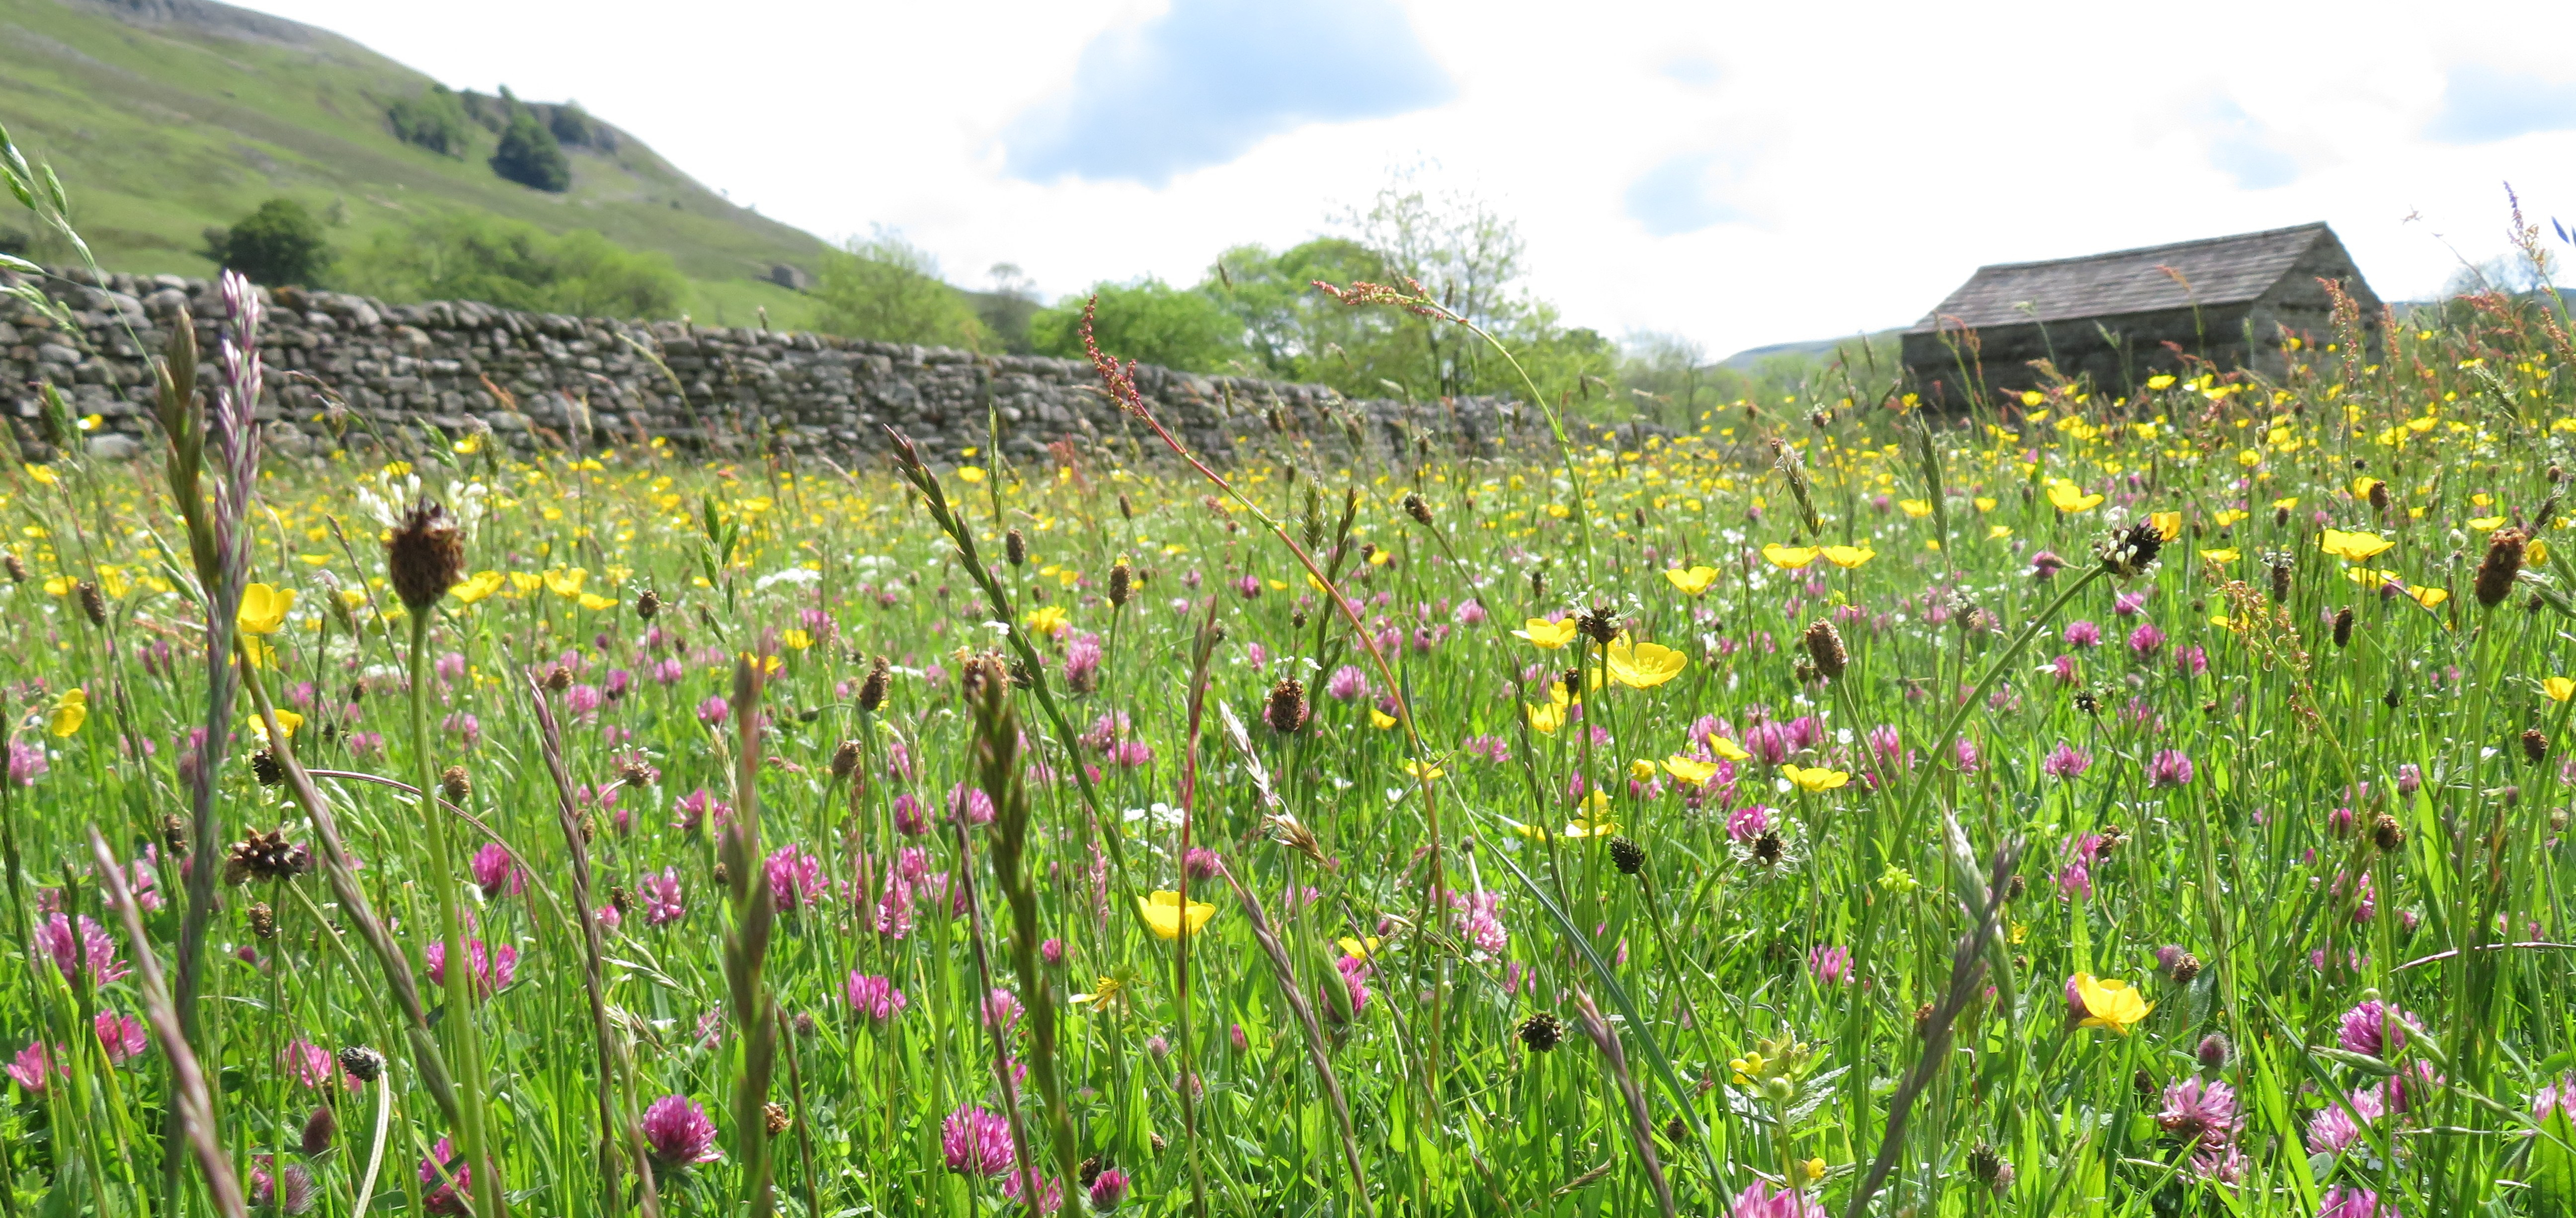
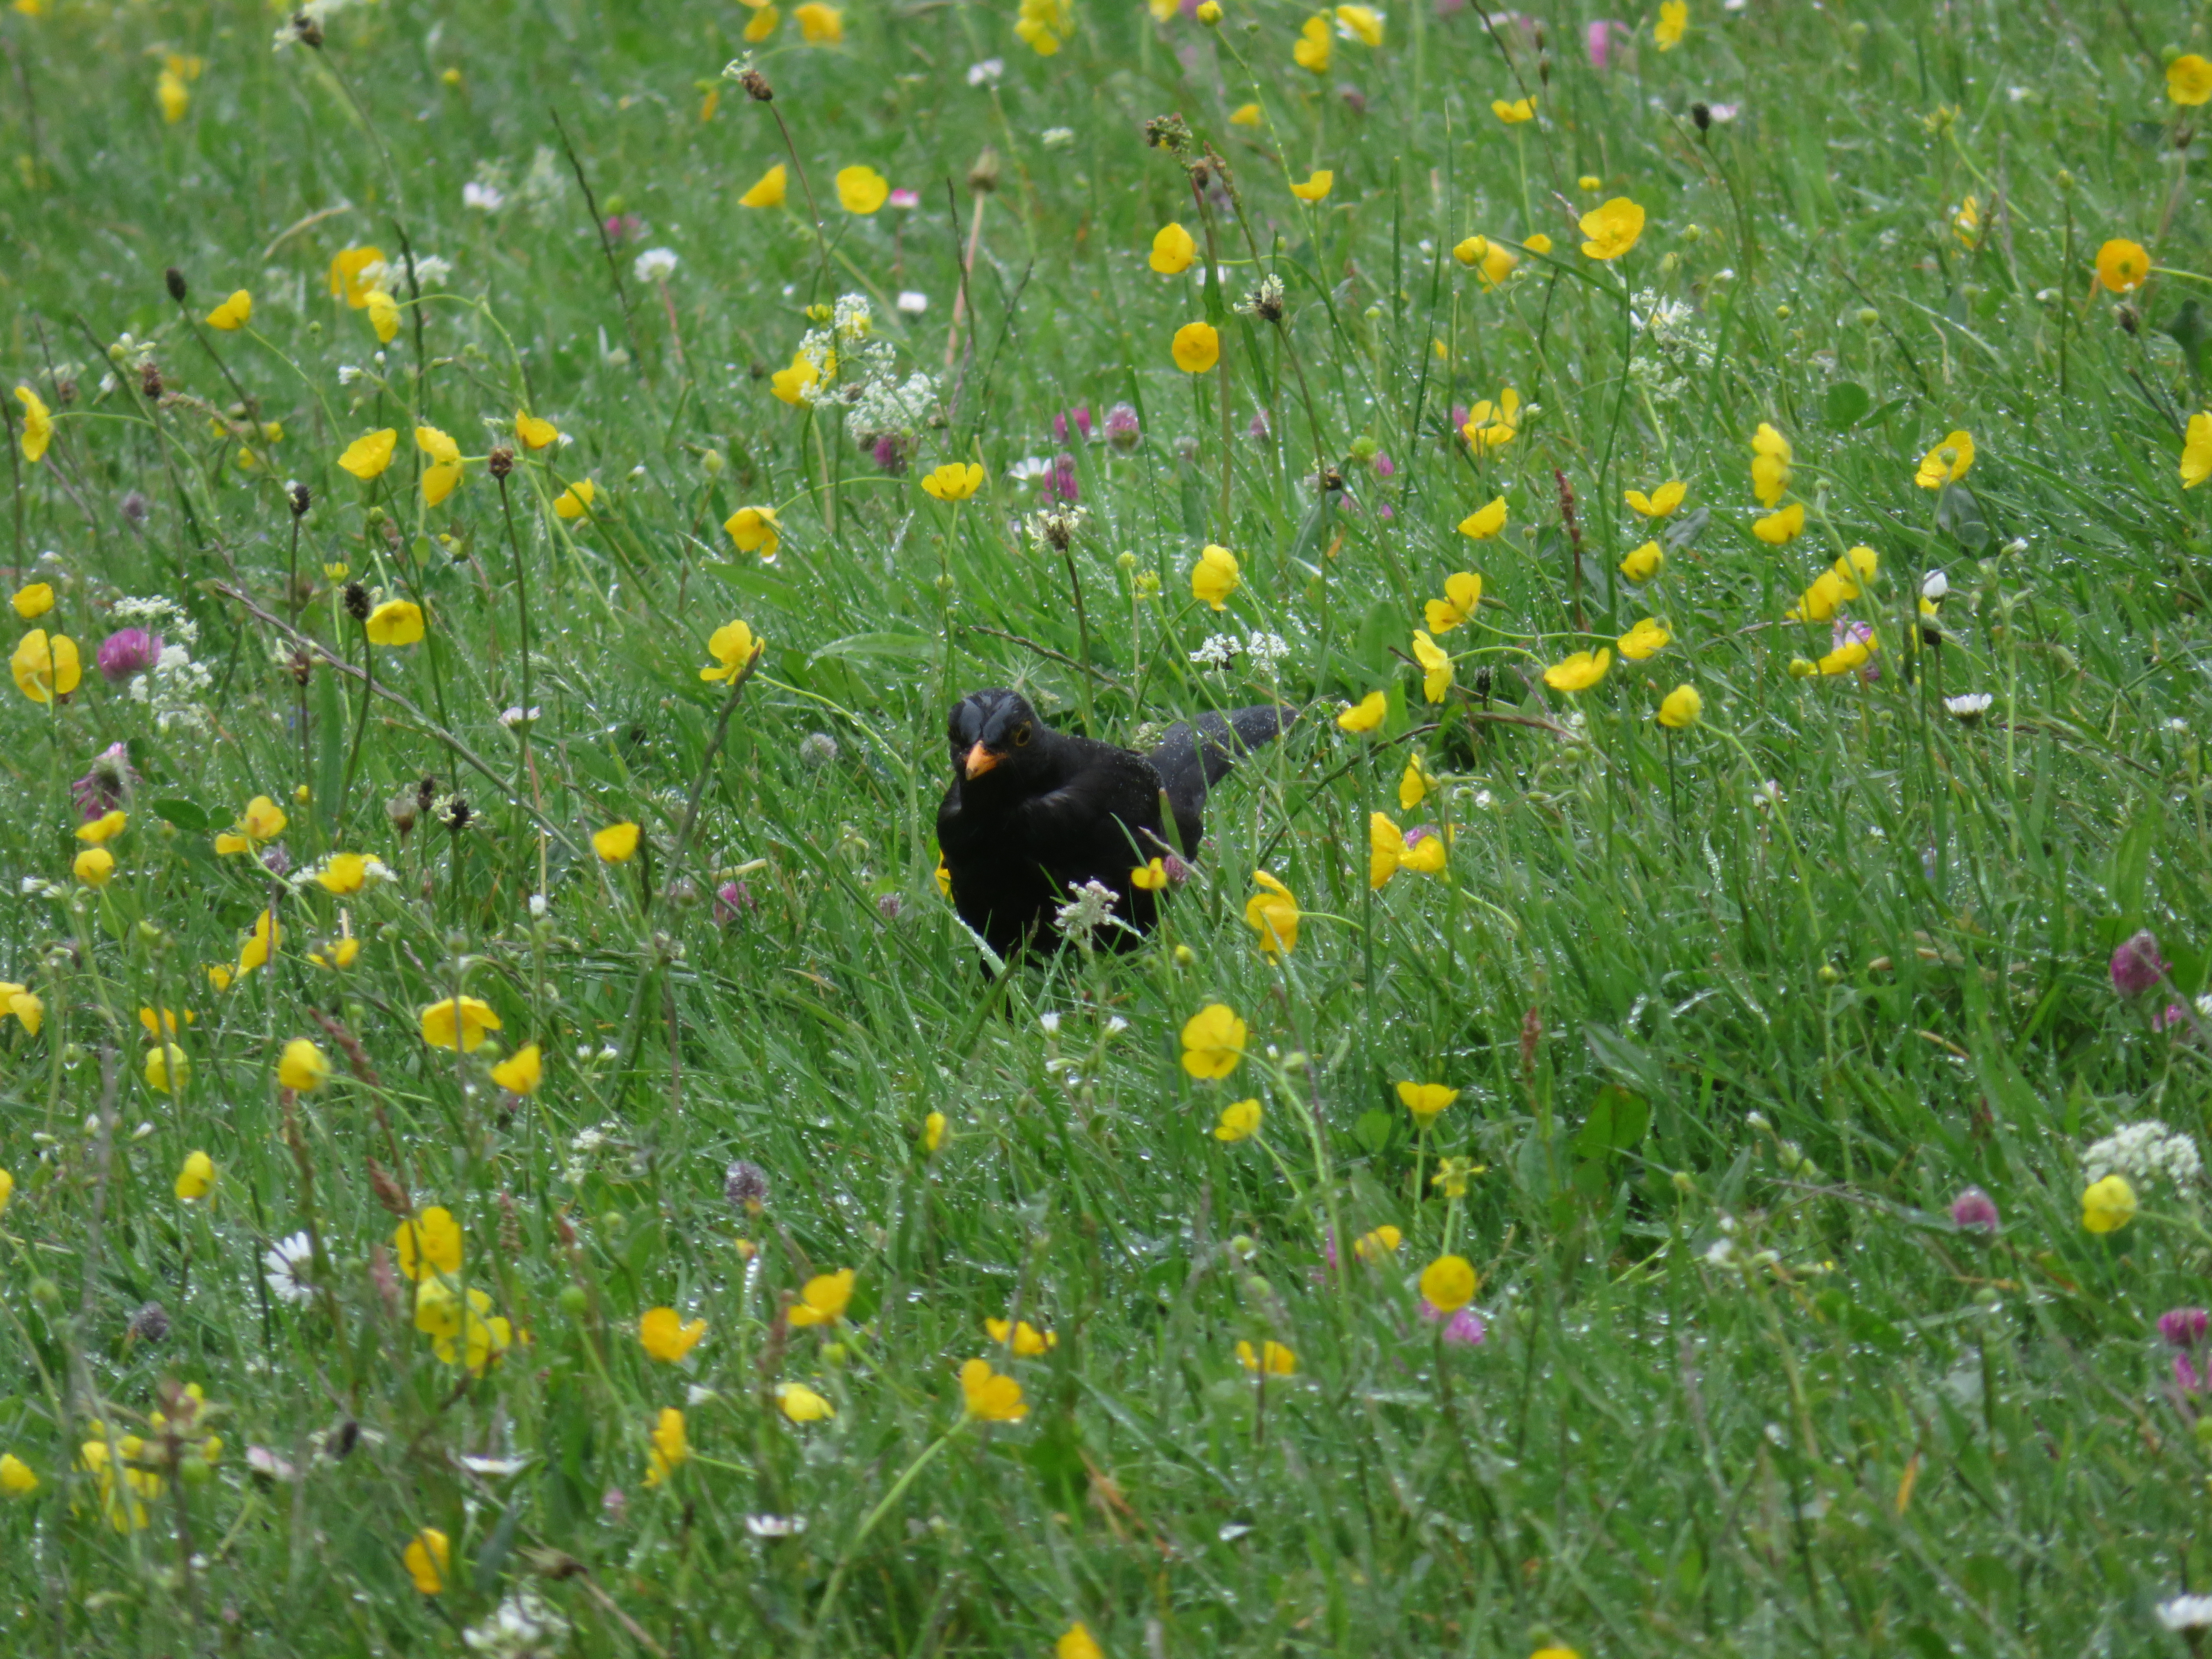
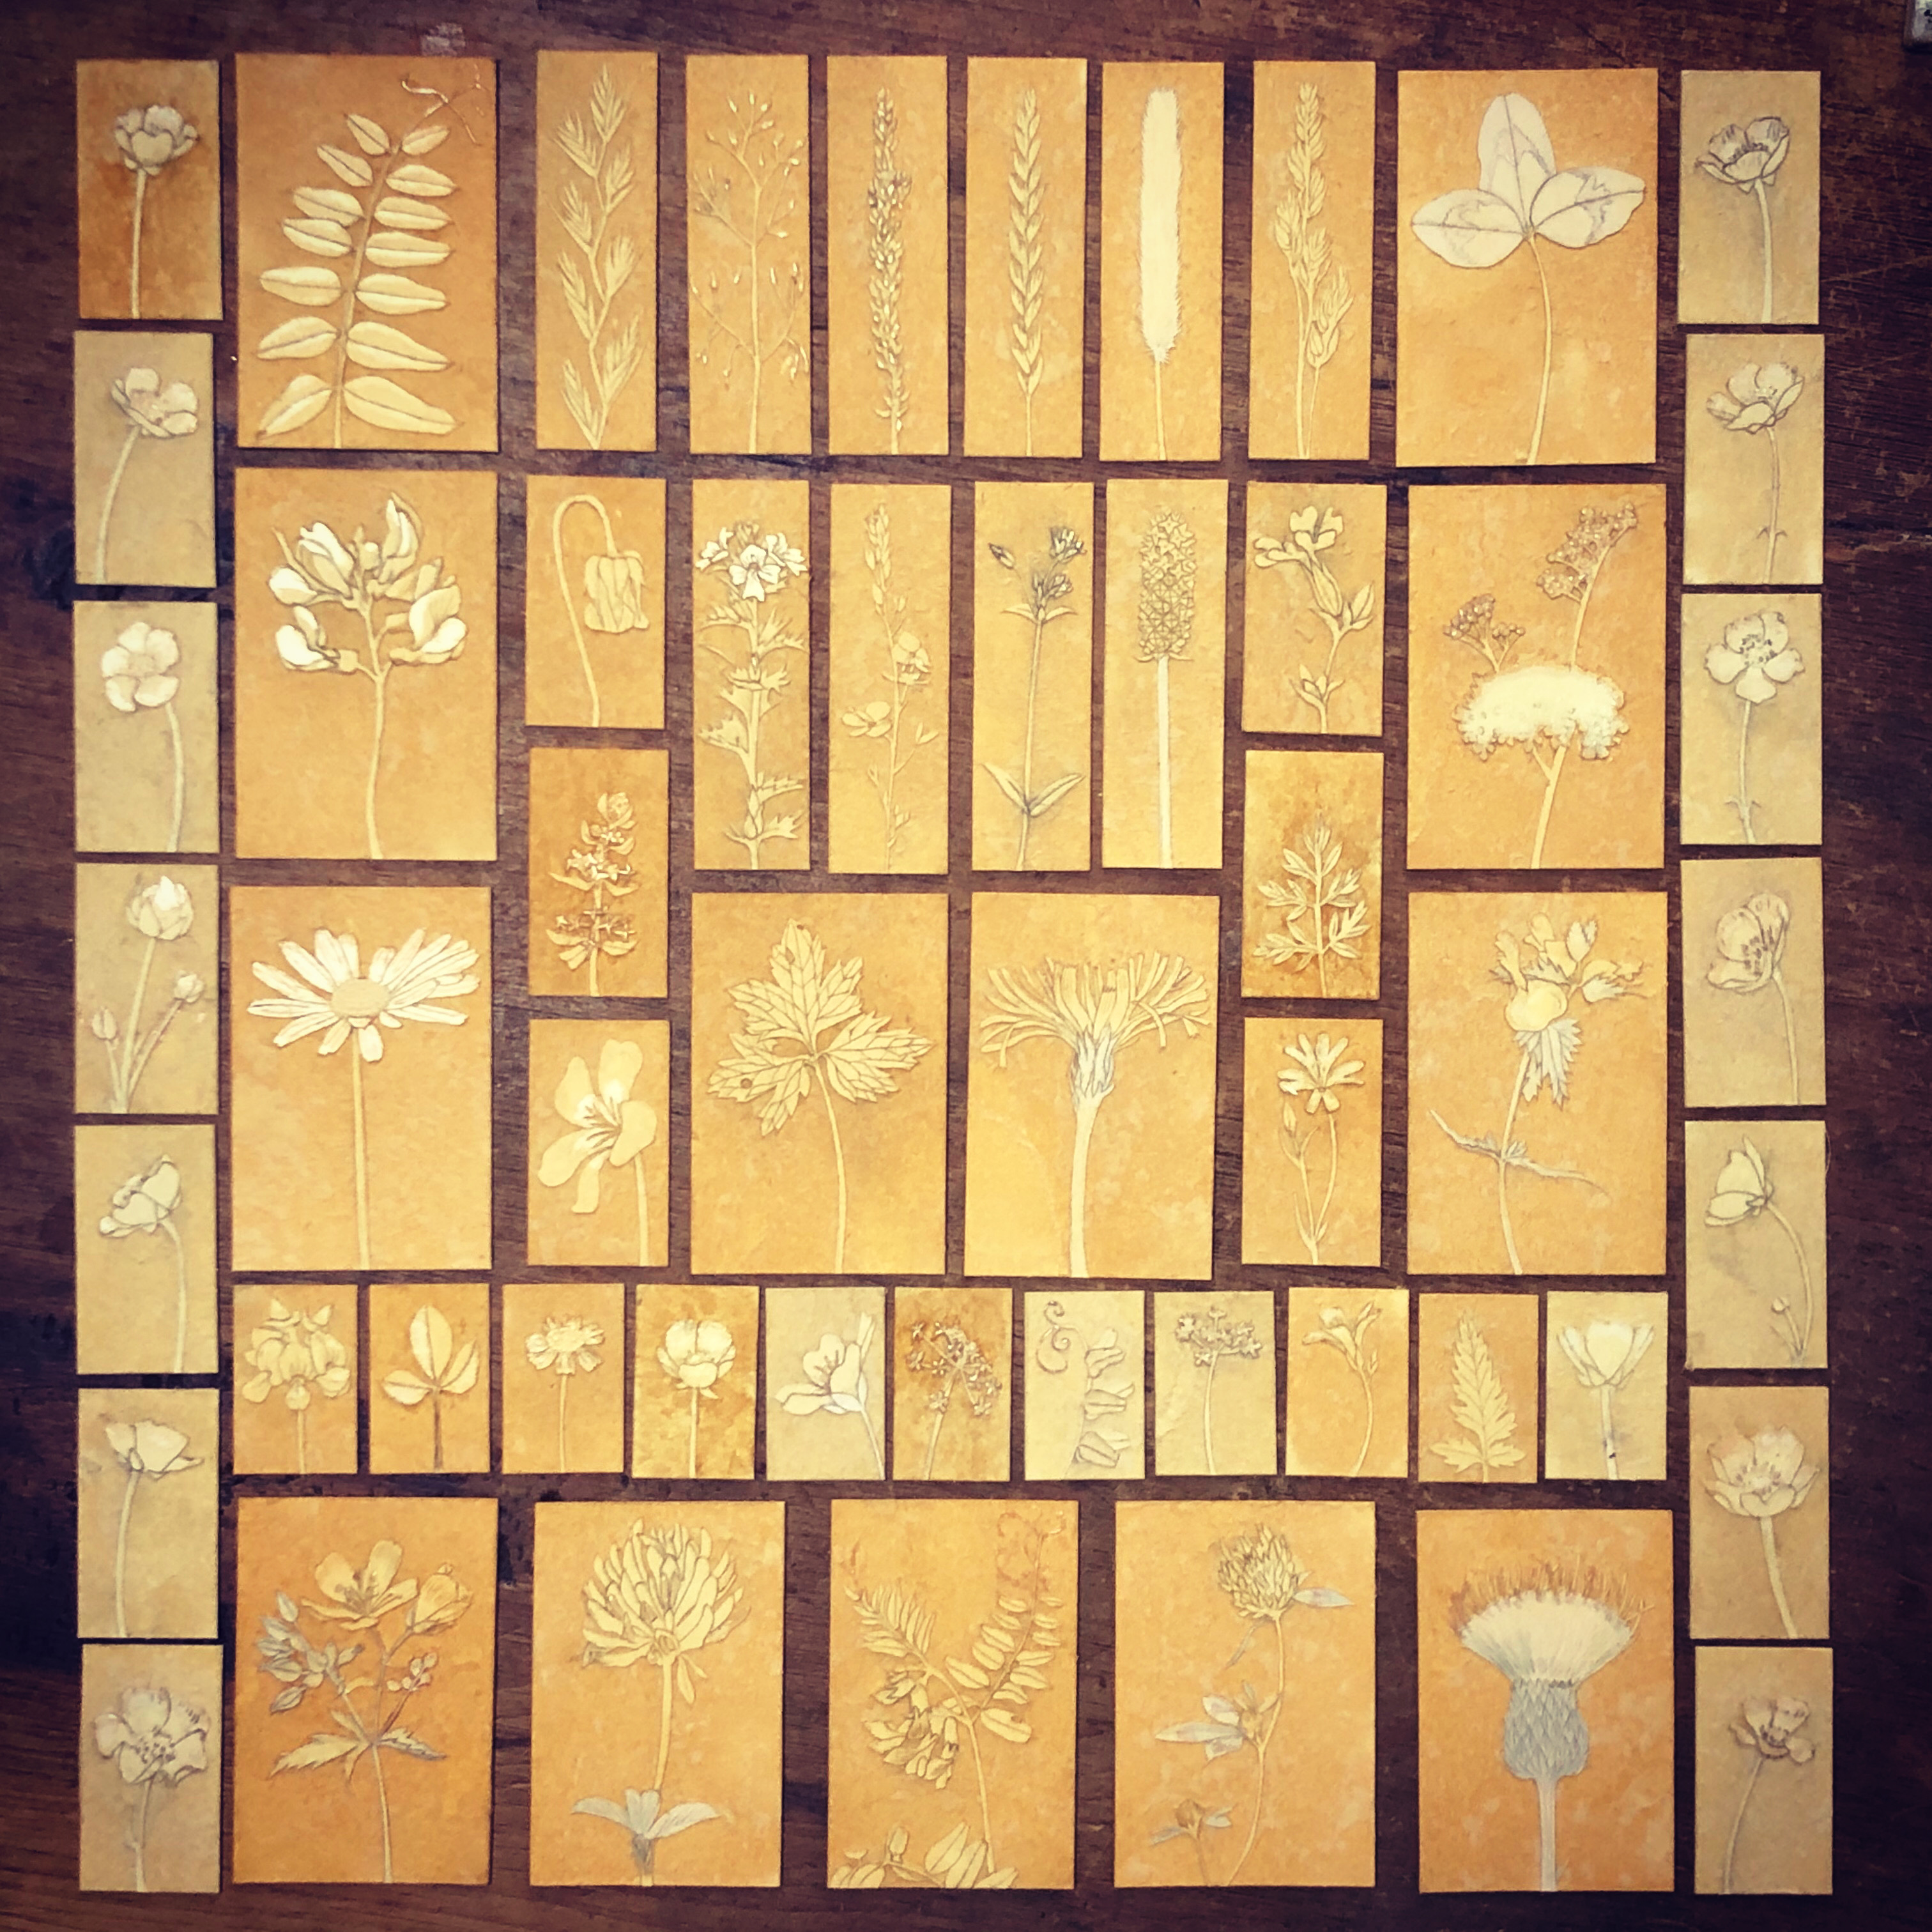
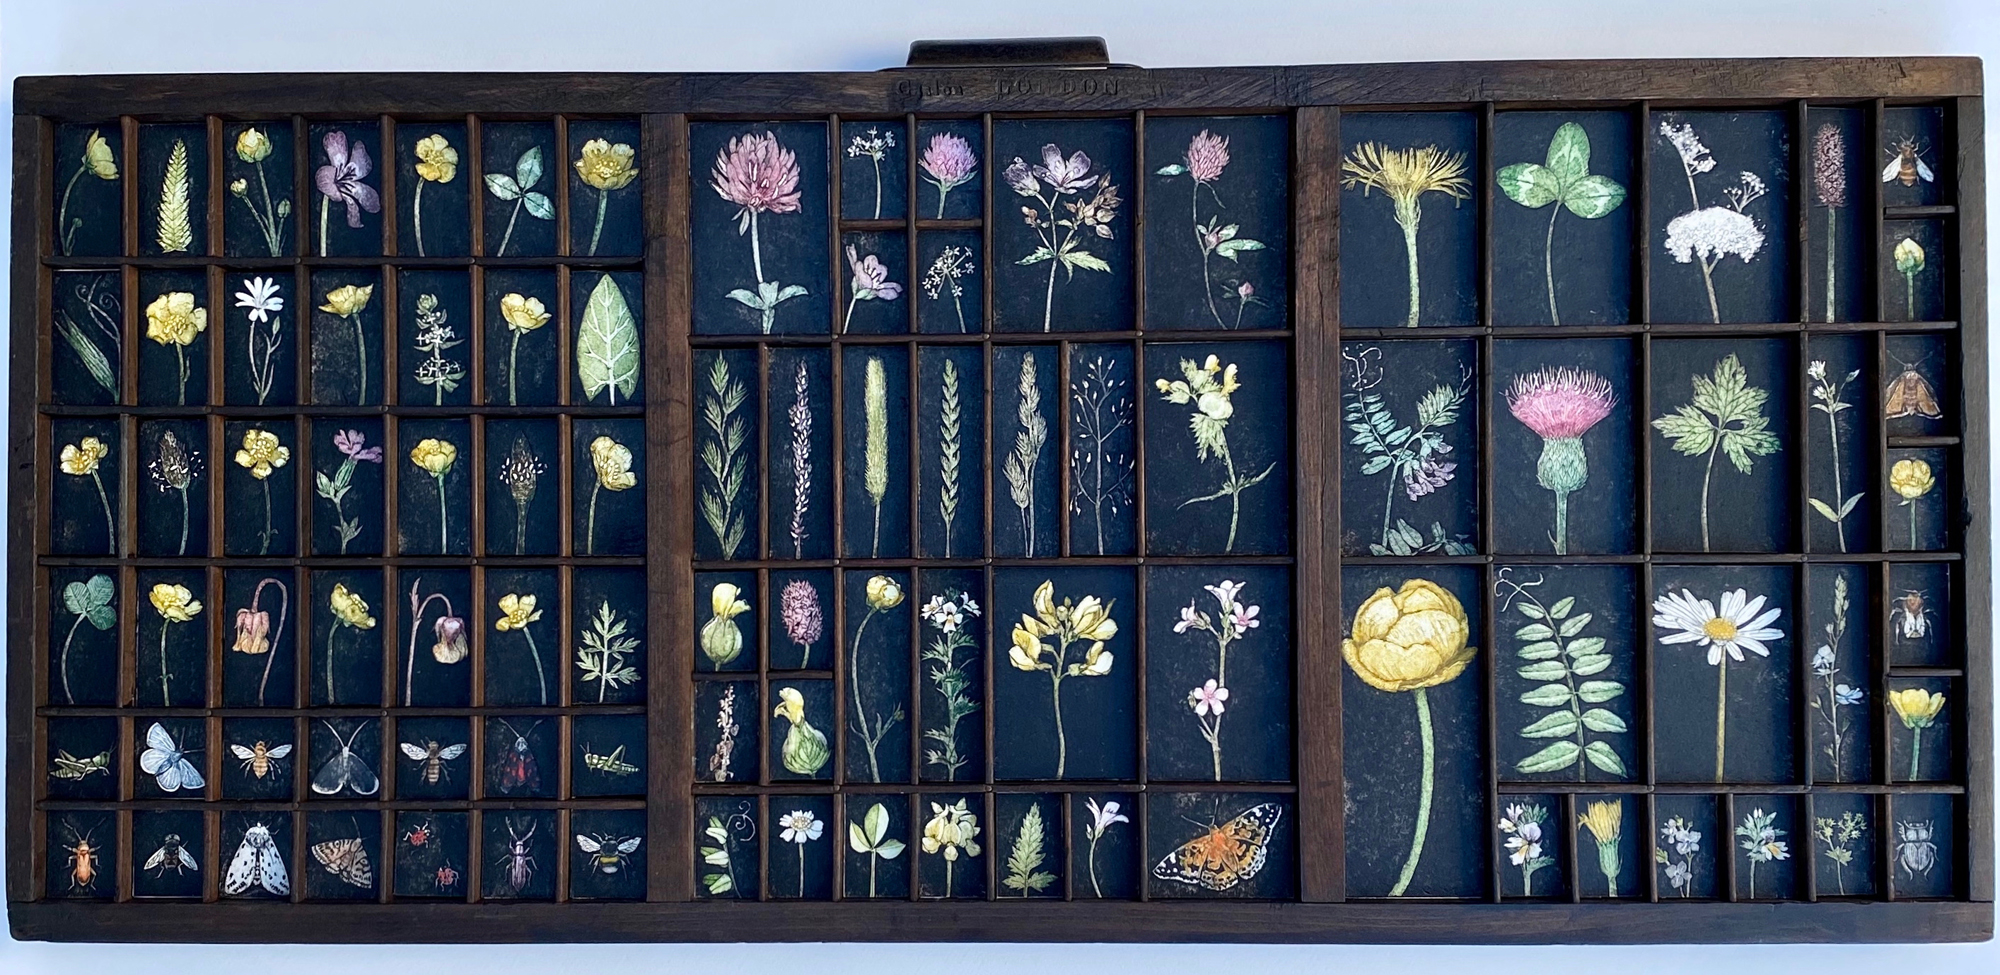
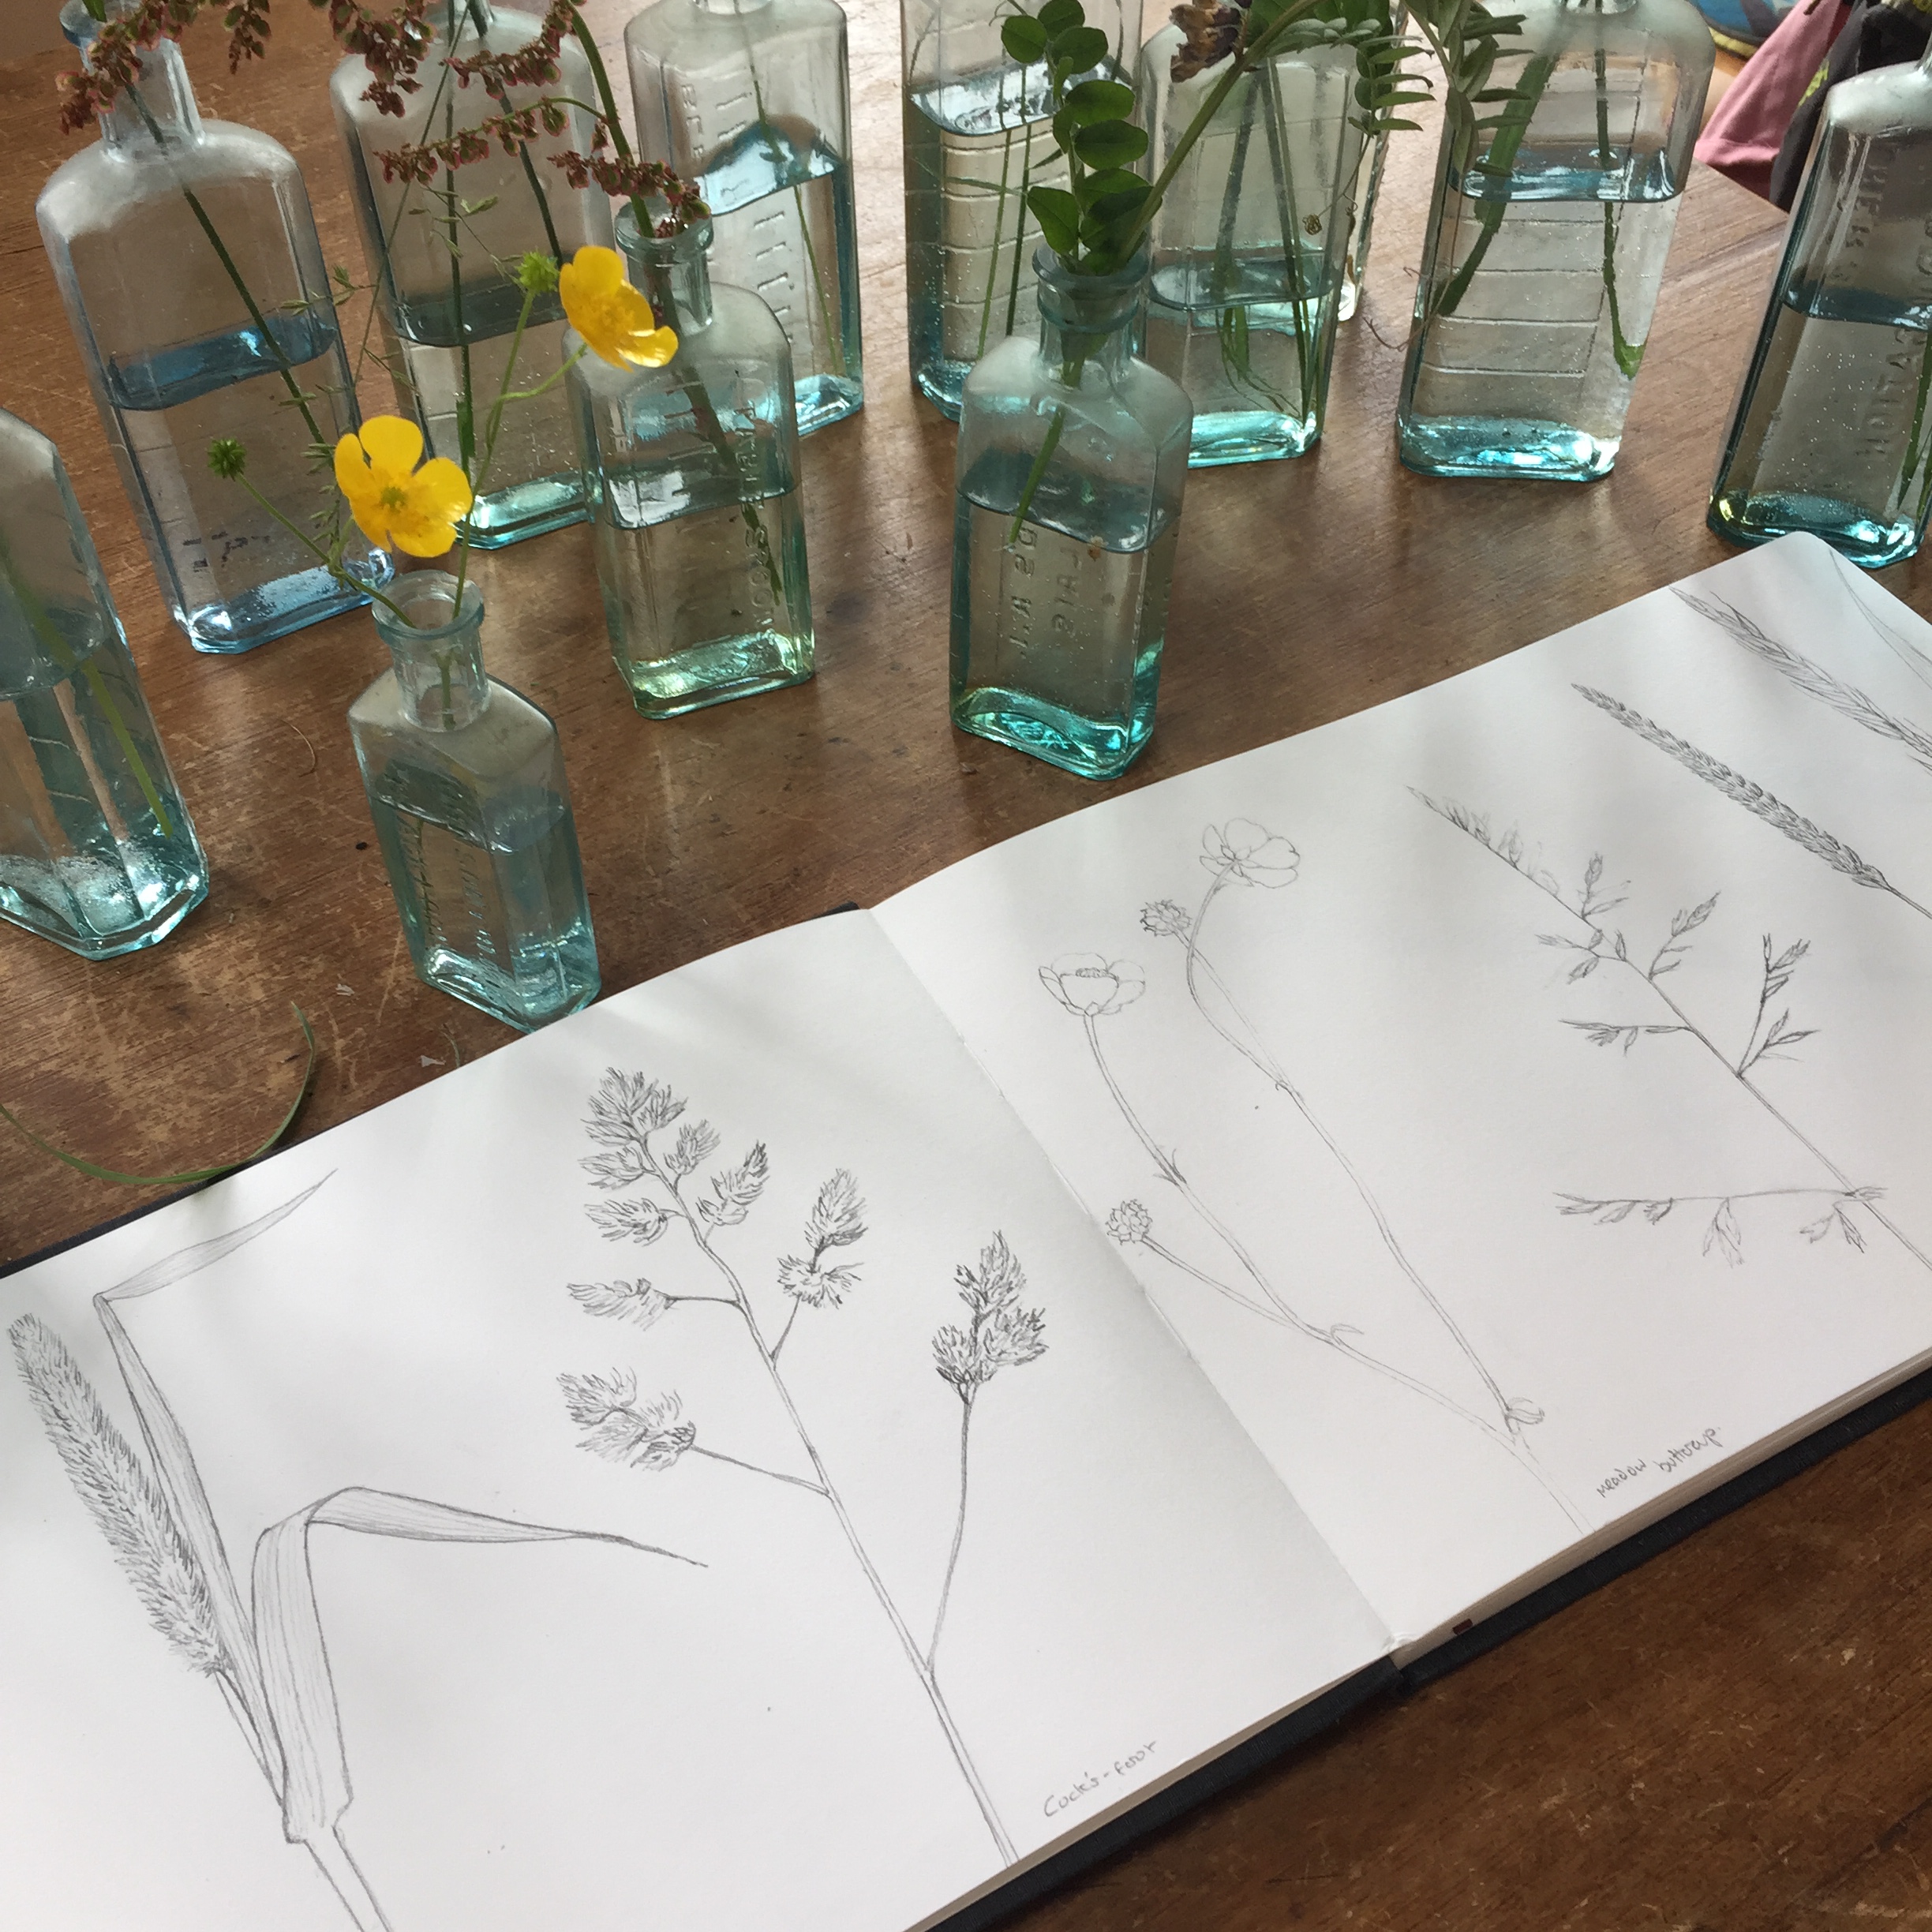 My meadow collection has been a long time in the making. I began the work last year when the hay meadows were in full flower. I spent time sketching the different grasses and flowers in preparation for making the plates. It became obvious that the piece would be something of a labour of love and I was tied up with other work last year so I put it to one side until January when I knew I’d have six months to work almost exclusively on the final work for the exhibition. The finished piece is created within an old print type drawer of the kind that you often see in junk and second hand shops. I’ve used smaller ones before in my Collections project and I like the way they give the pieces a museum quality with each print becoming an artefact within each space. I also thought that each individual print shown in a section of the tray would give the whole piece a feeling of a cross section of a meadow and there was a connection with Marie Hartley and her wood engraving blocks and the original books being created using letterpress.


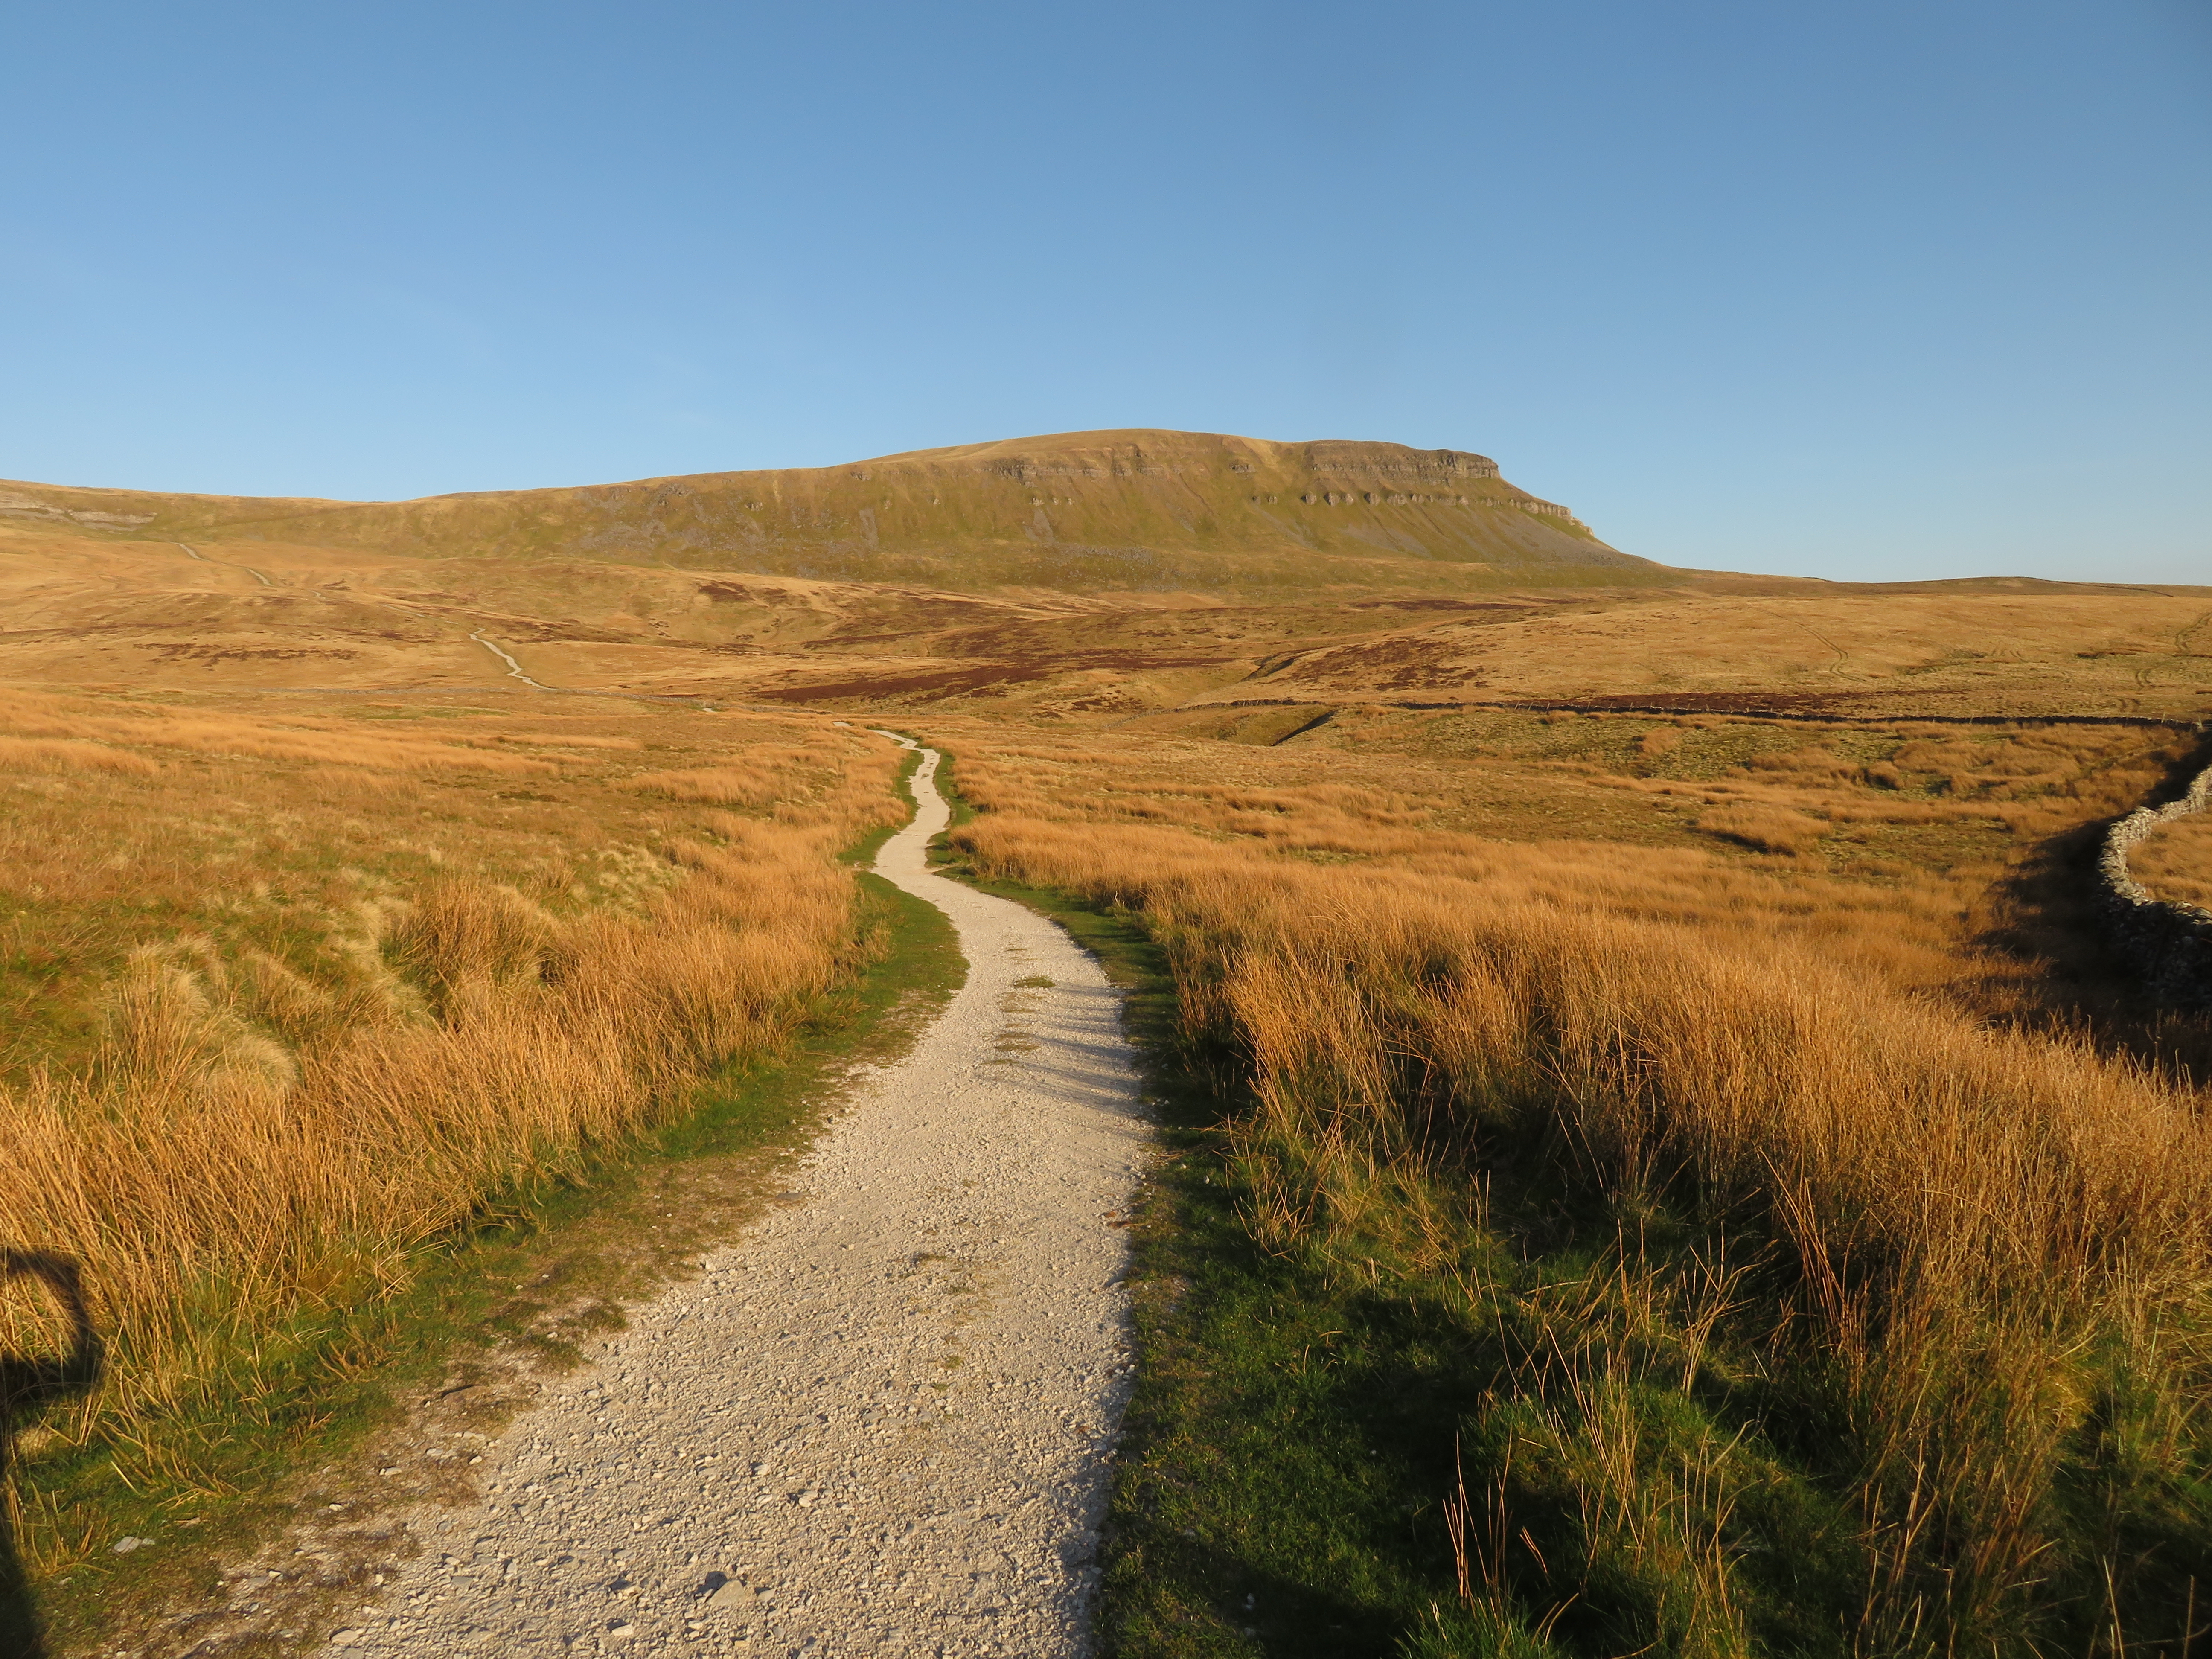
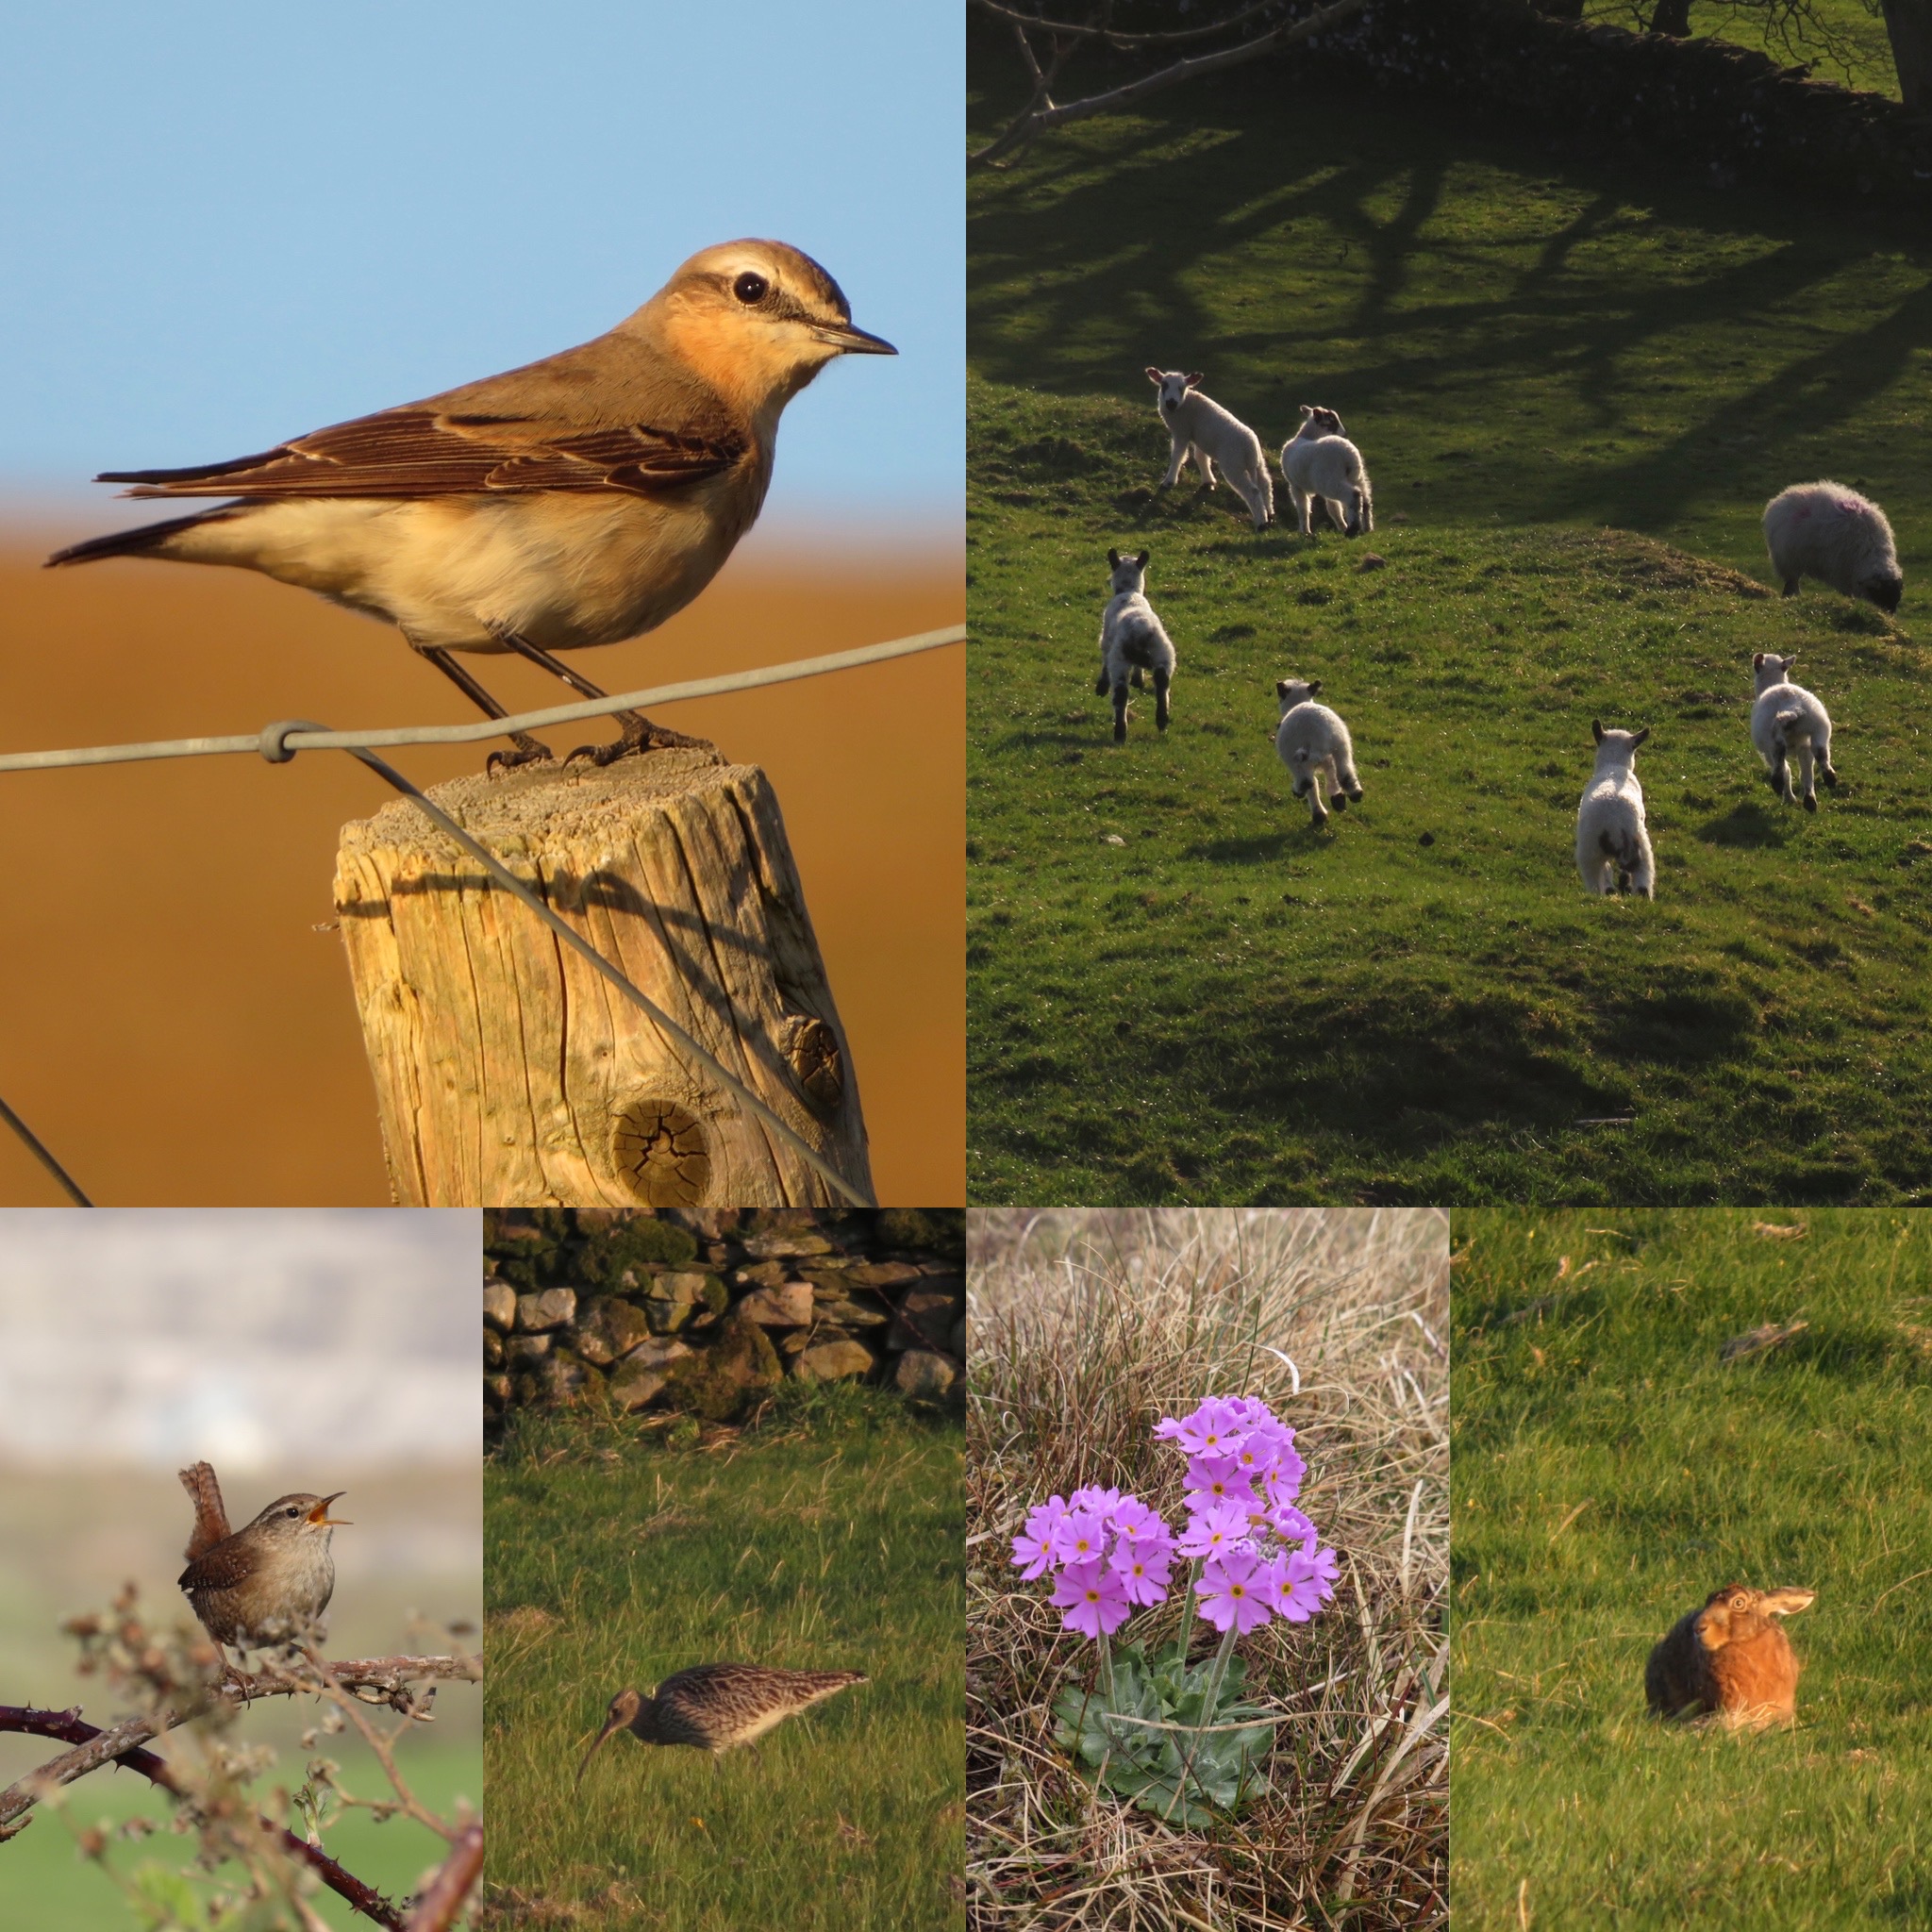

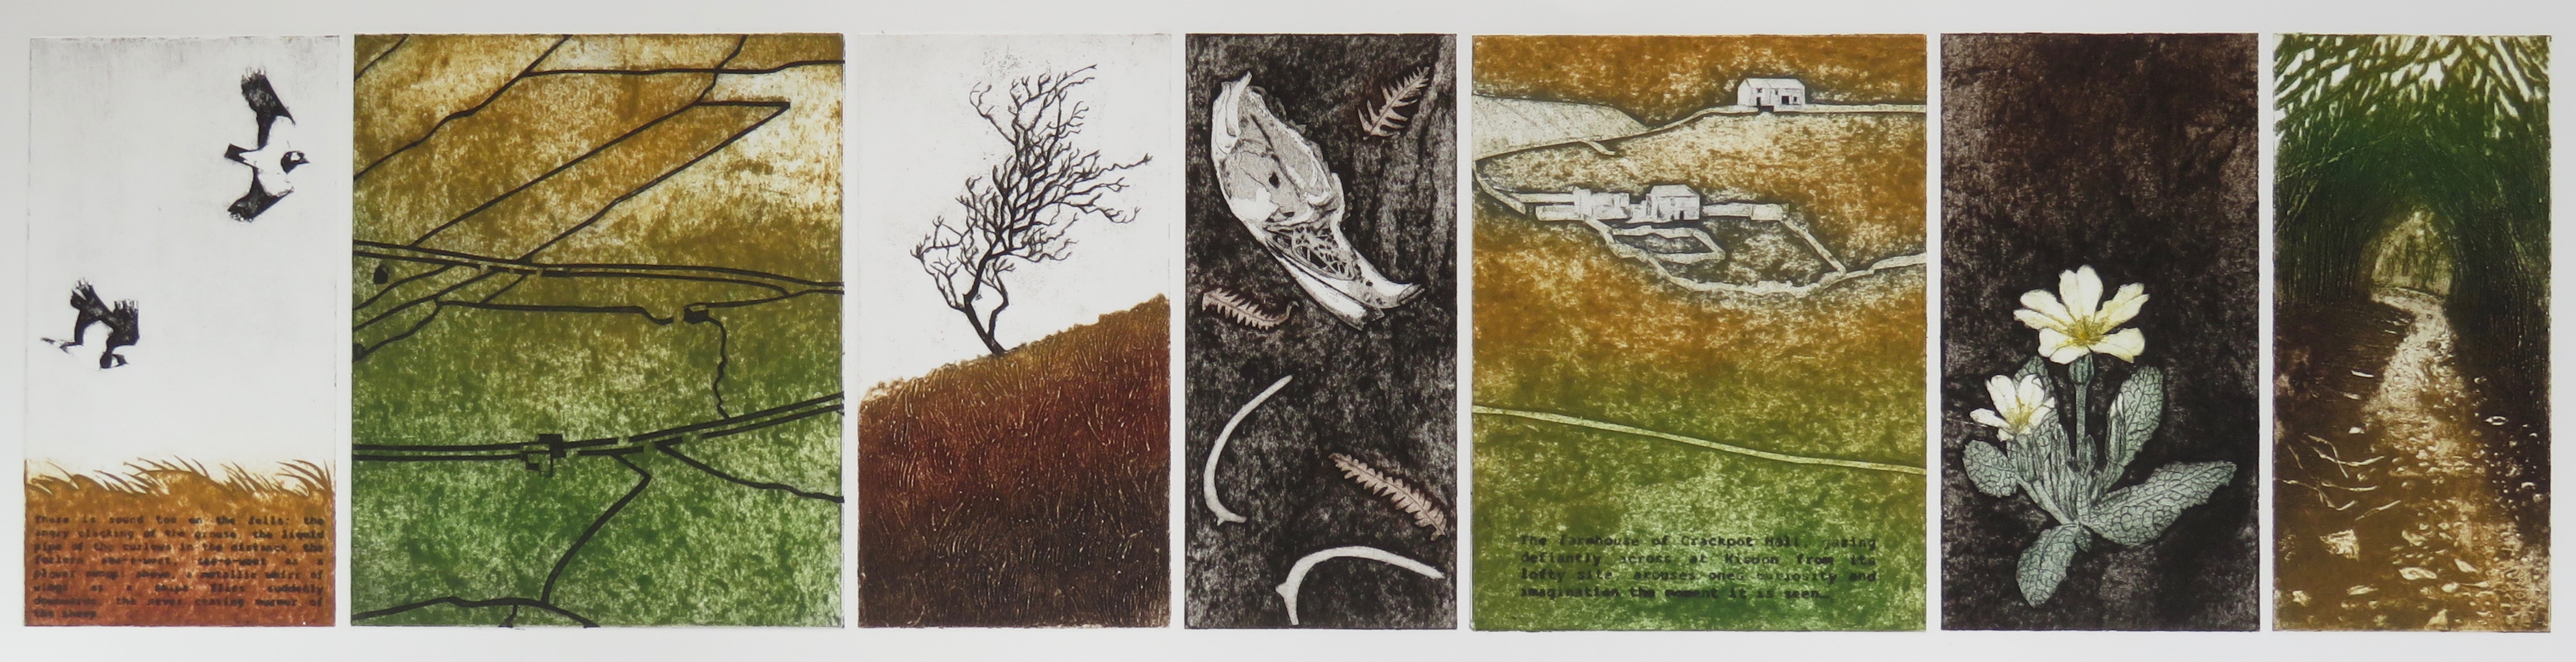
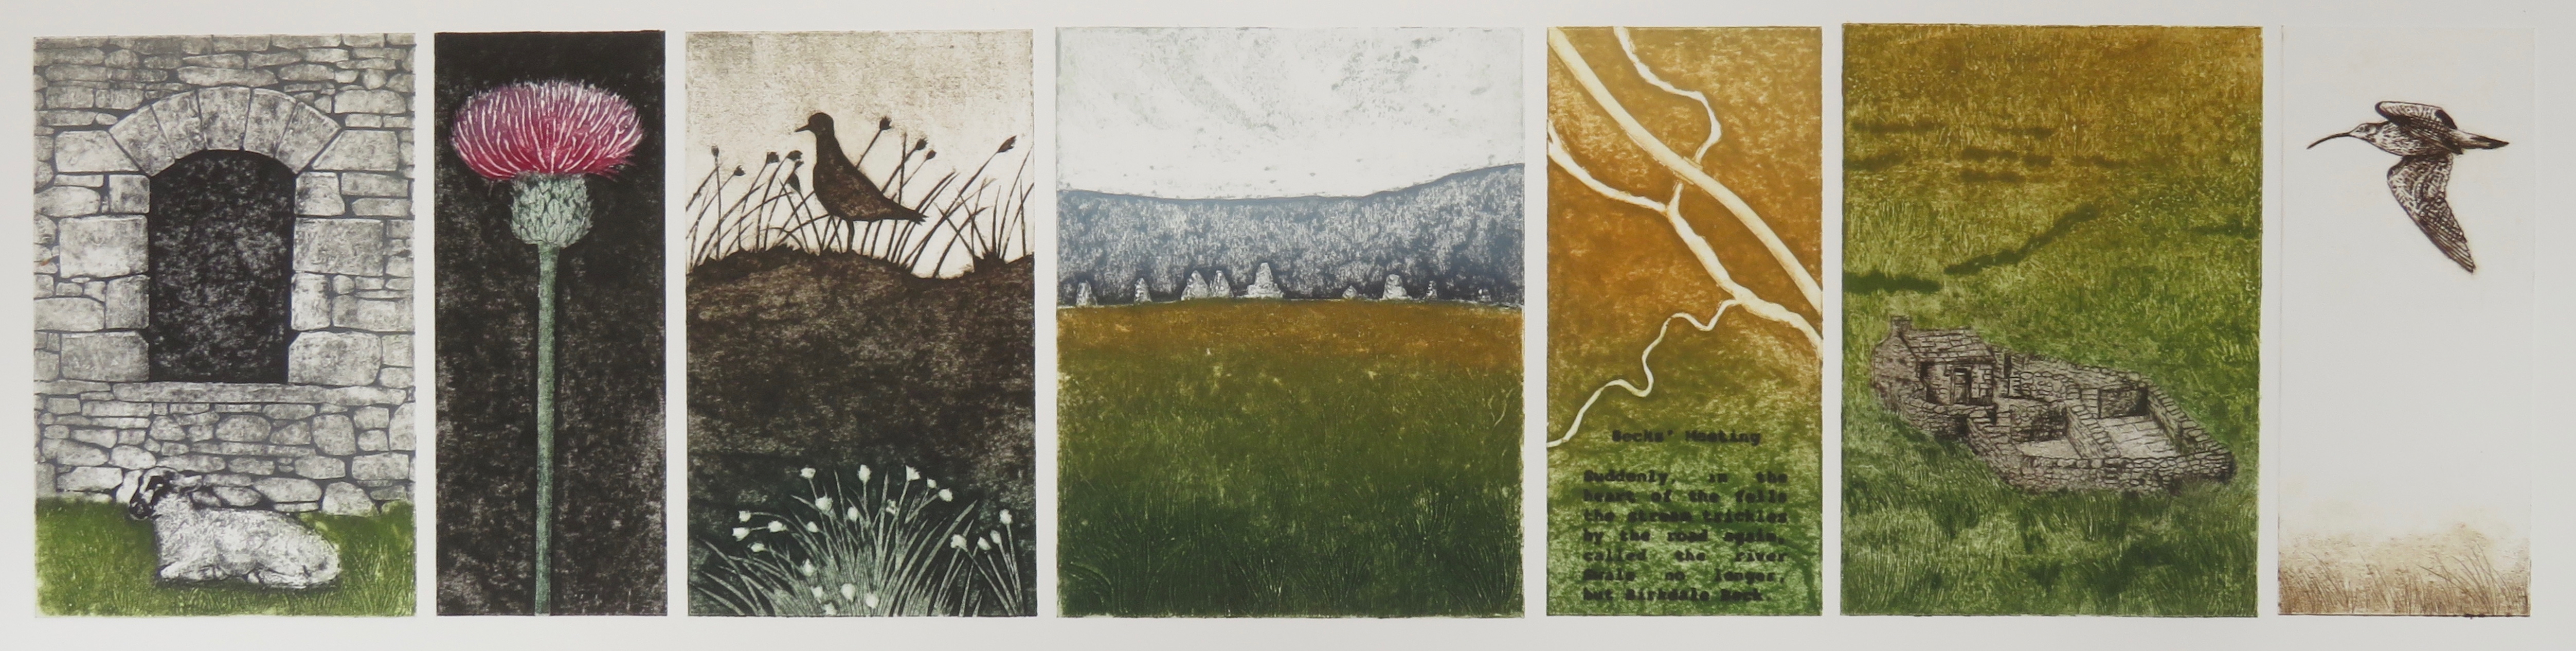

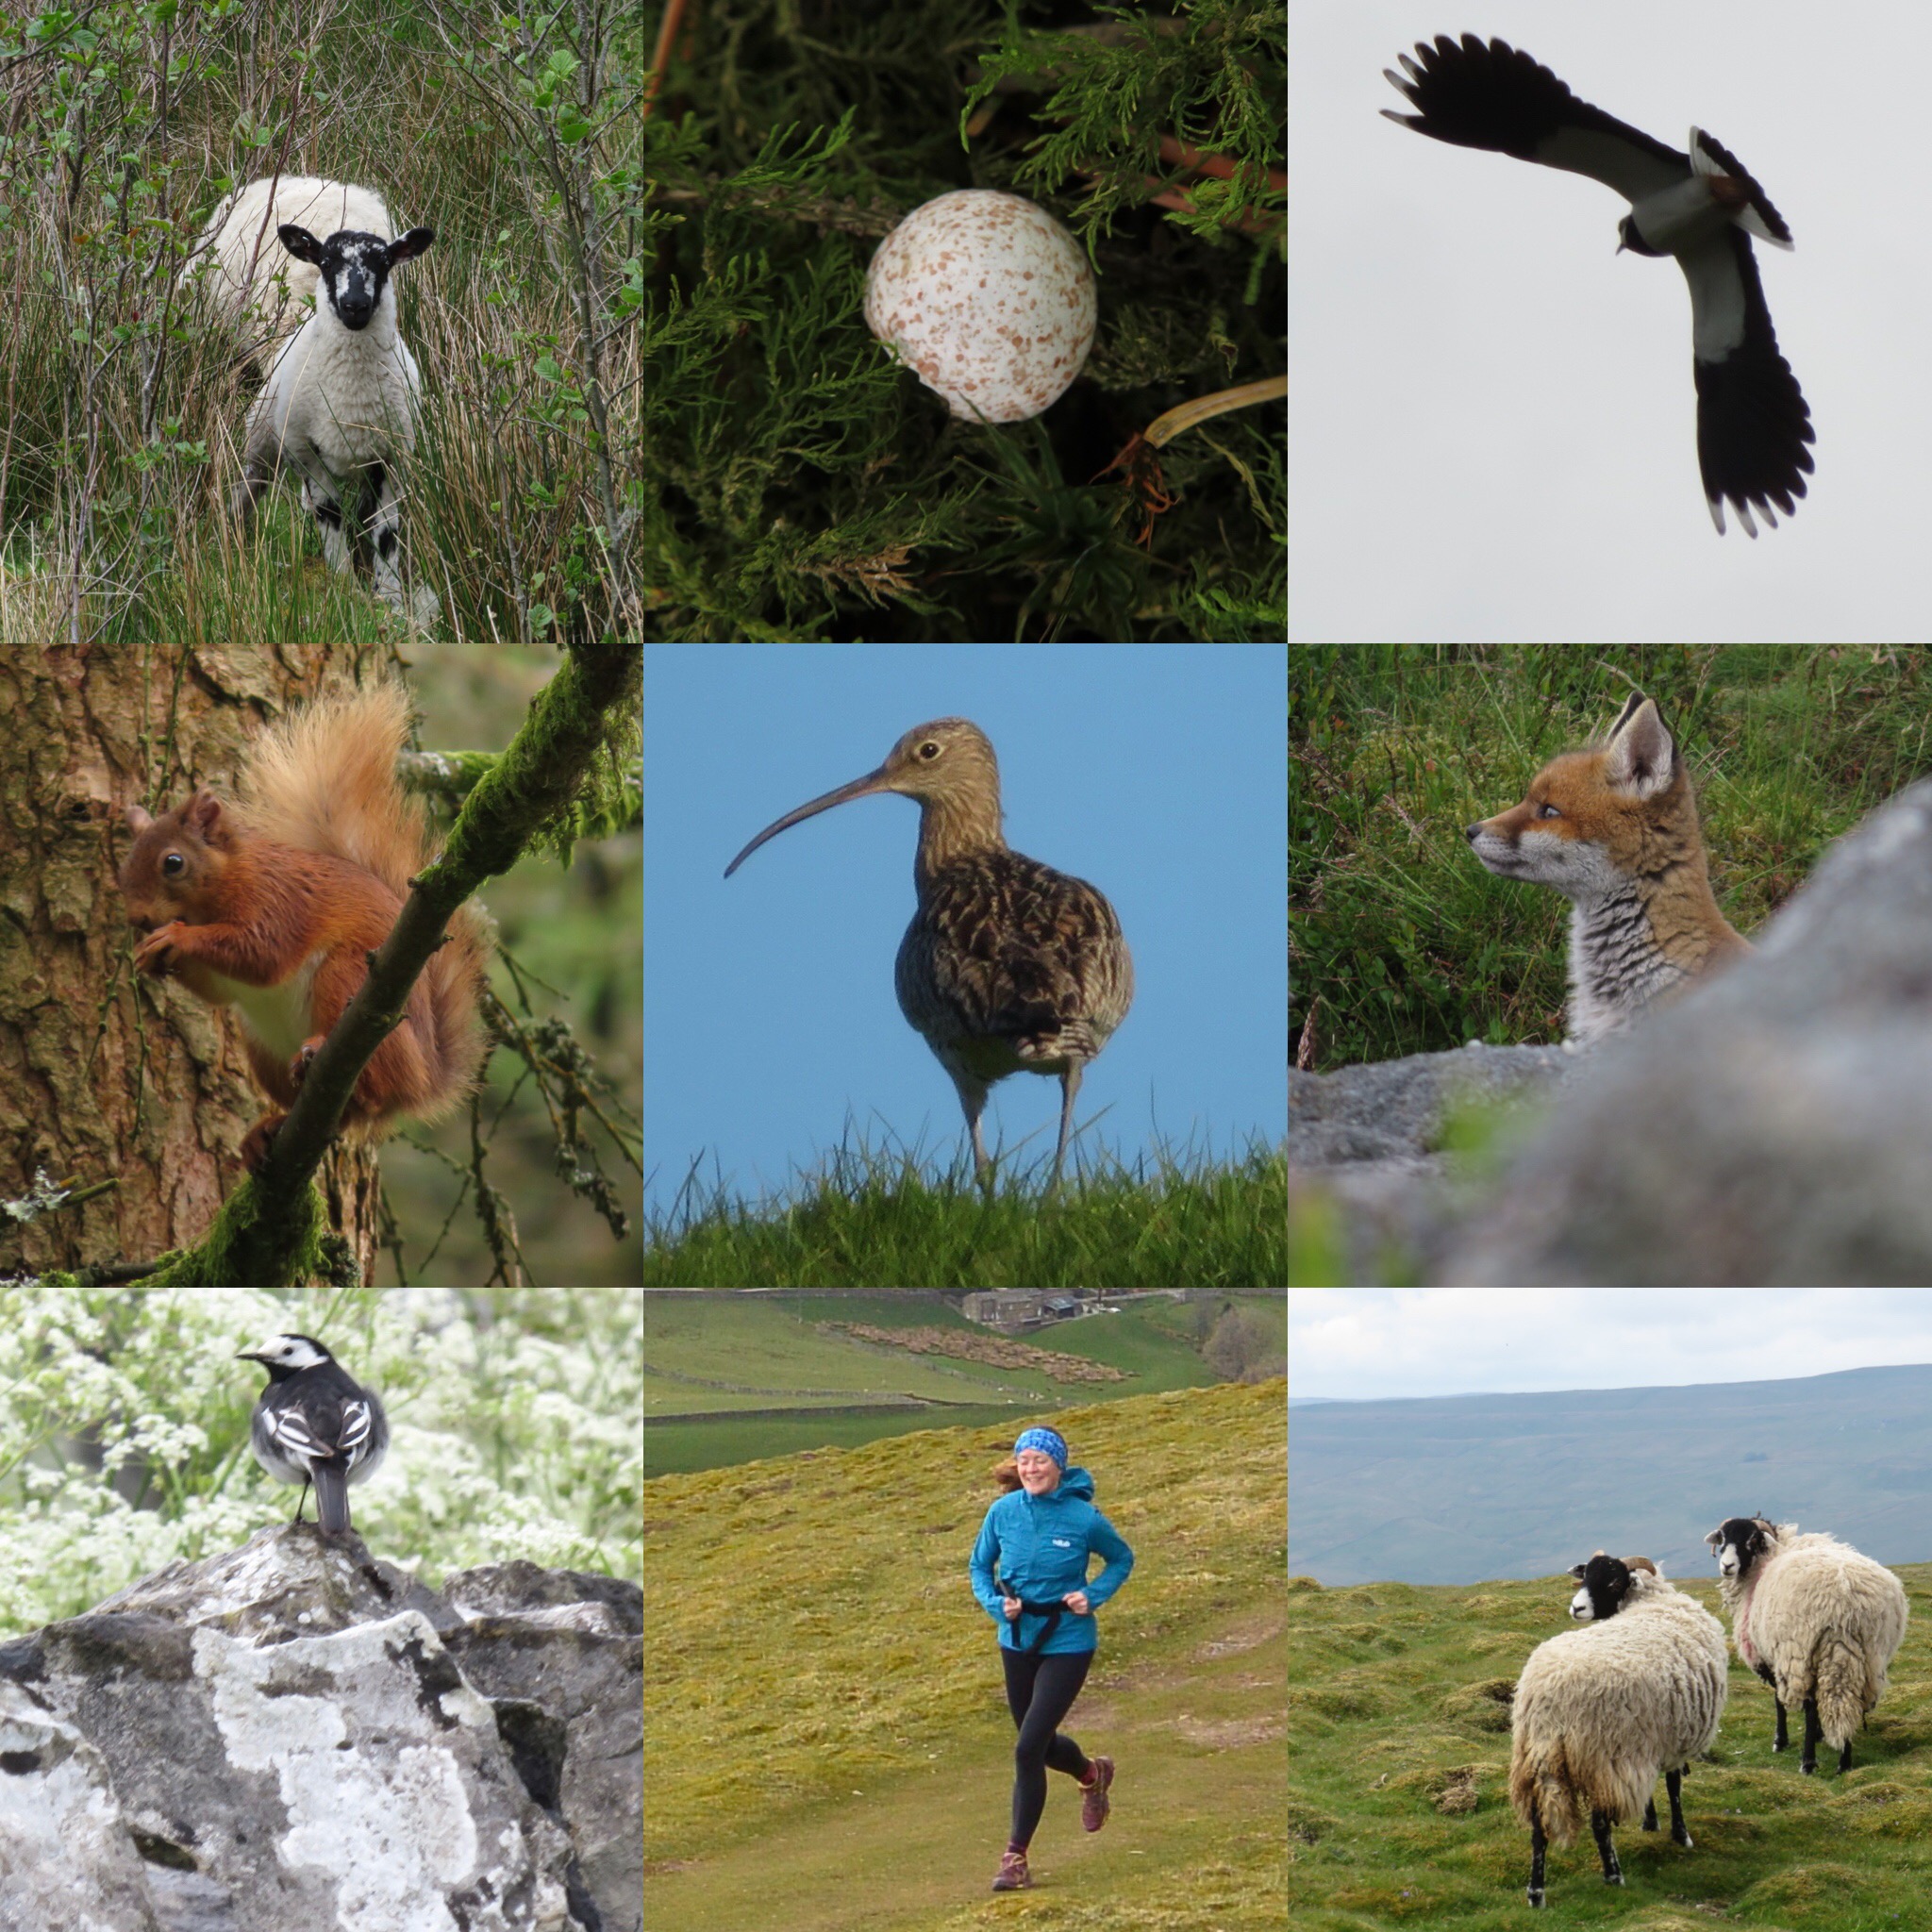
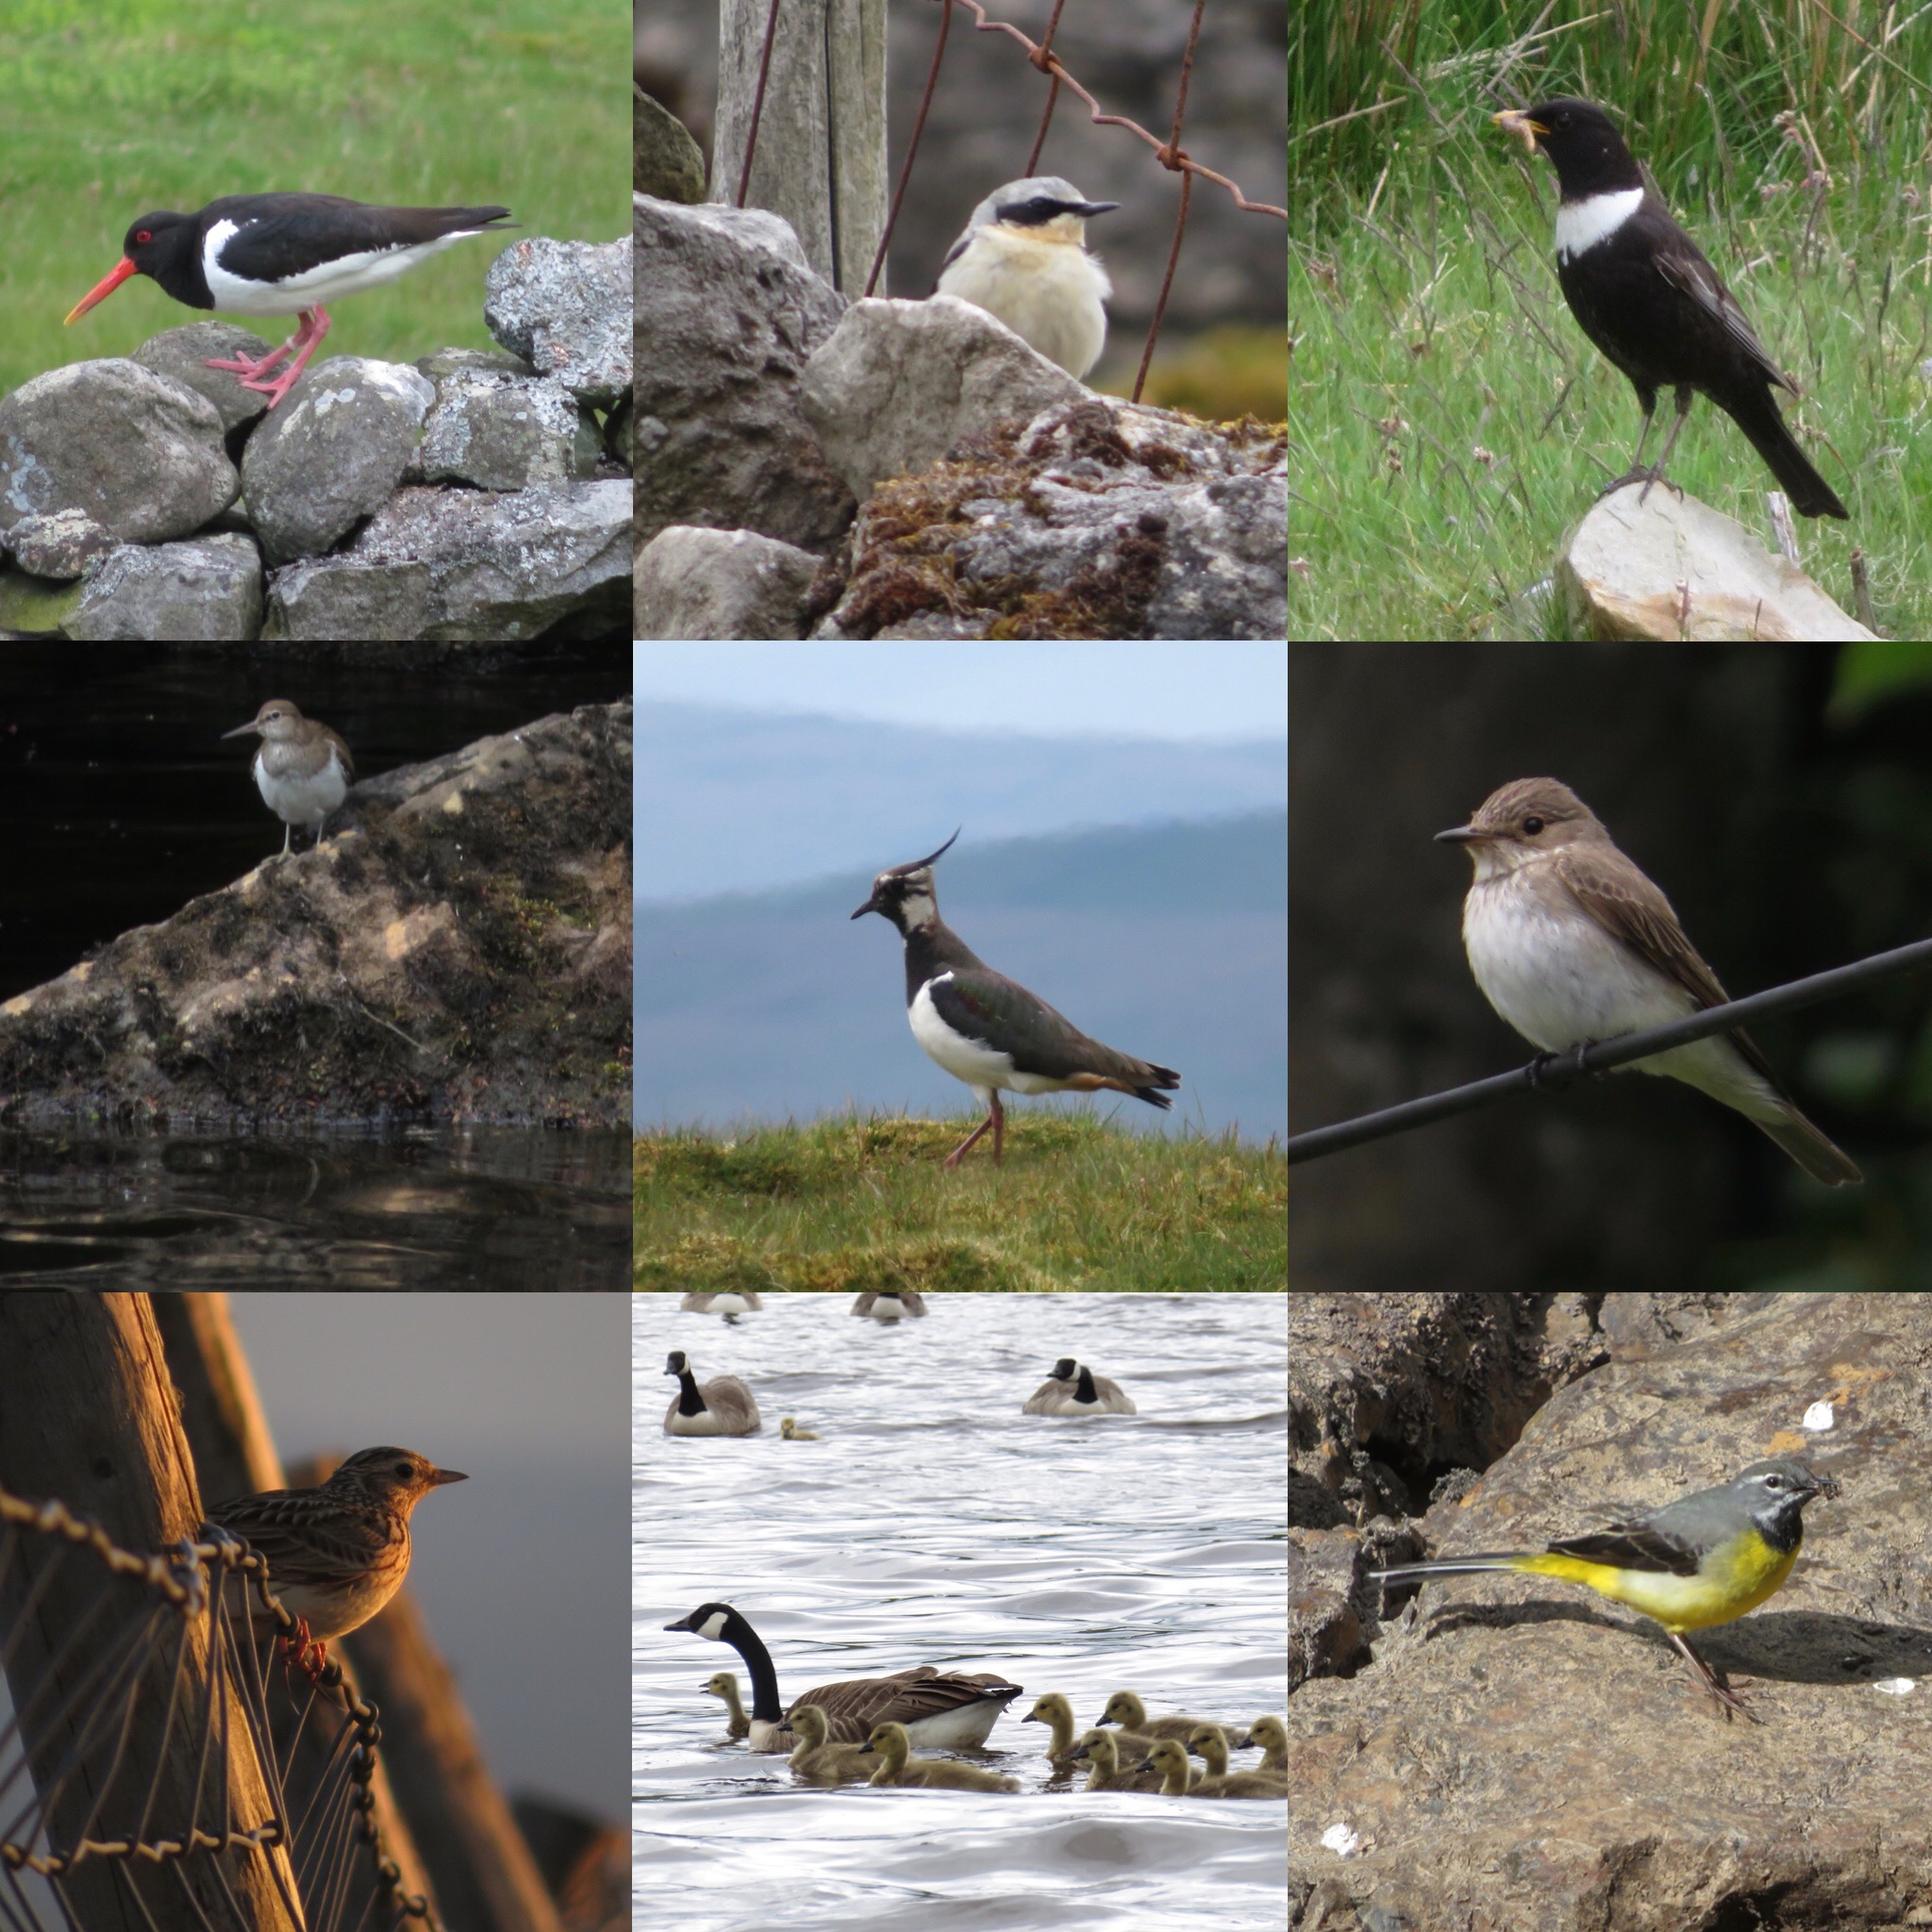
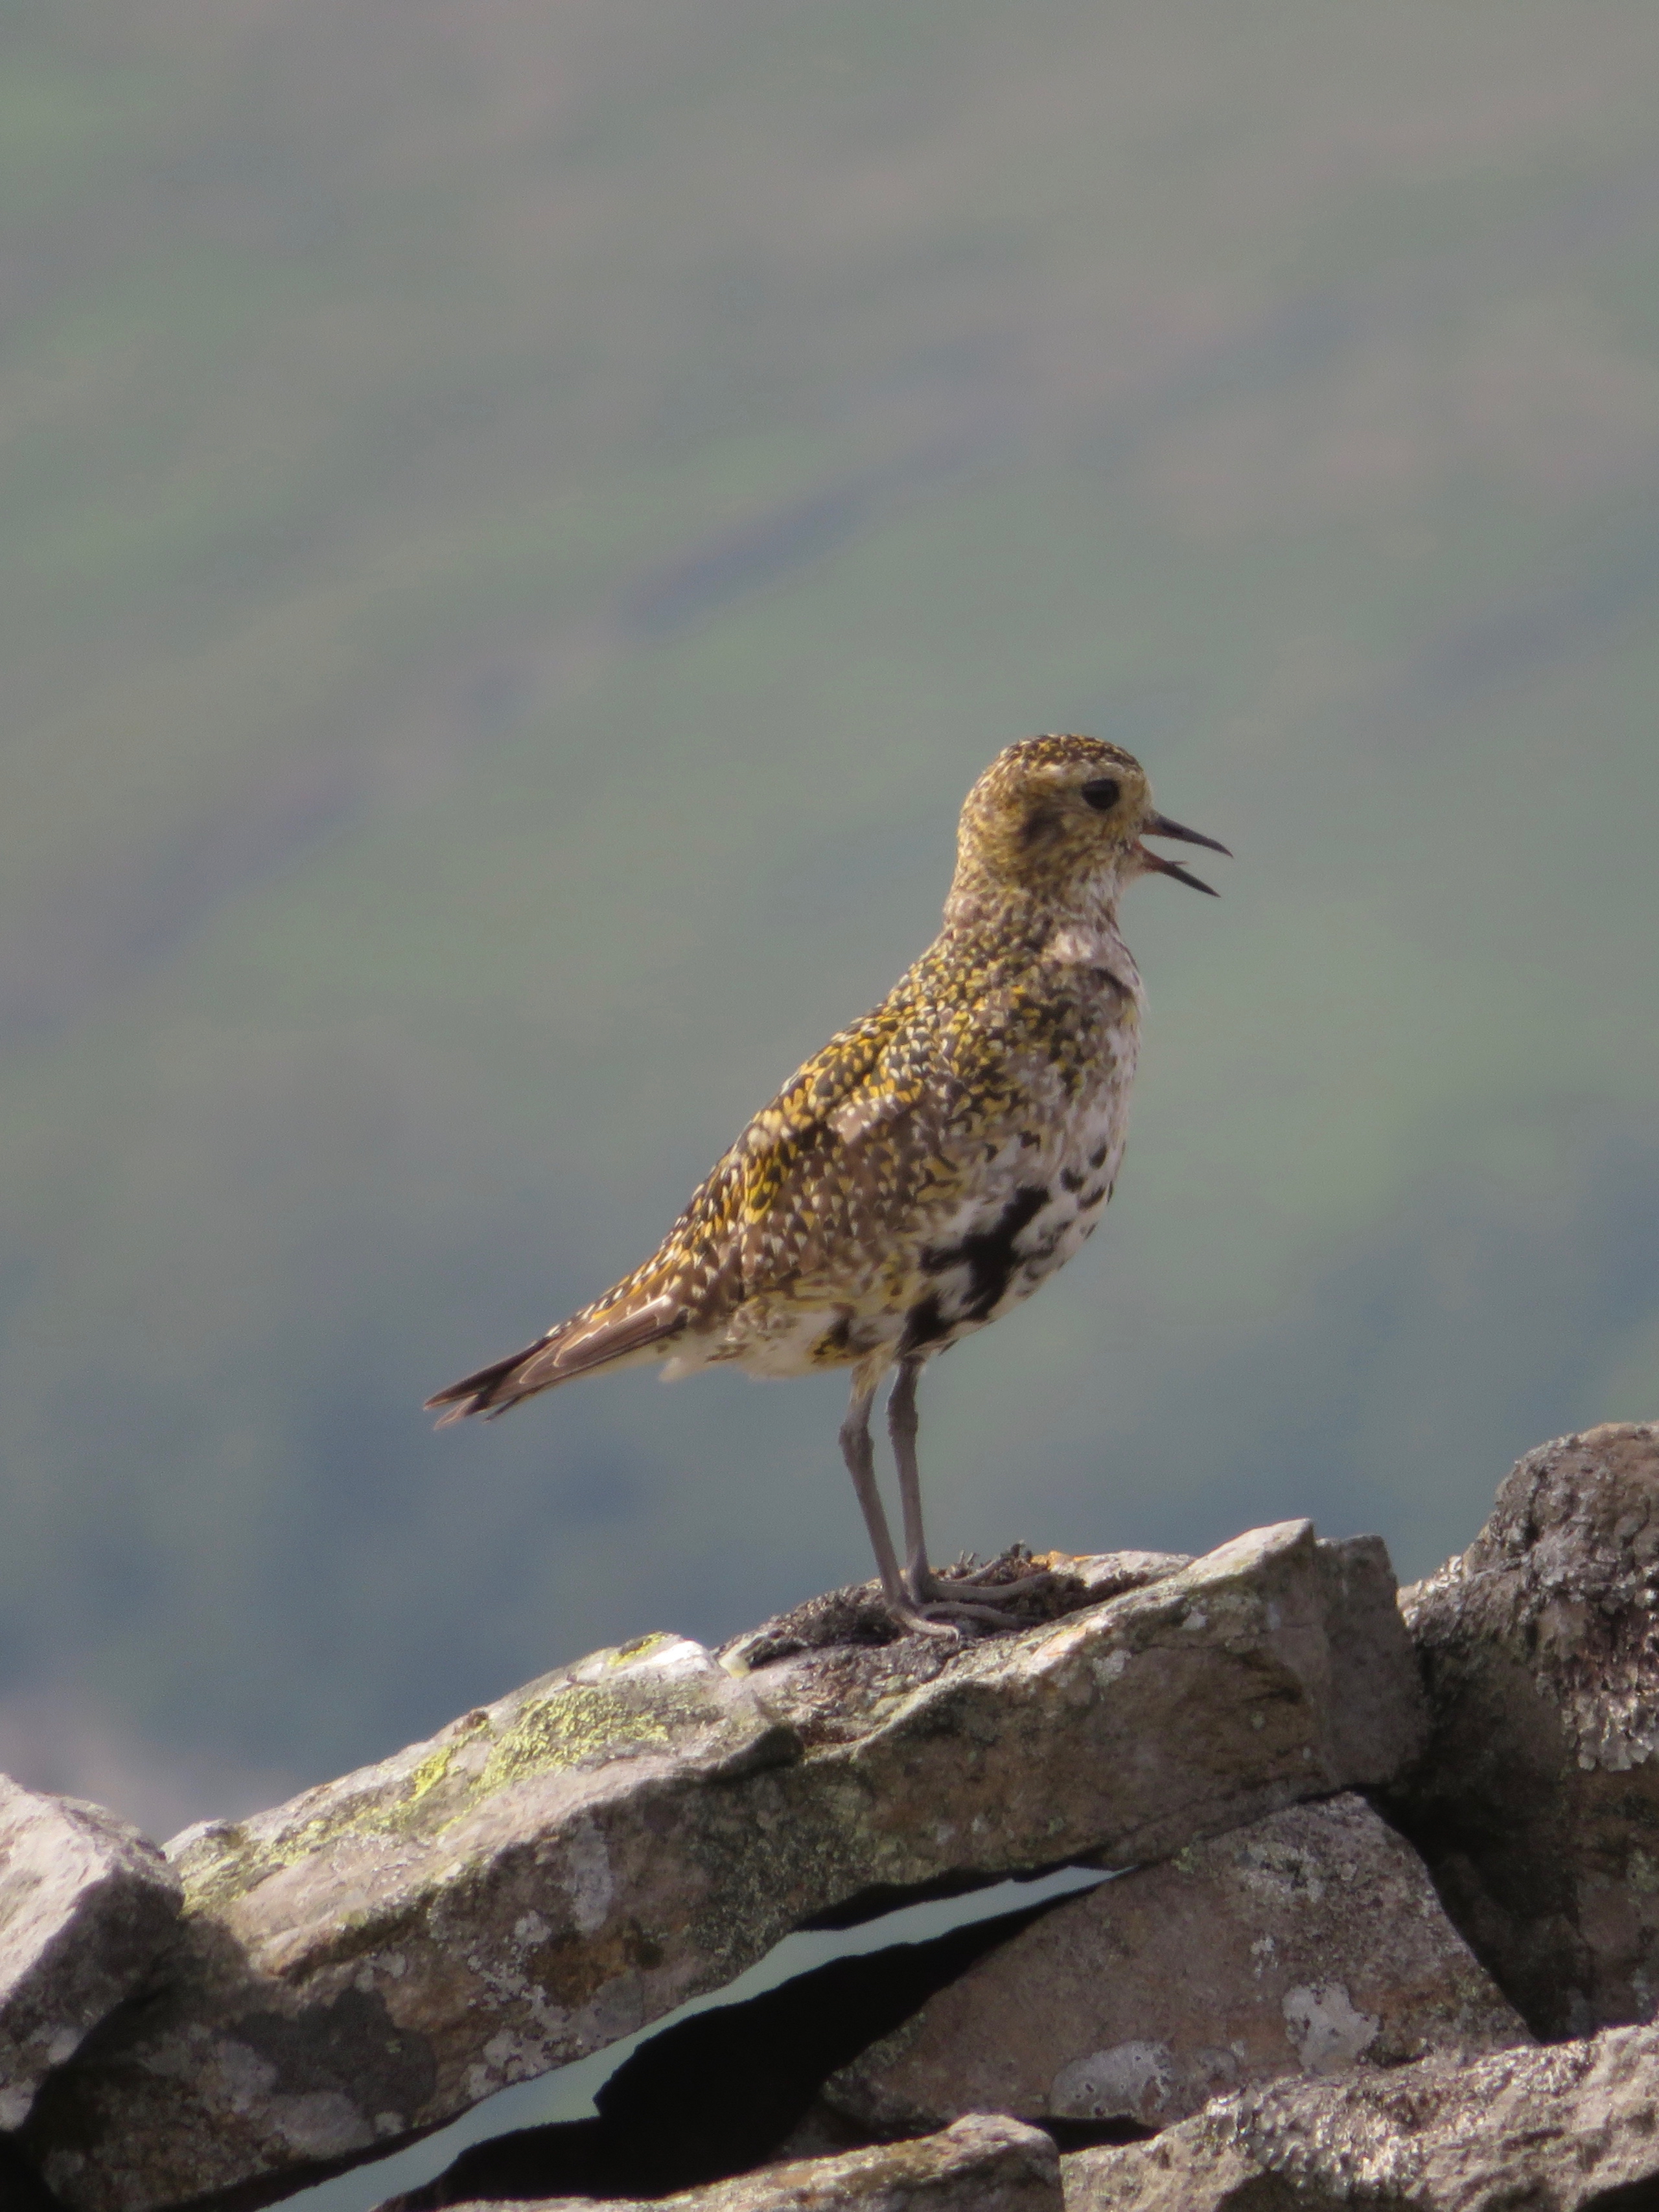
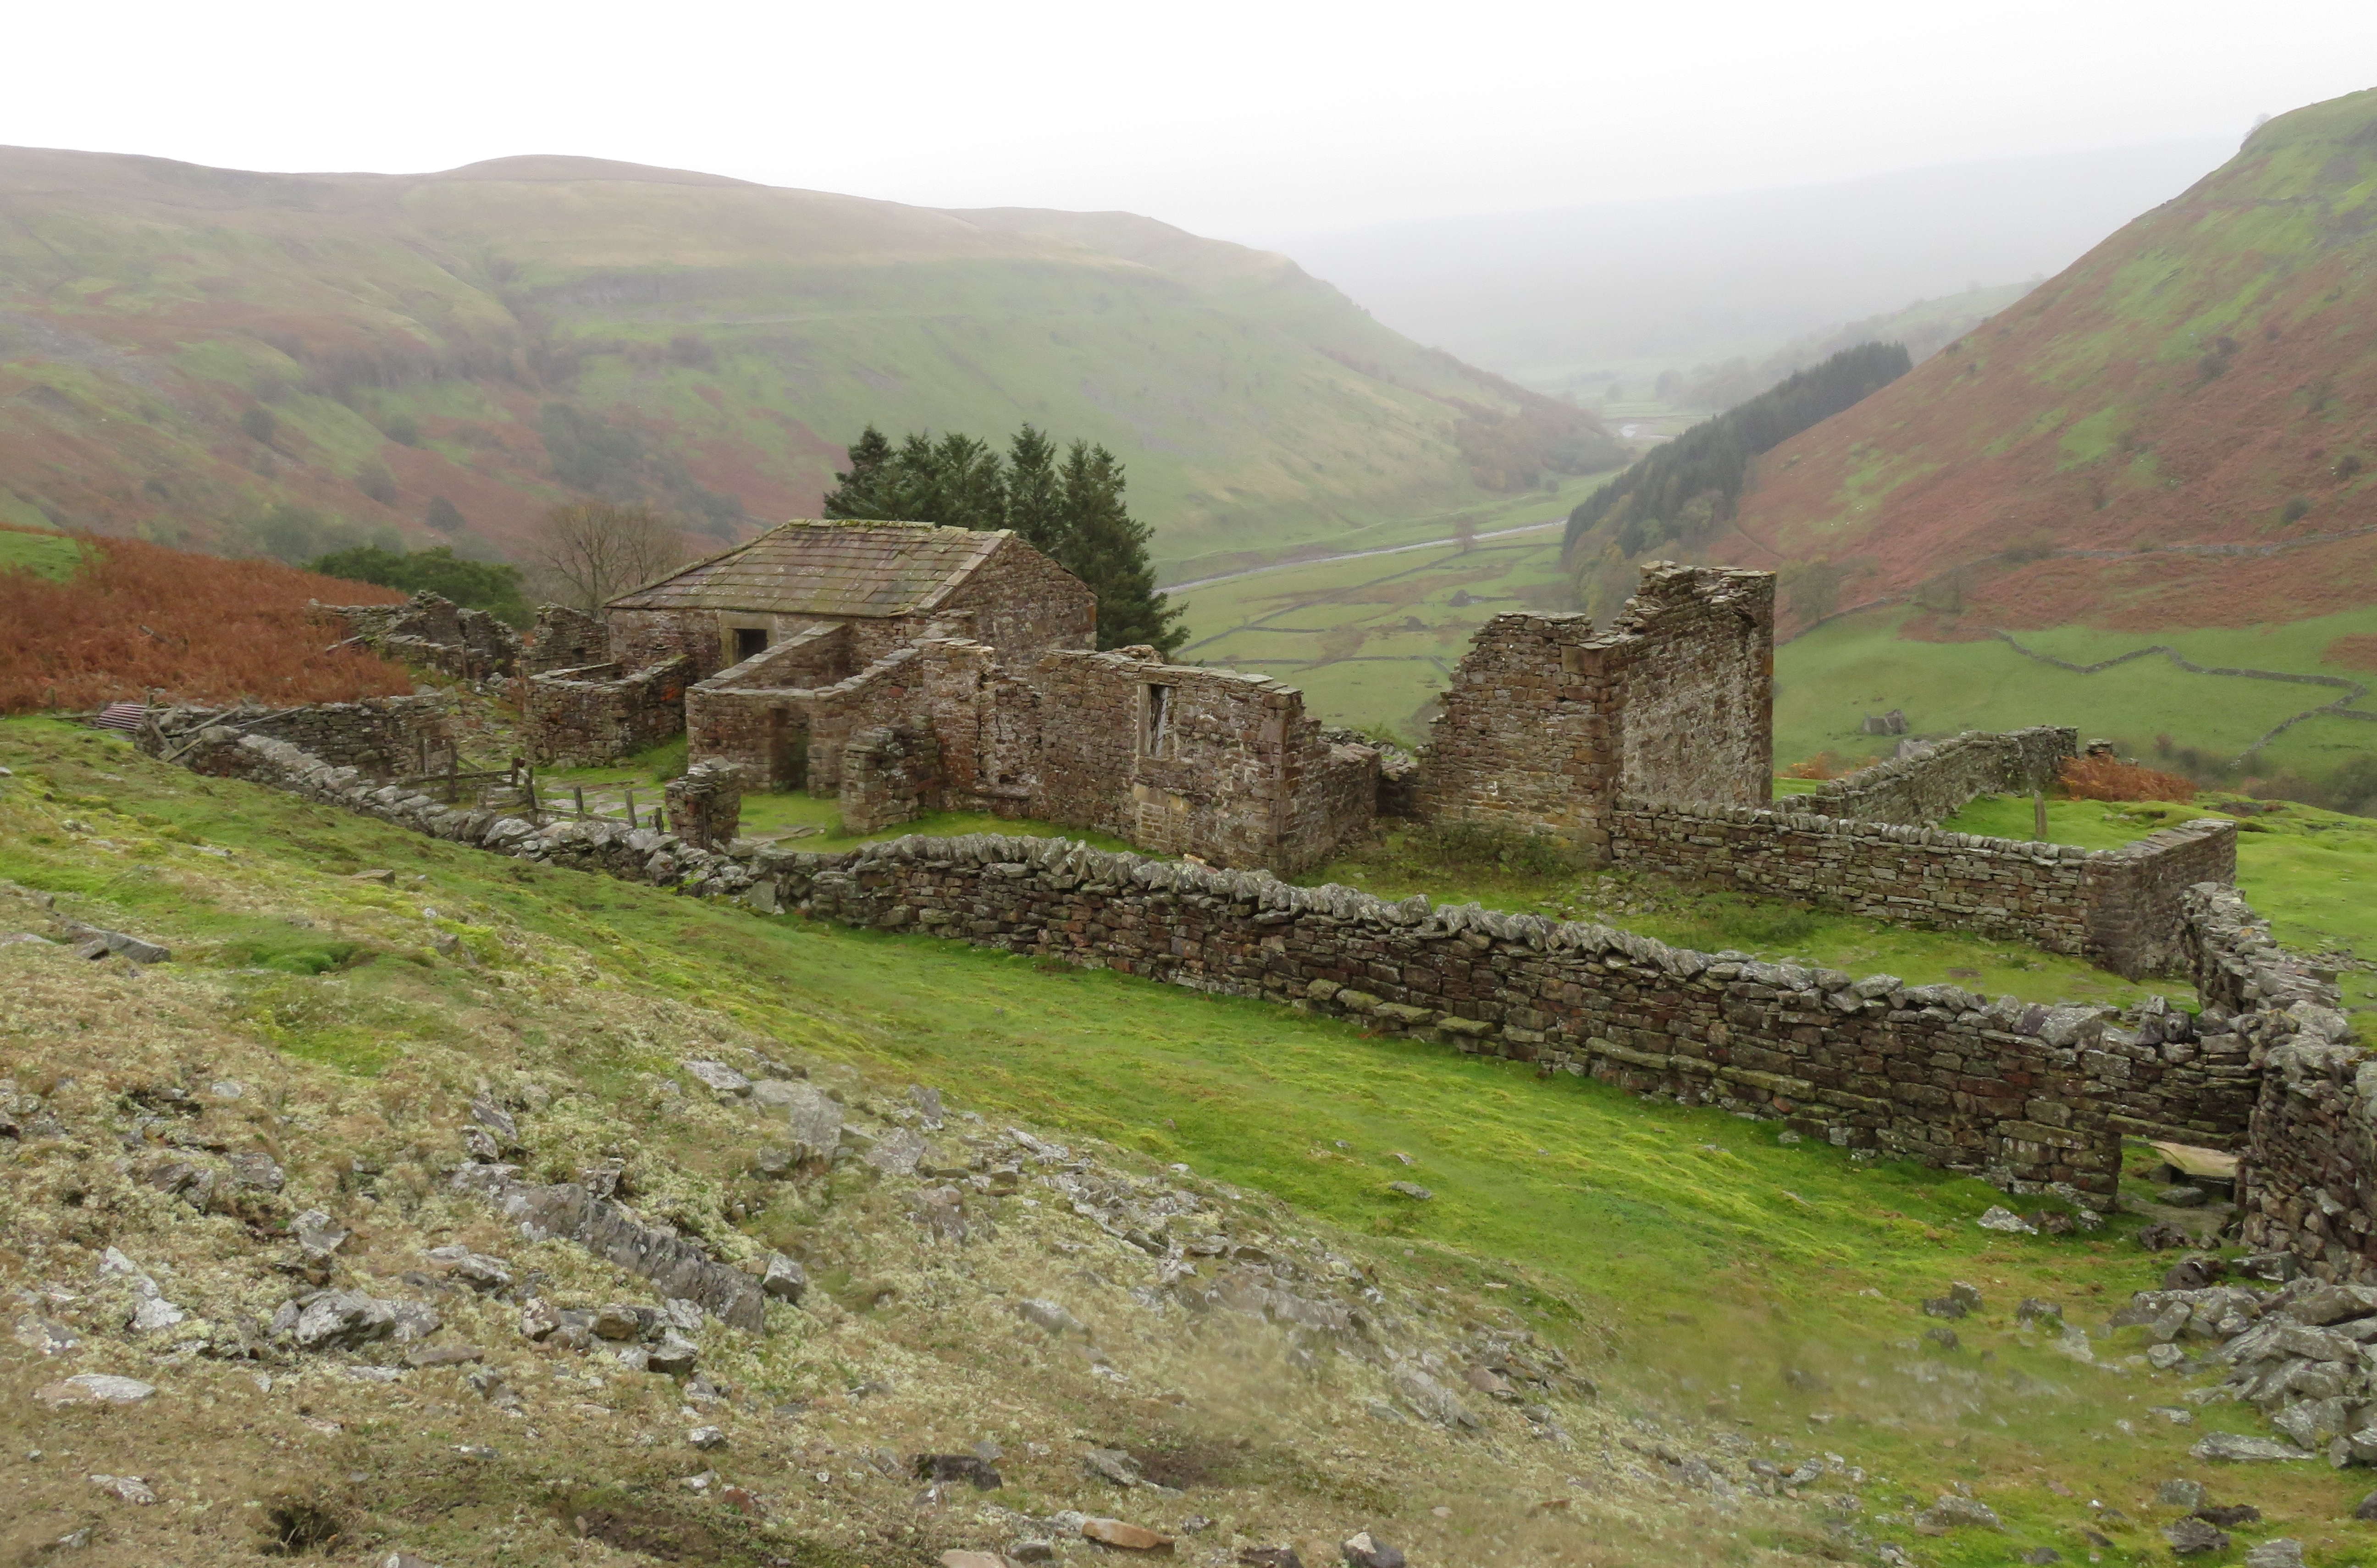
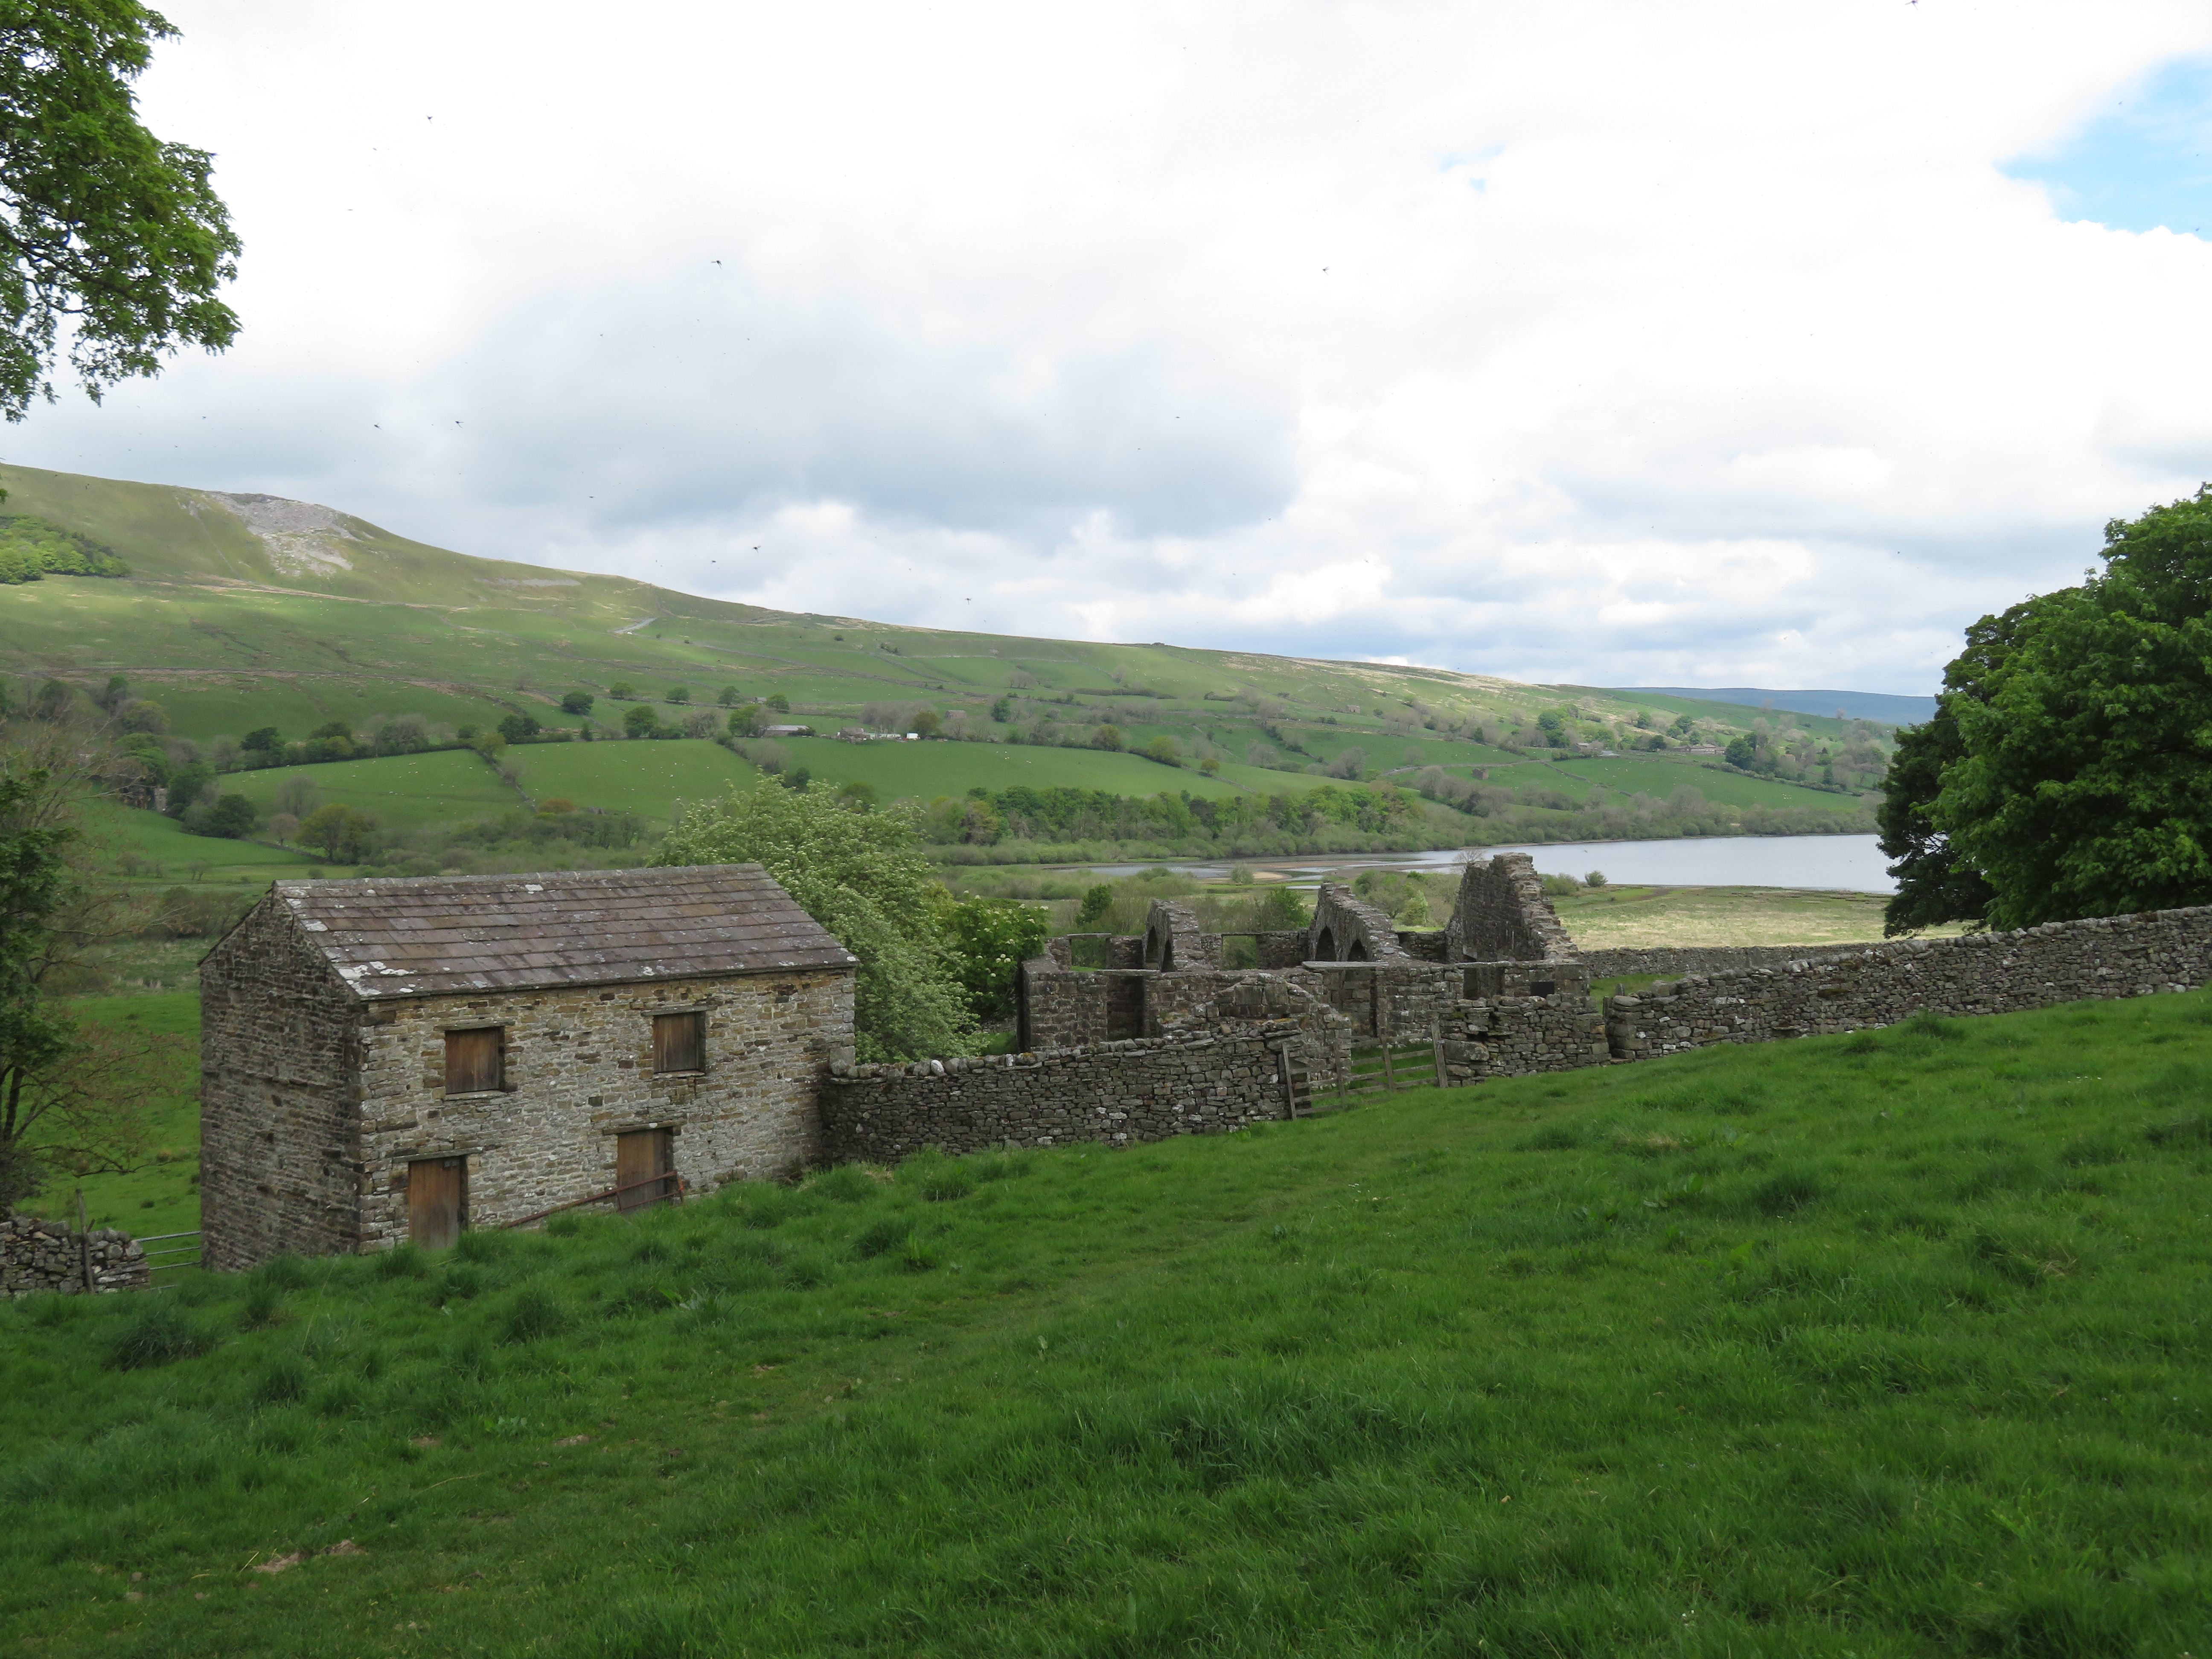
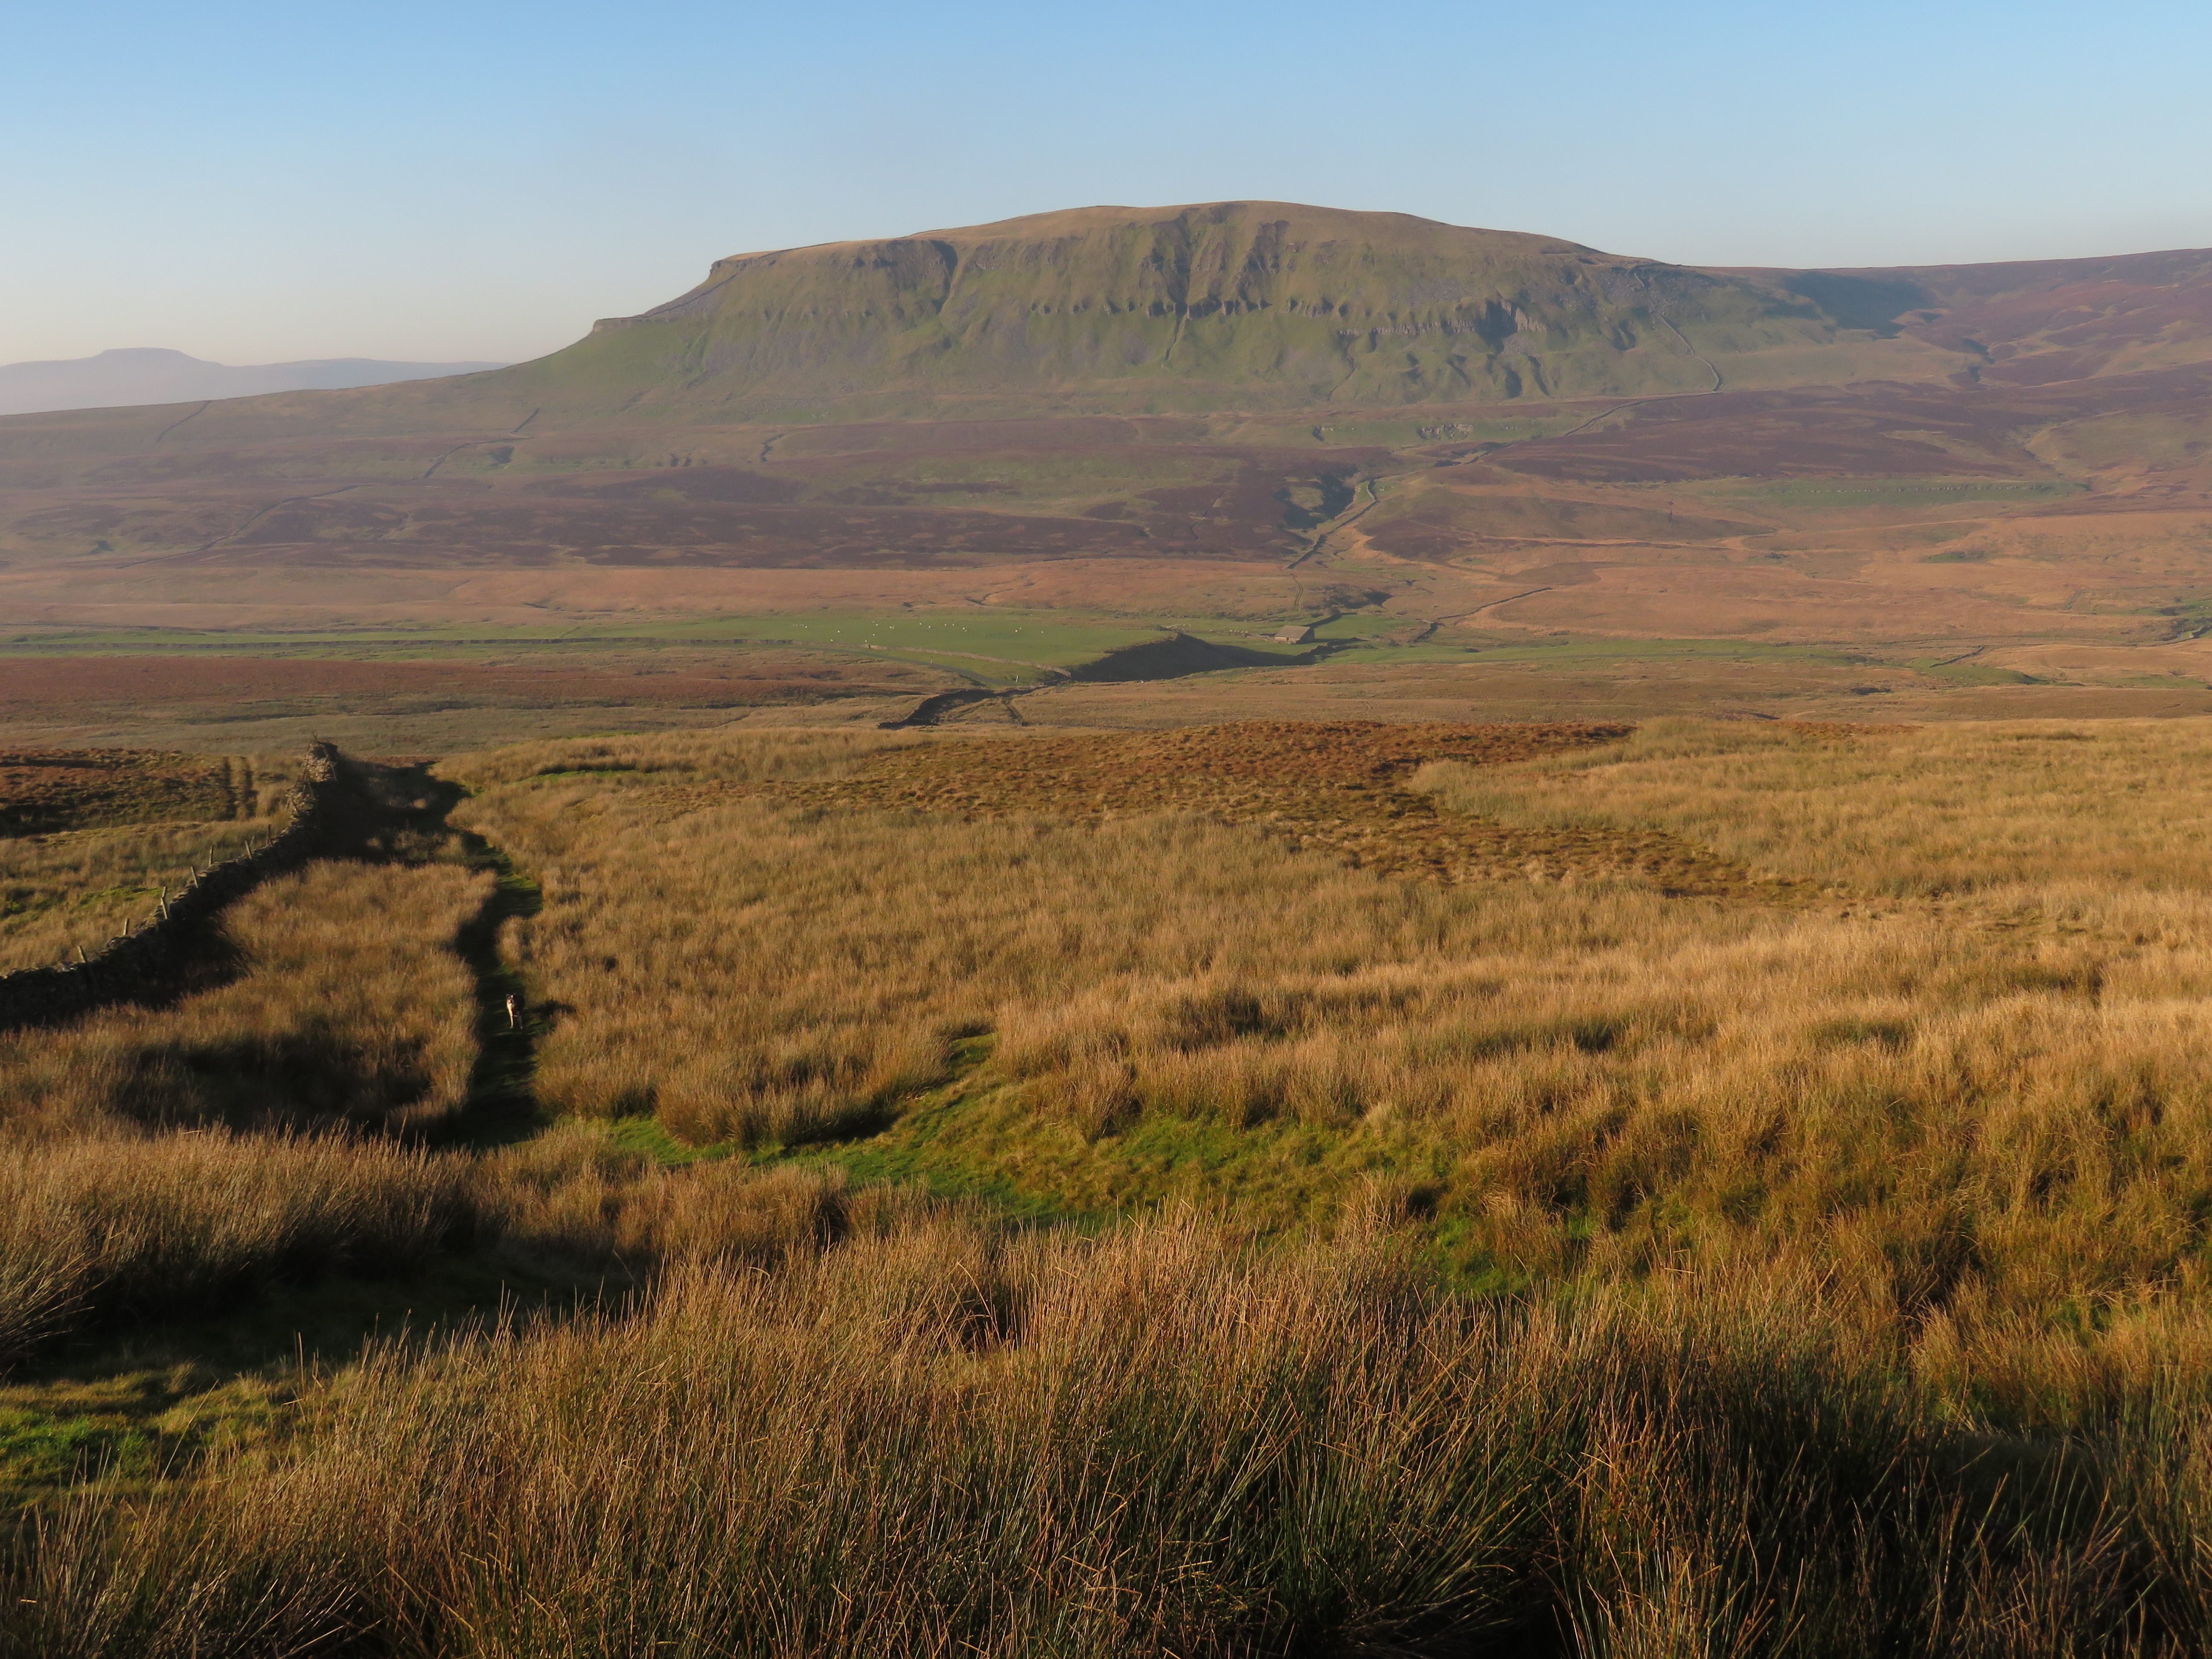
 I think that one of the most poignant things is the fact that she refers to seeing corncrakes near Askrigg and these have now vanished from the Yorkshire Dales. I’ve been out and about and seen some really amazing wildlife. Here are some collages of photos taken on my visits to Muker, Keld, Penyghent, Plover Hill and Semerwater.